|
Darrells Electrification Guide: Tape Wiring and More
By Darrell Payne
I know we’ve seen this tutorial on tape wiring before. In fact, it’s the ultimate in tape wiring guides! But we’ve included it in this issue to round out our complete guide to wiring. Darrel’s pictorial guide can also be found in the Greenleaf galleries here.
Tools
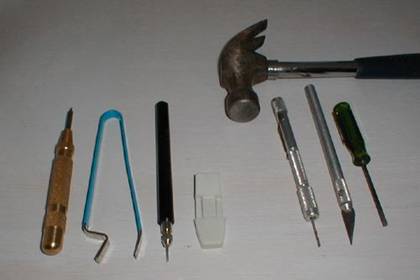
Useful tools to have. Hammer you recognize. Others left to right are grommet punch, brad insertion tool, pilot hole punch (awl), tester (lamp), pin vise with drill, Xacto knife, small screwdriver.
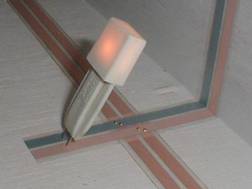
Having laid down the first tape we need to install the junction splice to get power into the system. Note that I cut the conductive material away from the pilot hole I made for the screw. It prevents shorts even though they are unlikely if screw is centered exactly.
Install splice by tapping with hammer to get two contacts to pierce conductors in tape and alternately tightening the screw until it is FULLY seated. Note I put it far enough INSIDE the house so the connecting plug has support too and won't stick out to be bent or broken off.
Begin a new run by overlapping the conductive tape on top of another run. This picture shows that you can even use tapes from different manufacturers (or eras as the case may be).
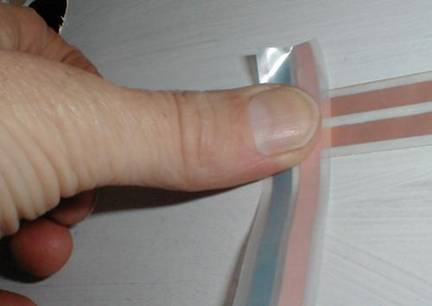
Make sure the tape is pressed down FIRMLY and keep a slight pressure on the untaped part to prevent bubbles as they're harder to cover later. Just run your thumb along the tape as you go pressing the tape down.

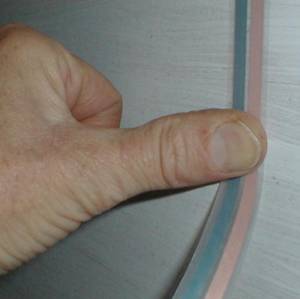
Places where the tape connects floor to wall (as here) or wall to ceiling or an inside corner will not easily go IN to that corner. Using a fingernail may break or cut the connector. See next picture.
I use the NOT SHARP back of some scissors to gently press and work the tape into the corner. Here I pressed the wall part first (to the side) then the floor part (down). It doesn't have to be PERFECT but close is a good idea.

Then just continue sticking the tape down with your thumb as before. Notice that there's a LOT of extra tape. It doesn't matter if you have too much but if you have too little and it doesn't reach you'll have to use a whole new piece of tape. Besides, the flooring will cover this.
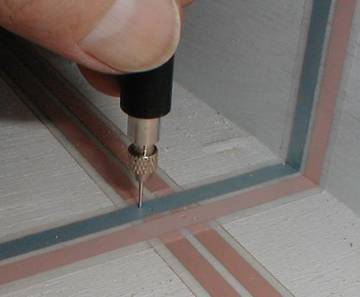
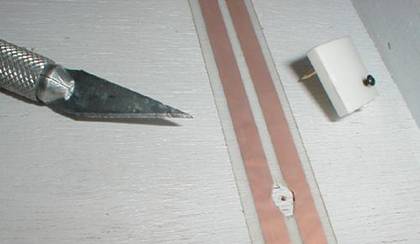
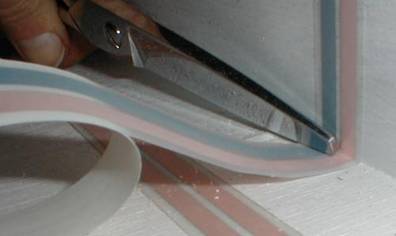
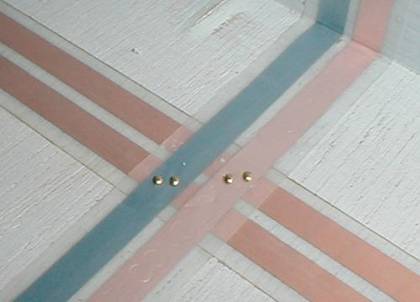
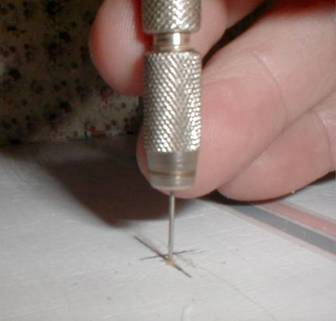
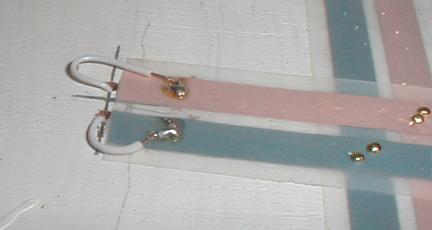
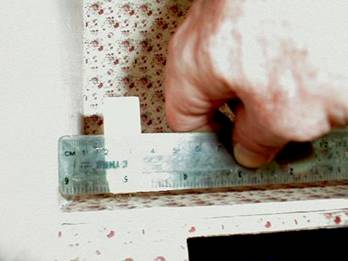
Our new tape is in but it needs power. NOTE: POWER is OFF and UNPLUGGED while making new connections to prevent damage to the transformer. There's not enough power to shock you. Punch four pilot holes diagonally. That's two per conductor. Make sure each pair are in different conductors.
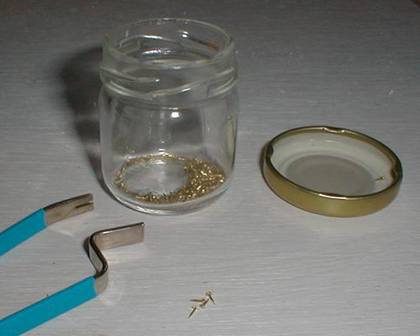
These brass brads are TEENY! You don't have to use this tool (available from CirKit dealers) but it really helps. The jar had jelly at one time from one of those Hickory Farms sausage, cheese, jelly gift boxes. Holds all my tiny brads.
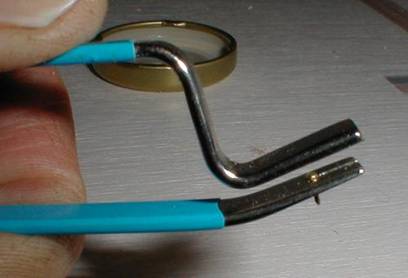
As you can see, even without clamping it shut yet it will hold the tiny little brad quite easily. Of course you should clamp it shut before attempting to position it where you intend to install the brad.
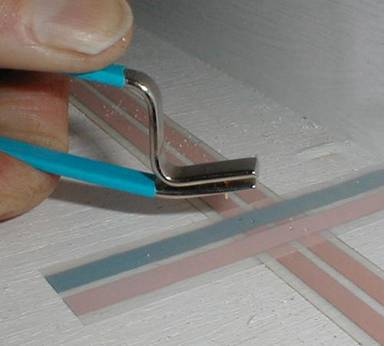
Holding the brad with the insertion tool, place the point in one of the four pilot holes and press down firmly. Press STRAIGHT. Even doing that one of every 20 or so will BEND and have to be discarded. Don't try to use a bent one because doing so may damage the tape which costs more than another brad.
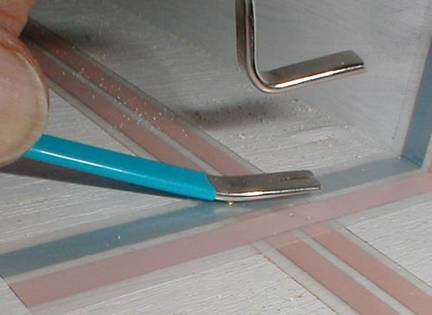
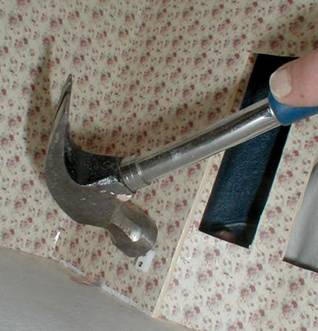
Once the brad is in as far as you can push it in, slip the tool off (it's slotted) and use the back of the tool to press the head of the brad the remaining way into the wood. You DO have the power off and disconnected right? Repeat this for EACH of the four holes, then tap them all LIGHTLY with a hammer just to be sure.
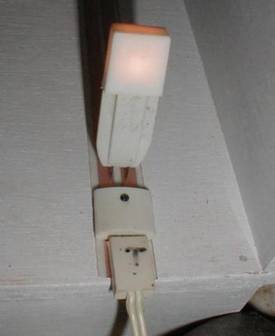
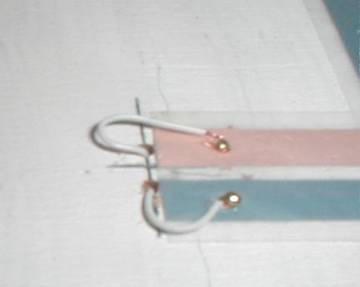
This is how each tape to tape connection should look. Note the right conductor to right conductor and left conductor to left conductor connection. Theoretically you only need one brad per conductor but we want INSURANCE the connection will last.
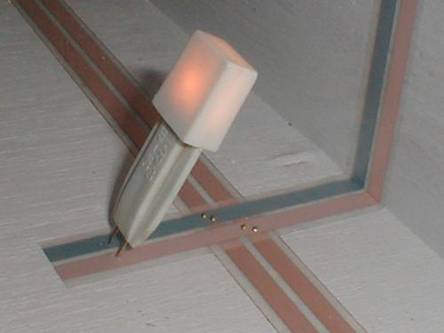
Get all the metal tools away from the connection and connect the power and turn it on and TEST your connection. Be sure to test on the NEW tape not the one that already HAD power. Once you know it works remove the testor and power off and unplug again to do the next connection.
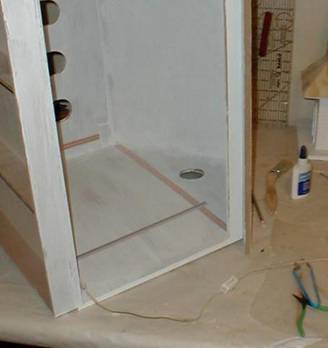
When installing tape wiring with those tiny parts it's often easier to turn your dollhouse on it's side, back or even roof. Then you're always working DOWNWARD which is definitely easier to do. Here you can see the run going up the back wall of our church we just connected to the floor run. We need to connect it to the upper run for the ceiling light fixtures.
Installed four brads as before, then added power and tested the run on the OTHER tape that did NOT have power before. Remember we already tested the one coming up the wall from the floor.
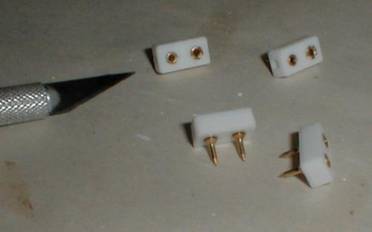
These are typical cheap dollhouse wall sockets. They come four to a package. They aren't to scale so if you use them I recommend putting them in places they won't be noticed as easily. Like behind where you will have furnishings, behind the fireplace, etc. In this case it's going to be way up inside our bell tower.
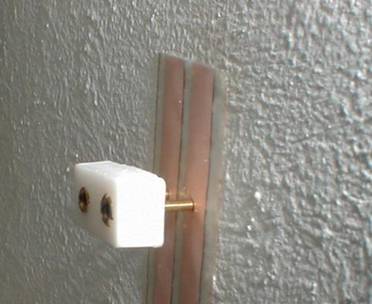
I had already textured the inside of the tower before putting the wire in so once this is installed I'll add more texturing over the wiring. Fortunately it's not easily seen without crawling inside the church. I drilled two pilot holes and pressed the socket in. Now I just need to put a scrap block of soft wood on it and POUND IT IN with the hammer. Power is OFF and unplugged.
Once it's in, I test sockets TWO ways. First I apply power and make sure the tape under the socket is good (see tester) then I actually plug something in and see if it lights. No, it's not plugged all the way in because sometimes they get stuck so I don't want to fully seat it yet. It's just plugged in enough to see if the socket works.
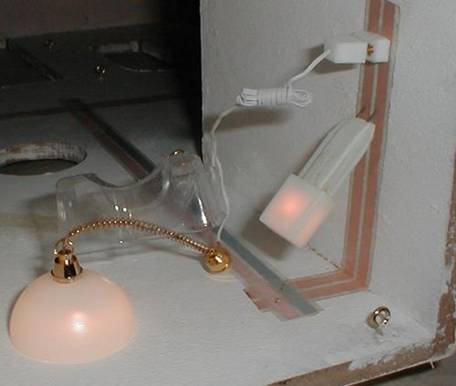
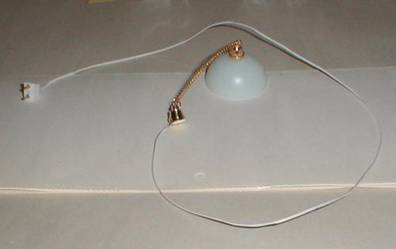
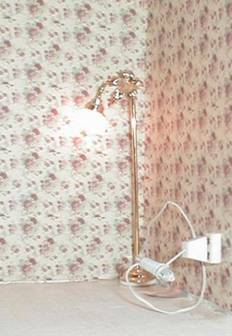
Usually I wire lights into the tape itself but in this case I'm using the plug and socket. I want it to hang OUT of the tower to the room below so I had to open the fixture and lengthen the wire. Then I glued the fixture to the bell tower ceiling and wrapped up the extra wire. (The "rope" you see will be used to ring the bell of course!)
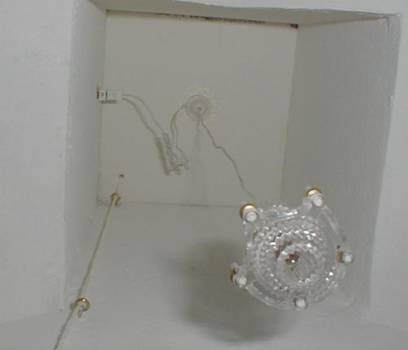
The tower ceiling isn't glued in place yet and I need to straighten out the hanging wire and coil up the excess going to the plug but it's in where it will be. To open this tower up I had to cut off the hole in the roof for it. In the kit this is normally just a peaked roof and you can't see inside the tower NOR is there anyplace for that "rope".
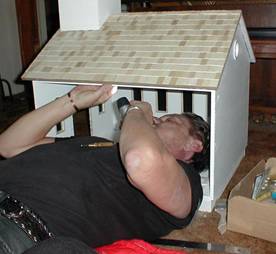
I often wire lighting directly in. In some cases it's not practical and you MUST use sockets. Hiding them helps. Here I am marking and installing sockets UNDER the upper lip of the open side. And yes, I have a small pillow.
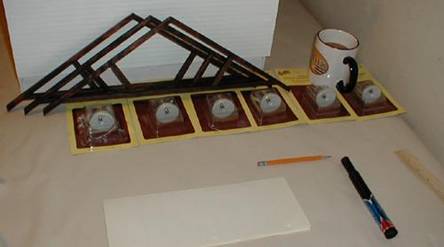
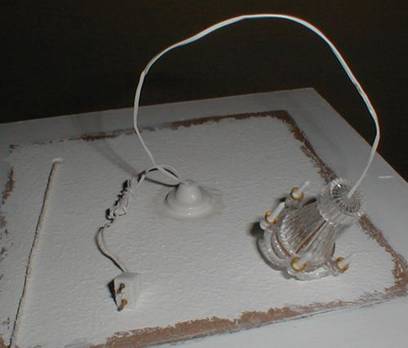
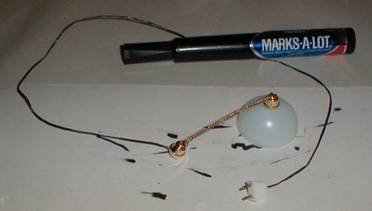
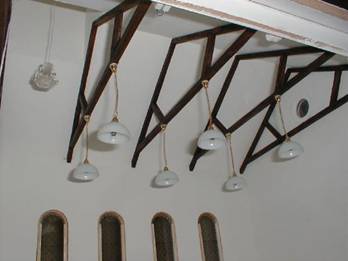
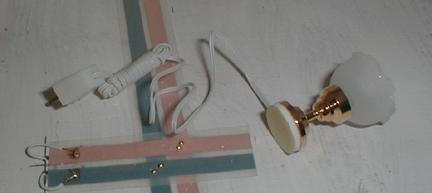
Each of these 3 assemblies will have two lights. The beams are too narrow for tape wire so I'll use the wire already on the light fixtures. I've gathered them all together here.
To make sure all the lights line up nicely, I have put the 3 beam assemblies together and mark the lamp locations on all 3 at once.
I intend to color and route the wire along the beams. To do so, I must take each lamp and carefully remove all the "kinks" in the wire making it straighter and smoother to work with.
Then I used a regular marker to paint the wire black. Paint would work better. This stuff comes off on my fingers something awful. LOL!
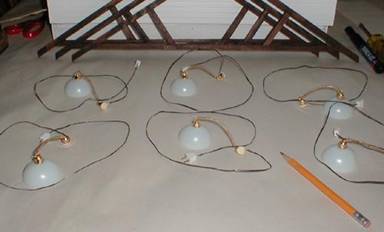
But I managed to get all six of them done. Next I glue 2 lamps to the bottom of each wood assembly centered on the marks made earlier and taped them in place to dry.
Lamps are drying and now I'm gluing the wire down to the top of the cross beam. From the left vertical support there are 2 wires to glue down. This is to make the wire less noticeable.
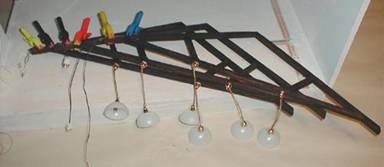
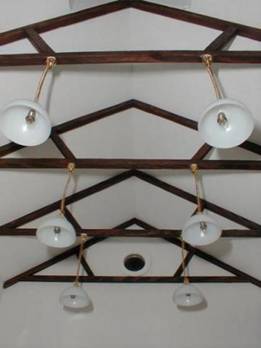
All 3 assemblies are ready to install with 1 exception. The two underneath have their excess wire coiled into a loop and tied that way with thread and the last one on top still needs that done. So the wire won't be hanging down.
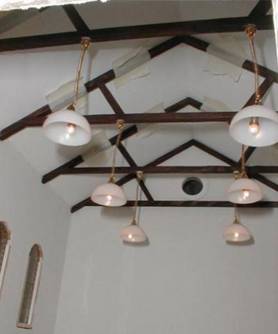
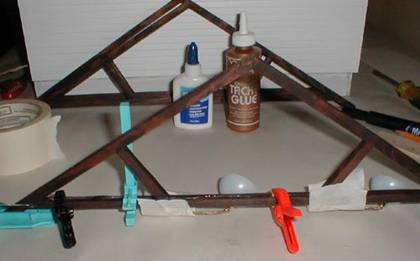
Each assembly is glued into place and masking tape applied till it dries. Then we plug the 6 plugs into their sockets and turn the power on. They ALL LIGHT UP! We DID remember to test each socket when it was installed so unless I broke a wire putting these together it SHOULD work.
From this LOW angle you can see the plugs.
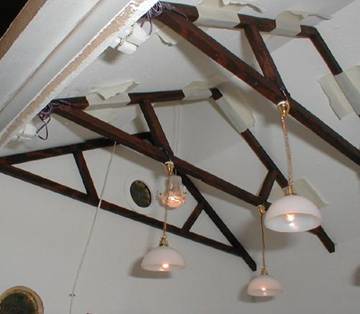
Looking towards front, you can see the hole cut for the steeple tower and it's chandelier lamp along with rope to the bell. And of course still from the low angle the plugs show up. I see they need to be seated a bit more and I need to straighten the hanging portions of the lamps a bit.
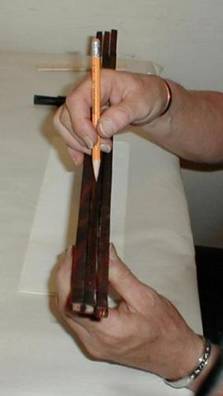
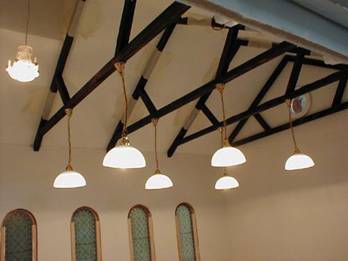
To space beams correctly I put one on each end, then measured to the mid point for the center one. Then from center to each end another beam was put at THOSE center points for a total of FIVE. The 2 on the end walls of course have no lamps, just the ones away from the walls.
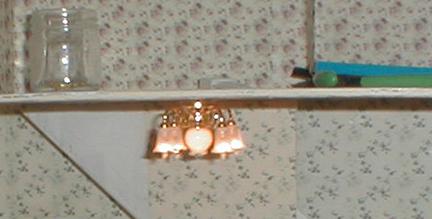
Glue has set up and tape is all gone. This is the view from the front door of the church and what the little worshippers will see when they enter. Notice no wiring shows.
Installing A Ceiling Fixture into Tape Wire
I'm going to show you the first of two methods that can be used to install a ceiling fixture.
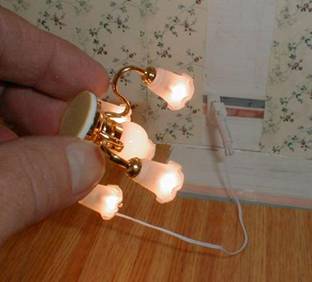
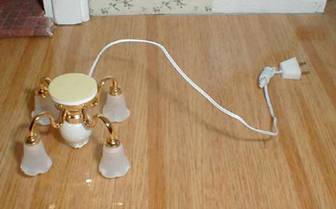
Before installing ANY light or other fixture, it's a good idea to test it first to see if it works. I turned the power on, and plugged it into a previously installed outlet. (I ALWAYS install at least ONE outlet in anything I do for just this purpose)

I don't need to try to hide all this long wiring and I won't need the plug so I cut them off. Just a bit longer than I think I need to give me some room to play. (SAVE this and when you begin to make your own lamps you'll have a power cord with plug already for it.)
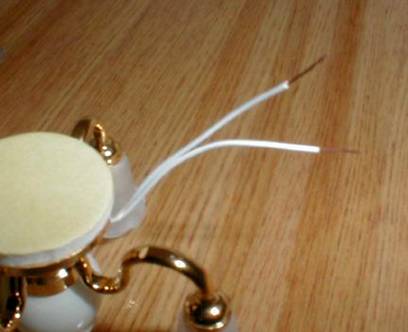
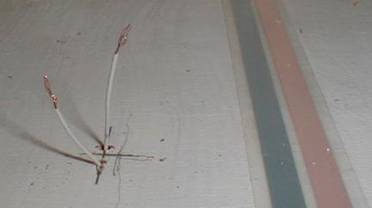
I've carefully split the two wires apart and stripped the ends of them.
I've measured and marked on the floor ABOVE where I am going to install the fixture. I'm drilling two small holes for the wires to come though.
Here are the wires coming up through the holes from the ceiling below
I've gone ahead at this point and attached the fixture to the ceiling. This helps by removing any downward pressure on the wires while I'm trying to work on them above.

Even though there is a tape near it's not close enough for my short wires. No problem. I have a small scrap of the tape wire to add. But it's not CONNECTED so the new tape has no power yet.
Now it does. As shown before in connecting two tapes, I've just added the four brads to connect the new tape to the existing one it crosses.
To make these connections, I installed a brad into each conductor of the tape but didn't push them quite all the way down. Using tweezers I wrapped one wire around EACH of these, then pushed them to seat them firmly into the tape. This SHOULD now be functional.
I turn on the power and we DO have a working ceiling fixture now. BUT... I'm not finished. I like "insurance" against future problems, so....
I add a small bit of solder to each of the connections back up on top. (with the power off of course to avoid damage in case I short the two sides DURING the soldering with the iron.
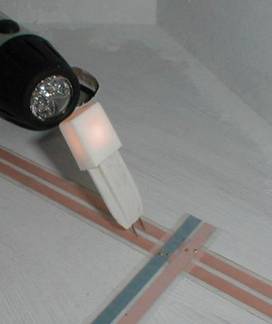
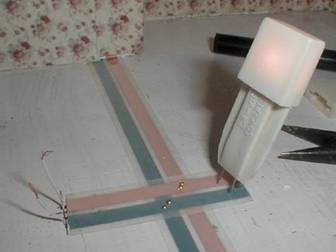
To install a socket we first have to locate our HIDDEN tape wiring. I always install mine centered 1 inch above the floor line. To be sure I use the test probe. I have a powered tape here.
To install a socket we first have to locate our HIDDEN tape wiring. I always install mine centered 1 inch above the floor line. To be sure I use the test probe. I have a powered tape here.
Now I plug a lamp into the newly installed socket and turn the power back on to test it. This one works fine
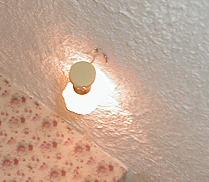
What about installing to a tape run on the ceiling itself. Here's the light I want to install laying over the floor installation from the ceiling below.
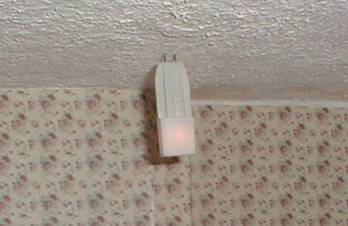
By a mix of measuring and guessing I poked around thru the FINISHED ceiling with my test probe with power ON, until I found the tape. It's here.
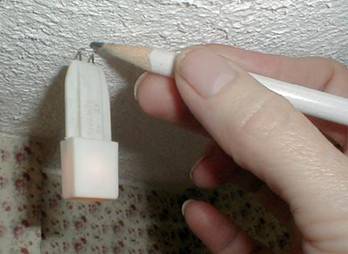
I don't want to lose the spot so I make a couple of small marks by each prong. And then turn the power back off.
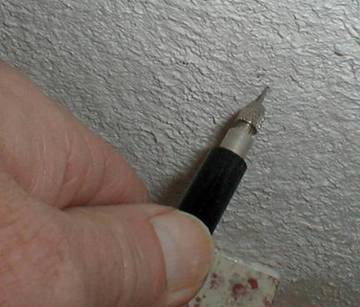
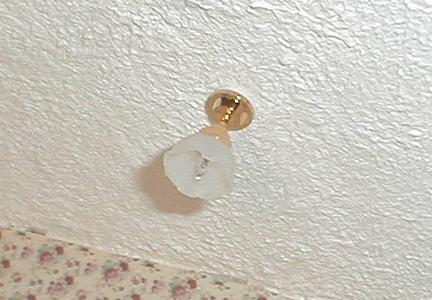
I make a couple of pilot holes with the punch, and press a brad into each one of them.
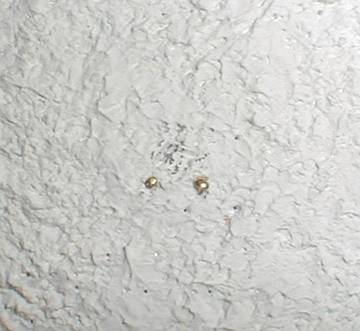
Here are the two brads installed into the ceiling. Did they actually hit the tapes correctly? Next I'll find out.
To check them I turn the power back on and just TOUCH the prongs on the test probe to the brads. It lights so we have installed them INTO the tape run correctly. Turn the power back off.
To prepare the light for installing I cut the long wire off. Then carefully separate and strip the two wires. These are a lot shorter than the ones that had to go thru the ceiling before.
I "tin" the two wires AND the two brads in the ceiling with solder. Preparing the parts in this way makes the next step much easier.
Before we wrapped the wires around the brads before fully seating them. You could do that here as well. But I find it easier by tinning the parts and then just holding a tinned wire against a tinned brad and touching it with the soldering iron. As soon as it moves into connection, remove the iron and hold it just a second. It's attached. It's a lot easier. Later I'll make a separate album on soldering if there's enough request for it.
To test it, just turn the power on. This one works fine. The reason the light is hanging UP at an odd angle is the house is on it's back at the moment because I found it easier to work on this part that way.
All that's left is to stick the light fixture to the ceiling, hiding the wires in the process. This light is installed.
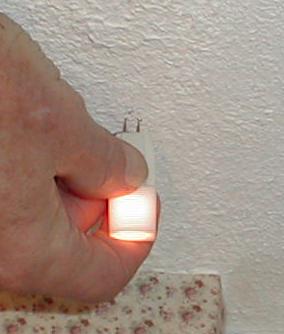
Installing a pound-in light

In this house we're building there's a "faux" hallway wayyy in back. It's not possible to easily wire or light that hole. Here's how I tackled that one. There are some small lights designed to pound directly INTO a tape run. No adaptors or wires needed. Problem is, in this spot we cannot even get TO it with a hammer NOR can we SEE what we're doing. Here's one of the two types we have.
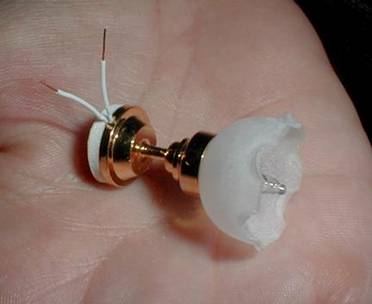
First I cut off a length of tape wire a bit longer than I think I need. Then I poked the prongs of the pound in light into the tape on one end.
With the backing peeled off here's the two prongs protruding thru the tape wire. I took this to an anvil and bent then carefully tapped these prongs so they layed down against the back of the tape and added a bit of solder to hold it better.
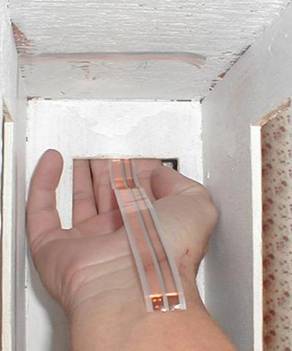
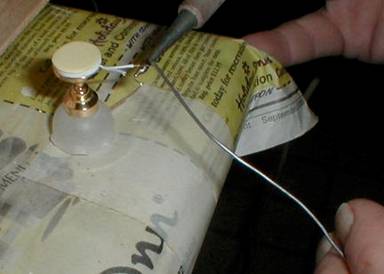
The light itself cannot be seen, but the light it produces is what I'm after. So I carefully stick the tape up and inside the fake hallway hole by "feel" and rub the tape down to make sure it's stuck well.
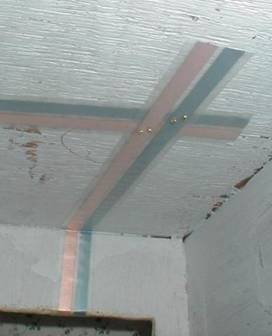
Then I carefully run the tape thru the doorway opening, and up across the ceiling to cross an existing tape wire. Then of course use the brads to attach it to the working tape wire. This is done with power off of course.
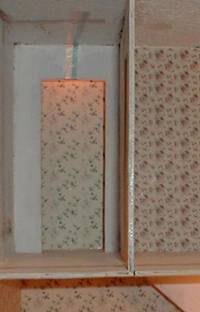
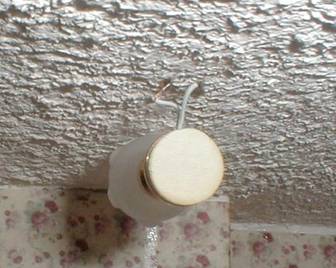
So now all that's left to do is turn the power back on and see if it works. It does. And I admit I was kind of perplexed for a while as to how to light this space.
(Editor’s Note: Our thanks to Darrell for sharing his expertise with us and showing so many ways to light up our little world!)
Return to Newsletter Home...
|