|
Snowy Landscape
By Deb Roberts
Seasonal houses need seasonal landscaping and sometimes snow is a hard look to imitate in scale. Here’s a quick look at one technique to get that winter tone for your holiday house.
Materials needed:
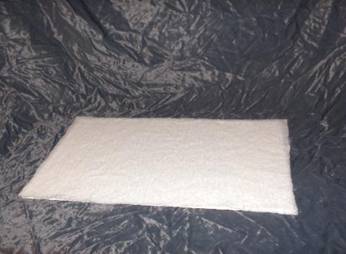
White poly quilt batting
Cotton snow (the type used for Dept 56/Lemax villages--easily found at Michaels and Hobby Lobby)
Spray glue
Iridescent snow flakes (Michael's sells them under the brand name of Buffalo)
Sheet of mdf or plywood for base
hot glue gun
assorted trees, bushes and lawn ornaments
seed beads
string of mini colored lights
tacky glue
tweezers to apply seed beads to trees
**Warning** When working with spray glue, be very sure you're in a ventilated area. Overall, this is a very messy project, so you'll also want to make sure your workspace is covered to protect from overspray and to catch the bits of cotton and flakes of snow that get away.
Cut your mdf or plywood base to the desired size and coat it with tacky glue. Cut a piece of quilt batting to the size of the base, plus 1/4" on all sides. Smear the glue down over the edges of the base so you can press the batting along the edges to cover them as well. When the glue dries, trim the edges on the bottom
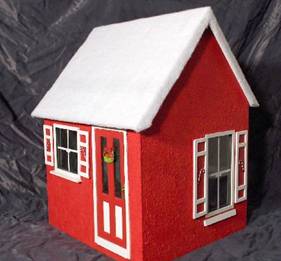
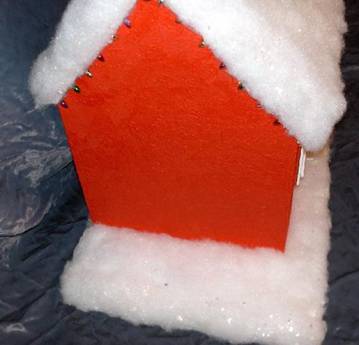
Lay another sheet of quilt batting over the top of the house and cut it to size. Remove it and cover the roof with a layer of tacky glue, then glue the batting into place. Trim the edges flush with the roofline on all sides.
At this point, your house is looking all snug and warm, but not really snowy. Here comes the fun part! Turn on a fan and open a window, cover all areas of your workspace around the house, and wrap paper or plastic around the house itself so only the roof is exposed. You *really* don't want to skip that part because glue overspray will ruin your beautiful house. Spray the quilt batting evenly and then add the cotton snow in a thin layer. Don't worry about it looking too thin, there will be a second layer of snow later on. I tore the snow into pieces and stretched it out before applying it. Do the same thing with your base.
Now you've got a house that looks like there's a sheep sitting on top of it, but doesn't really resemble snow yet. We'll fix that next.
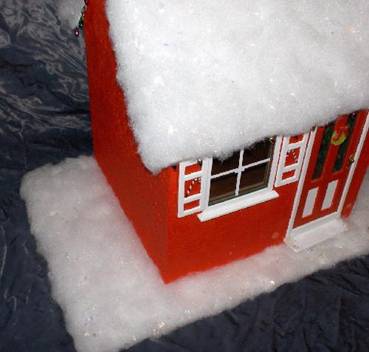
Give another spray of glue to the top of the cotton snow on both the house and the base, then lightly sprinkle the irridescent snow flakes over the glue. The flakes are going to look big and out of place, but that's okay. Here's what it looks like so far:
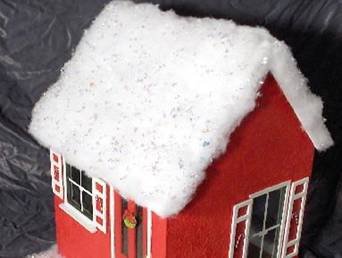
You can see that the flakes look funny, but we're going to cover them with another thin layer of snow, so what you'll end up with is a sparkle underneath the snow, giving it a realistic look. Give one more spray of glue over the top of the flaky snow and then add your second layer of cotton snow. Here's how it looks with the second layer of snow and the icy sparkles beneath it. Better now?
Yay!! Now you have a snowy house and yard to decorate!! Glue the house down to the base and then you can start the decorating. The possiblities for this are endless, but I'll show you what I did with mine just so you have an idea. A hot glue gun really works better than tacky glue at this point. I started out using tacky glue and discovered that with all the cotton fluffy bits and the wayward snowflakes, the hot glue really works better and with less mess for this part.
I used multi colored strings of lights and glued them around the eaves and bottom of the roof. (these aren't the light-up kind so no worries about wires)
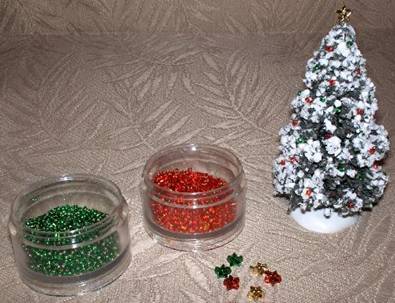
I made a Christmas tree for the side yard by using a Lemax tree and gluing red and green seed beads onto it and a star shaped bead to the top. Fun and easy and it makes a really cute little decorated tree!
For the rest of the lawn decor, I went with an old fashioned elf-workshop style using wooden toys like nutcracker soldiers standing sentry by the door, soldiers by the bushes, a small elf family to one side, and a couple of tiny snowmen under the window. One side yard is bordered with candy canes and the other is bordered with gift wrapped packages. Let your imagination run wild when you start adding in the fun bits to the yard. For the holidays, anything is possible and whimsy adds to the enchantment.
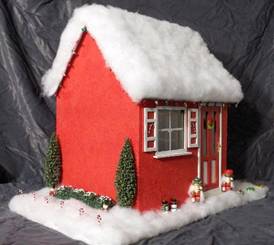
Here's the finished Holiday House:

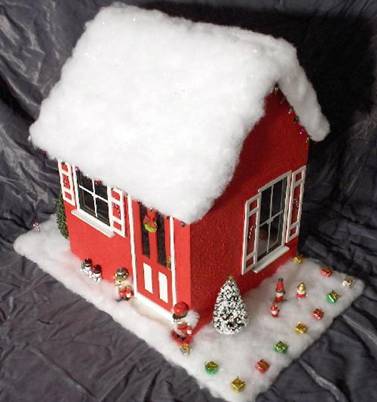
Enjoy your little holiday house! (and see if you can bribe one of the kids with "Santa is watching you" to get them to clean up all those bits of cotton snow and snow flakes making your workspace look like Frosty exploded)
Return to home page |