|
Landscaping the Gris Gris house: Part 3
By Brandaen Jones
This is the last chapter in the Gris Gris house I hope that it was helpful and gave ideas out there to everyone.
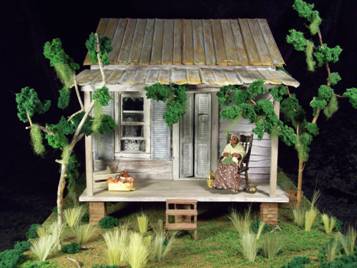
Landscaping to me can sometimes be the hardest part about a doll house. I actually come from model train background so landscaping for me incorporates a great deal of the products from Woodland Scenics. The actual base of the Gris Gris house is not attached to the house at all, that way I could move it much easier and it was made on foam core so that it would be super light.
I covered the entire base with a brown colored acrylic paint so that no white would show through. The entire base was then covered with scenic cement and I began dusting the entire project with fine turf of earth tone and green grass. This was a process and a half! The stuff goes everywhere and I kept it on a large garbage bag so that I could continue to catch what fell off. I think it is a good idea to kind of lift the project up and shake the excess off then keep applying after you spray some more of the cement on.
Once the layer dries in place and you have a nice coverage over the entire area I re-sprayed the entire layer again to hold it firmly in place. The tufts of grass are actually field grass product line from Woodland Scenics. Each section was held together by tweezers and dipped at the end in scenic cement and hand placed. This was a gigantic pain but you know what, it came out so wonderfully that I just did a dance for joy!

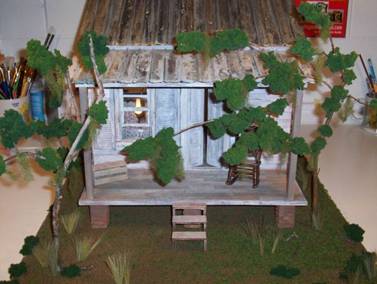
The trees; my, was this a hard one for me. I have seen some amazing tress out there built by some miniature artists that are just too great for words! I am not, alas, that artist yet. I wanted a bayou look and I didn't have the money to buy those great trees from those amazing artists. Everything for me comes down to saving money and trying to be creative with that money. I was at work and stepped outside to get some air, looked down at this crepe myrtle tree that had lost all its leaves for winter. Now I live in Florida , we have no snow but we go from green to brown. Some of the branches were just beautiful to me and I broke them off the poor little tree. Now the tree branches in the gris gris house are real but please! PLEASE! If you are going to use real natural items microwave them for a few seconds to kill the critters! I have also read about sealing the items so that they don't get brittle and last longer. I was just trying to achieve a look so at that moment I was not concerned with brittle. I made little holes in the foam core so the trees could rest in the landscape and glued them in place.
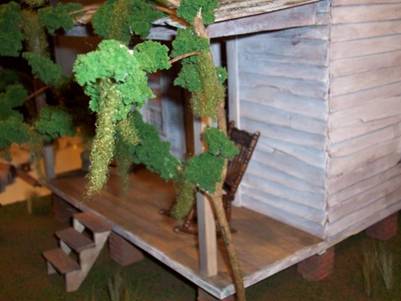
Now the bayou has that great hanging moss and I wanted to mimic that in miniature along with the roots of the trees pushing through around the base. I glued on clump foliage and green poly fiber stretched out to mimic that effect. The base roots were tiny parts of the same crape myrtle tree glued around the base.
That is about all I did to achieve the look of the bayou. The only thing I would like to add was I forgot the roof!! I know it's not landscape but I didn't want to leave it out!
The roof is made out of sheets of aluminum that were pressed into a wood jig that had raised beams in them to create my tin roof look. I wanted, of course, for it to be rusted and aluminum doesn't really rust. Now I used a very toxic way to achieve this effect but recently I was at Michael's and found a great product that almost achieves the same thing. The product is called Sophisticated Finishes rust antiquing. The first step is iron filings suspended in glue, please put on a lot of layers. Let one dry and keep adding! The next solution is awful and please watch the ventilation again! It eats away at the iron filings to create the rust look, please wear plastic gloves too!
Return to Newsletter Home Page...
|