|
Pretty Autumn Picket Fence
By Deb Roberts
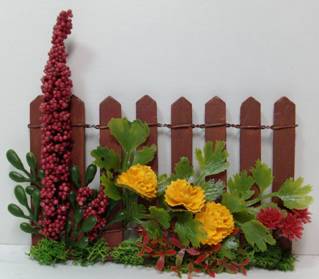
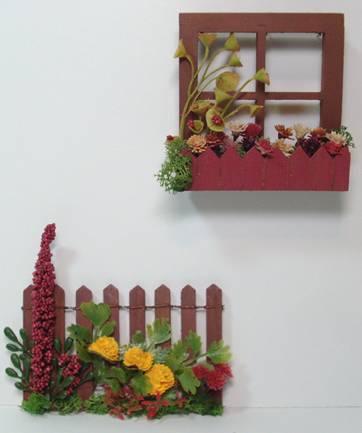
After creating a picket fence window box from speed shingles (see the previous article in this issue of the Gazette), it occurred to me that coordinating a real picket fence for the landscaping would give any dollhouse a little extra elegance. That coordinating look pulls the house and the yard together into one gorgeous unit.
The supplies you’ll need are the same as you did for the window box, just add a picket fence, some bright yellow paper flowers, and a few extra leaves.

Paints in autumn colors
Tacky glue
Glue gun (optional but very helpful)
Sharp craft knife and scissors
Bits and pieces of flowers and greenery
Lichen or reindeer moss
Wooden picket fence
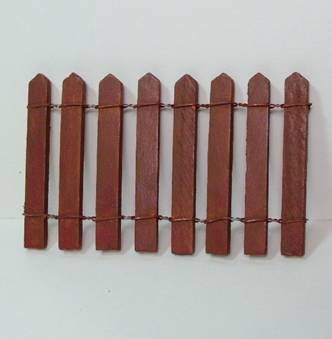
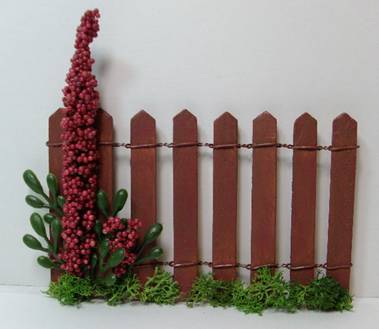
Begin with painting your picket fence the color of your choice. I’m using the same warm brown that I used for the window box to achieve that coordinating look. For these instructions I’m using a small piece of fencing. You’ll want your picket fence to fit the area desired in your dollhouse yard. This could be used for an entire fence around a house or for a smaller focal point around a fountain, bench, or garden.
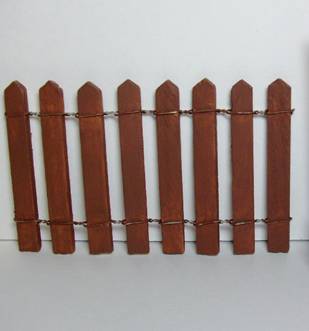
I added a dry brush of dark brick red to the fence pickets to give it a little depth and weathering.
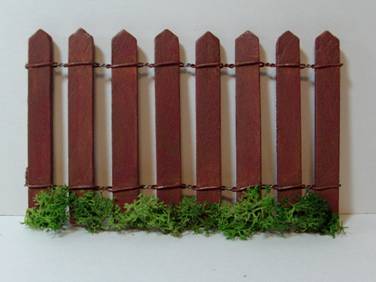
Put a little tacky glue at the bottom edge of each picket and glue bits of lichen or reindeer moss to the fence. Spread out the lichen just a little so that it covers the empty spaces between the pickets. You want to create the illusion of grass growing up around the fence.
On one side of the fence, glue a tall flower. This can be the foam bead type of flower stem pictured or it could be something like a sunflower. The tall form helps keep the landscaping in proportion with the height of the fence. After the flower is glued on, tuck some leaves behind it and then a few more shorter ones in front to make it look natural.
Back in the vine section of the floral department of that national hobby store I’ve mentioned, I found some very delicate plastic vines that have very small leaves. The store carries these vines in large bundles and they have them in all green, green and white, and green and red. I chose the green and red combination because I can use these little leaves as tiny blossoms in so many things.
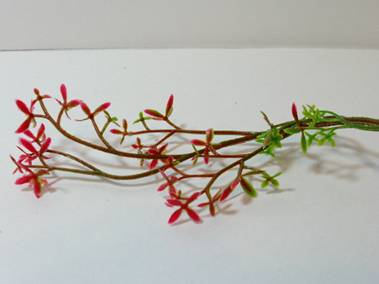
Cut the blossoms close to the base of the flower and glue them into the lichen to the right of the tall flowers. Add a small cluster of a different style, slightly larger flower to other side.
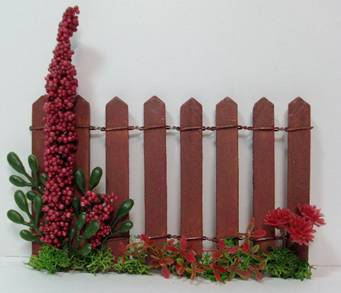
This creates a beautiful base at the bottom of the fence and can be repeated with random placement of the flowers for a longer fence.
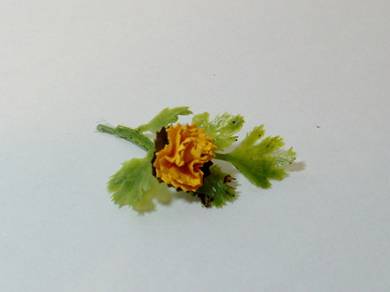
These bright yellow paper flowers are something that most of us are familiar with. They’re usually found in another national craft store and while they tend to be a little large for most 1:12 work, in this arrangement they fit in nicely. I think they look like the giant marigolds that I used to grow in my own garden. You can find the leaves used for these flowers in the vine section of the floral department. They’re sometimes sold in little pots as artificial herbs too.
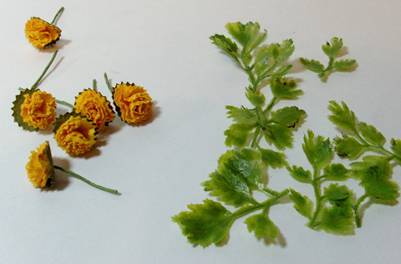
Cut the stem of the flower about half an inch from the blossom and cut a stem of leaves about the same length. Glue the flower stem to the bottom of the leaf stem so they’ll stay together when you place them in the arrangement.
From the front of the fence slide the bottom of the stem thru the opening between the pickets and glue it to the backside of the fence. Don’t worry if the glue shows on the backside—you can always cover it with lichen when you’re done.
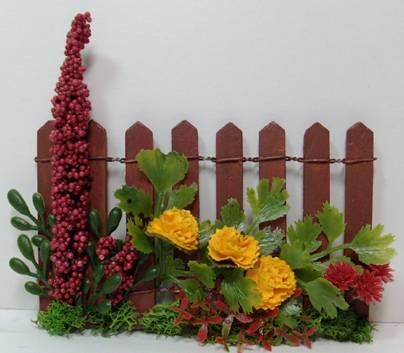
This is such a beautiful fall landscaping feature and when combined with the picket fence window box, you’ll have a gorgeous coordinating exterior to your dollhouse. Not only does the fence echo the colors of the window box, but it repeats the shape as well. The effect is subtle but stunning!
Newsletter Home...
|