|
The Outside Toilet
By Jo Med
If you fancy having a go at a small project that can be made using left over supplies and will allow you to practice your aging and distressing skills before applying them to a precious dollhouse kit, then this may be the one for you. This outside toilet is reminiscent of many still to be seen in the north of England dating from the 30’s and 40’s. It has been built entirely from things I already had in my supplies cupboard and my goal was not to buy anything for it. I almost succeeded but I did end up buying door handles – everything else I either already had or I made.
I am building a kitchen garden for my Garfield and wanted to put a gardener’s toilet in the corner. I enjoyed griming up my Spring Fling entry so much that I wanted to go for a bit of realism in the Garfield too – after all it’s an old house. You of course could smarten this up and have a 5 star outside loo for your discerning gardener.
I wanted a brick building but dolls house bricks are expensive and if you are not a fan of printies, here is another way of producing a brick effect finish. The good thing about this technique is that it can be used on entire doll house walls – if you have the stamina.
GETTING STARTED
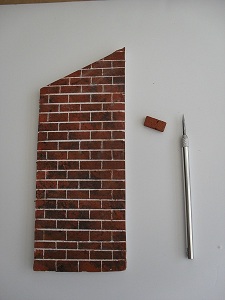
Shape of the walls
The front wall
What you need:
5 mm wide foam board to construct the walls.
Sharp craft knife
Steel ruler
Tape measure
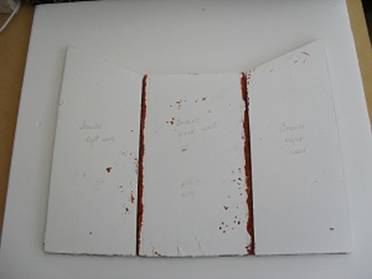
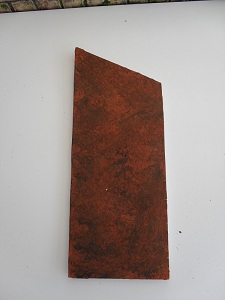
Back and side walls - The building has a slanted roof so the side walls are 3” wide x 7 ½ inches tall at the front and 6” tall at the back. The back wall is 3 ½ “ wide by 6” tall. Cut out the walls as shown.
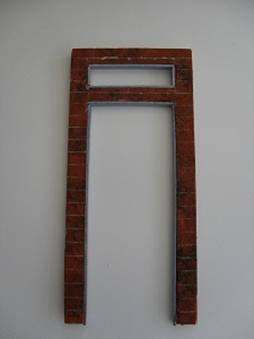
Front wall -The front wall is 3 ½ “ wide by 7 1/2” tall. Cut a doorway in this wall 6” tall x 2 ½” wide and a window aligned above the door 2 ½ “ wide by ¾ “ tall. I set mine ½ “ from the top of the wall. You can glaze this with a bit of acrylic sheet stuck on the inside. I lined the door and window openings with painted trim to hide the foamboard edges
Tip:
The top edge of the back wall should be cut at an angle across the thickness of the foamboard to follow the slant of the side walls. I forgot to do this and it was tricky to fit the roof on square.
THE MESSY BIT
What you need:
Polyfilla or Spackle or Gesso
Old credit card
Jug of clean water
Damp cloth
(This method is a technique recommended by Mulvaney and Rogers in their book “Magnificent Miniatures” which is an absolute must for anyone who loves miniatures in the grand style)
This is the fun bit for anyone who likes to get down and dirty. Mix up some Polyfilla (brand name for the stuff we use for filling cracks in walls) with a few drops of water until you have a paste that is spreadable. Mulvany and Rogers recommend gesso but Polyfilla was all I had at the time. I have never seen “Spackle” but I guess it would work in the same way.
Spread a thin coat of this evenly all over the outside of the walls using an old credit card. Keep dipping the credit card in the water to get a smooth finish. The back wall and the front wall must have a layer of polyfilla on the side edges so that when they are glued to the side walls, the joints can be disguised. You don’t need to polyfilla the edges of the side walls as these will butt up to the front and back walls. While this stuff is drying go check the new posts in the Greenleaf forum.
THE ARTISTIC BIT
Basic brick colour
What you will need:
An old saucer or paint tray for mixing your paints
Water
A bit torn off an old sponge
A damp cloth
Yellow ochre, burnt umber, red and black acrylic paints
A real brick, a doll house brick or a picture of a brick so that you can get the colour right.
Mix up the red, yellow ochre and burnt umber in approximately equal quantities until you get a shade that is as close to a real brick as you can (may take a bit of experimenting) and then dab the colour all over the dried Polyfilla’ed walls using the sponge. This gives a stippled effect. Leave to dry.
Mix a little bit of black with the remaining brick colour paint (assuming you have some left – otherwise you need to mix a bit more) Not too much black, just enough to turn it a charcoal/brown shade. Stipple this randomly over the brick colour. Dab with the damp cloth to soften the charcoal colour if you have been a bit heavy handed. Leave to dry overnight before attempting the next step as the paint will make the Polyfilla damp and it needs to be thoroughly dry before you score in the mortar lines.
THE TEDIOUS BIT
New brickwork
Old brickwork
What you will need:
Steel ruler
Scribe
The brick size I used was 18mm wide by 8mm tall.
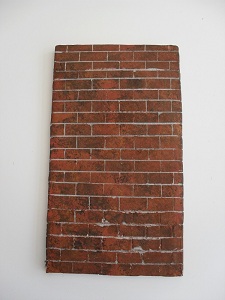
Measure lines 1 cm apart horizontally all the way up your back wall. Take the steel ruler and run the scribe along each line making a channel which will expose the white Polyfilla underneath. Do this fairly carefully; you don’t want to gouge chunks out of it. I made that mistake and a few bits did drop out but as I am doing an old brick wall, it didn’t matter too much. I got better at it as I went along. You can make the mortar lines as thin or as thick as you want but to keep to scale I would recommend 1mm lines. Then measure your vertical lines 2 cm apart and scribe the individual bricks on the first and every alternate course of brickwork. Continue until the whole wall is covered.
You can keep it like the side wall or if you want the aged look, mix a very very watery black paint and run it all over the lines to make it grey as I did in the next picture of the back wall. You can also see where bits of paint came off when I was a bit heavy handed with the scribing – but it adds character.
Start scribing the mortar lines on the back wall and when you move on to the side walls don’t forget to make sure that your mortar courses match up with the back wall so that the joins will be less obvious when the building is assembled.
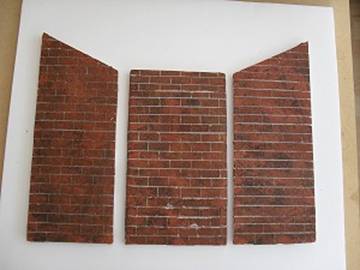
Aligning the mortar courses
ASSEMBLY
You will need:
Small piece of 5mm foam board for the floor
Floor covering of your choice
12” of angled wood trim
Cut the angled wood trim into 2 x 5 ¾” pieces. Glue the strips on the inside of the back wall leaving a 5mm space along the edges to glue the side wall and the floor in place. This will provide something for the walls to anchor to and will give a bit of rigidity to the building. I didn’t take a picture of this stage so here is an illustration using 2 random bits of trim.
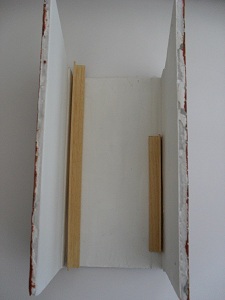
Using angle trim to stick the walls together
Use a bit of Polyfilla/Spackle or Gesso to disguise the angle trim. Let this dry and then paint the inside of the walls in your choice of colour.
Cut a piece of foam board 3” x 3 ½” for the floor cover with your choice of flooring and glue in place. You could add the floor covering later if you want. Clamp and leave to dry. Do not use masking tape at this stage as its likely to tear off some of the paint finish until it’s all varnished.
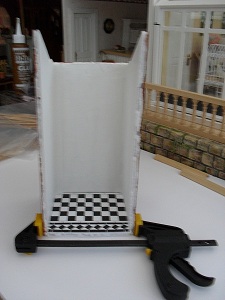
Clamps not masking tape.
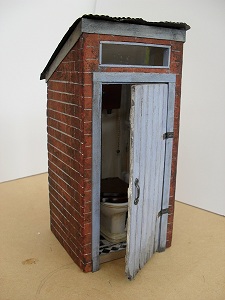
The outside of the building should look like this.
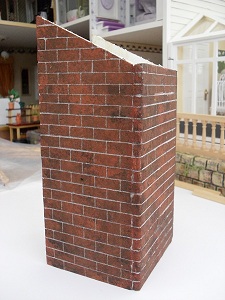
Outside (see where I forgot to angle off the back wall)
You may need to do a bit of touching up to the paintwork to disguise the joins. If your brickwork courses don’t quite line up at the corner, you can always plant some weeds or even a climbing rose to divert the eye.
It’s beginning to look like an old privvy now.
HOW ABOUT A BIT OF GRIME
You will need
A damp cloth
Paintbrush
Water based emulsion paint in colour of choice for interior. Matt finish recommended if you want to add grime.
Water-based varnish (oak) or any light brown/grey watery paint.
Paint the interior walls. When this is dry, start in the top left hand corner of the inside of your building and paint a bit of the stain or watery paint down the corner. Take the damp cloth and smudge it in so there are no hard edges. You can take as much off as you like and reapply to build up a grimy colour on the wall. This is a trial and error process to get it just as you want it. Do not do too much at once, a bit at a time will give you time to wipe it off before it dries if you don’t like the look. Treat all the corners and edges of the floor and walls in the same way. When this has dried , a matter of minutes, run some well diluted black paint down the corners and edges to give a bit of depth. If you are using tiles or a glossy tile paper, water based paints will not adhere to the surface, the water based stain will however.
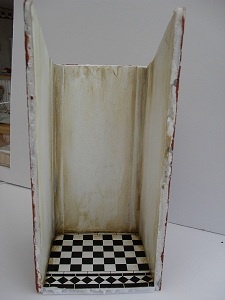
Distressed internal walls
THE ROOF
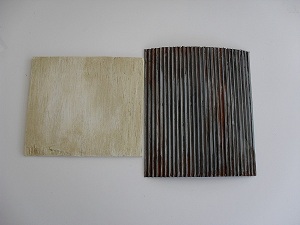
Basswood roof and tin covering
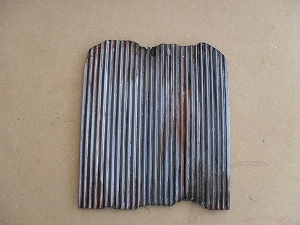
Distressed tin roof
What you need:
3 ½” x 3” piece of thin balsa or basswood
4” x 3 ½” piece of corrugated paper or cardboard.
Paint – colour of choice for interior, red, burnt umber and yellow ochre acrylic paint as before.
Grey primer
Silver acrylic paint.
A damp cloth
Paintbrush
Water-based varnish (oak) or any light brown/grey watery paint.
Paint the corrugated paper with the grey primer. I used a spray can. Leave to dry.
Paint the balsa wood on one side with whatever colour you have chosen for the interior, leave to dry. When the balsa wood roof is dry, grime it up a bit using the stain or paint that we used before. When the corrugated paper is dry, paint it over with silver acrylic paint and leave to dry. Mix the same brick colour paint as before, this works equally well as rust. Paint random bits of the corrugated paper with the rust paint. When you have painted a bit, wash your brush out and then smooth the paint edges with a wet brush so that the paint runs a little into the corrugated grooves. Continue until you get the amount of rusting you want. Finally when the rust paint is dry, finish off with a coat of watered down black acrylic paint to give it a dirty look. Let this run down the grooves too. Putting the acrylic rust colour on fairly thick at the edges will give a nice weathered effect at the next stage.
THE FUN BIT
Take the rusty tin roof outside with a box of matches or a lighter and burn the edges. This makes the acrylic paint bubble a bit which adds to the rusty look. It doesn’t burn that readily so there is no danger of destroying all your handiwork. Just let it burn until it has eaten a bit away then blow it out and burn another bit of the edge.
Now stick the tin roof on the basswood roof ensuring that it is placed centrally to give a bit of an overhang on the finished building.
PRIVVY NEEDS A DOOR
Outside of door
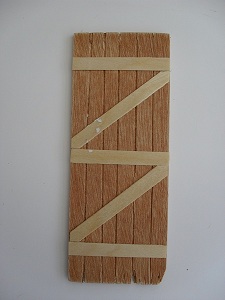
Inside of door
What you will need
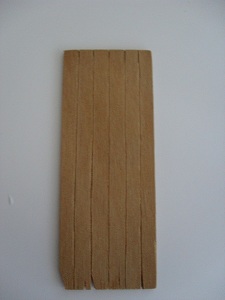
1/8th plywood 14 ½ cm x 5 ½ cm (I used a cut out from a Garfield tower window with the curved bit lopped off)
Sharp craft knife
Paint in colour of choice
A few bits of standard siding cut in half lengthwise or any very thin wood of an appropriate width.
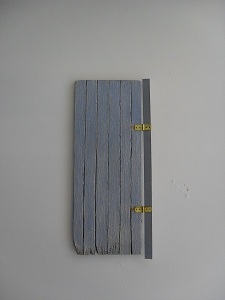
Score the door lengthways into planks on both sides. To get an even look these should be just a shade less than 1 cm wide. The grooves should be deep enough to be obvious after painting. If you want to give your door an aged look, chop the bottom edge a little with an easy cutter and then score it a bit more with your craft knife to make the wood look worn and a bit rotten. Paint these edges with the diluted black paint to make the wood look really old before painting the rest of the door. Cut the siding pieces as shown and stick to the inside of the door.
Paint the door, leaving the rotten edges black and then age it with a coat of watery black paint over the whole door paying attention to the grooves and the joints where dirt would naturally gather.
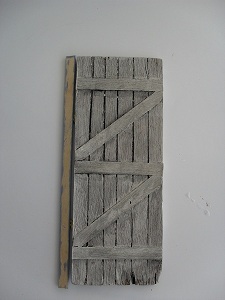
Inside distressed
Outside painted and hinged
DOOR TRIMS
Measure the door opening and cut trims as you would for a dollhouse door, 2 vertical and one horizontal and paint in the colour of your choice. If you are using metal hinges attach these now before attaching the trim to the wall. I’m useless with these tiny nails so I superglued them in place (keep the glue off the hinge joints itself or it won’t open and close). You will no doubt have your own favourite method of attaching doors – use whatever you are happiest with.
FINAL TOUCHES
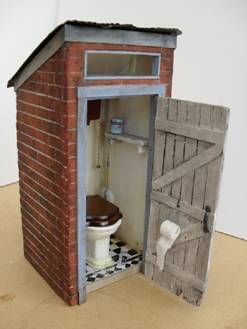
Attach the trims to the door frame and cut some trims for round the top of the building to hide any gaps between the roof and the walls. Then away you go – add a toilet and whatever else you want in there. Here’s mine (I know, I know, sacrilege to distress a handsome Victorian toilet but I was determined not to buy anything for this project – it almost worked, I had to buy the door handles – everything else I either had or made) If you want to put a light in your toilet, run your wires down behind the angle trim and down through the bottom of the building.
The toilet roll is a bit of dowel with a fine wire inserted into holes in the side.
The toilet brush is a cocktail stick with a bit of pipe cleaner stuck on it.
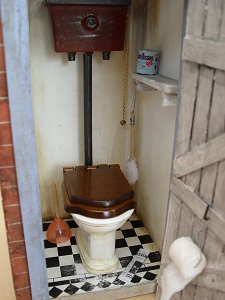
Add shelf and accessories
Outside
Return to Newsletter Home Page...
|