|
Lighted Crystal Christmas Tree
By Deb Roberts
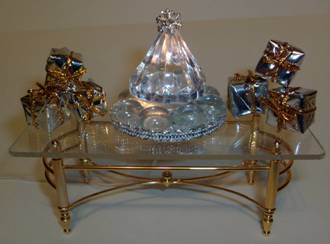
Sometimes it’s fun to step away from the traditional and do something a little more modern and unique. That’s what I had in mind when I created this modern, slightly art deco, lighted Christmas tree. The purity of the crystal and silver make this an elegant accent piece for any modern or deco holiday décor.
Here’s what you’ll need:
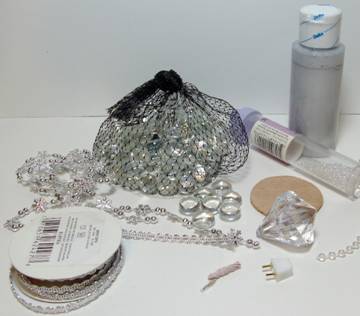
Small circle of wood about 1 ½” in diameter (a window punch-out works perfectly)
Silver paint
Grain of wheat bulb
Male plug
Silver ribbon trim
Silver star or snowflake
Flat bottom glass pebbles (found in floral departments of craft stores)
Fire glazed or aurora clear seed beads
Large plastic crystal “diamond” (usually sold in the wedding department of craft stores)
Clear and fast drying tacky glue
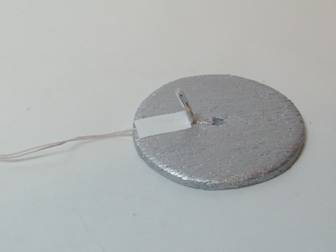
Begin by drilling a hole in the center of the wooden circle to hold the crystal and then cut a small trench from the center to the edge. The trench is where your light wire will be hidden.
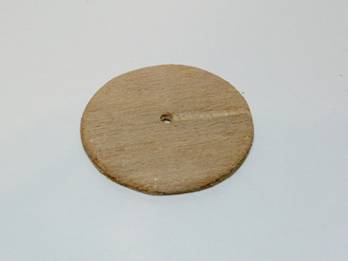
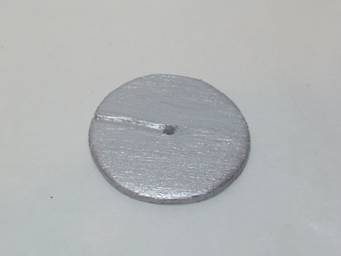
Paint the circle silver and set it aside to dry. Your paint job doesn’t have to be perfect since it will be hidden but a silver base will help reflect the light and make a nice foundation for the glass and crystals.
While the paint is drying, attach the male plug to the grain of wheat bulb. Begin by stripping the end of the wires about ¼” from the end.
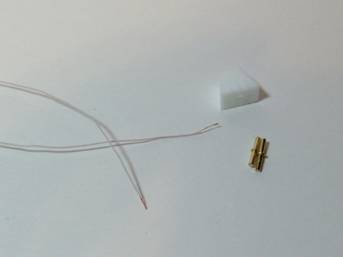
Push the wires thru the center hole in the plug.
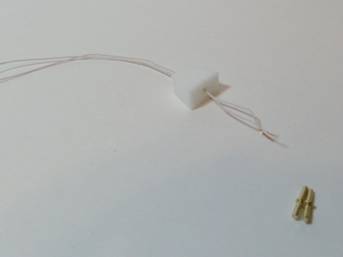
Carefully turn the wires into a U shape and insert each one into a hole on either side of the center hole. Be sure that all your copper wires are inside the hole.
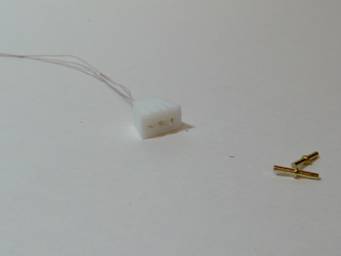
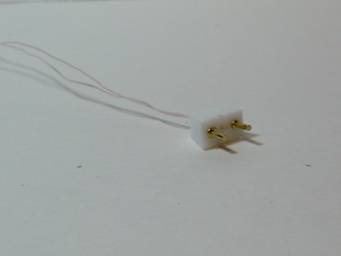
Replace the posts into the plug.

Be sure that the paint has dried on the circle base. Gently bend the wires at the base of the bulb so the light is turned upward. Place the wire into the trench, making sure that the light bulb is about ¼” away from the hole. Cover the wire with a piece of electrical tape.
Dab a bit of silver paint over the top of the tape so it blends in with the base.
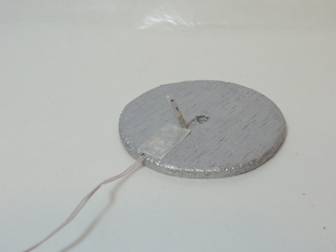
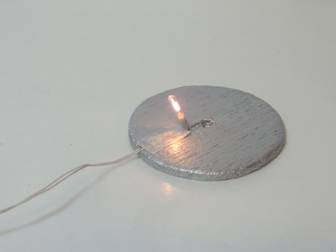
Test the light to makes sure it comes on correctly.
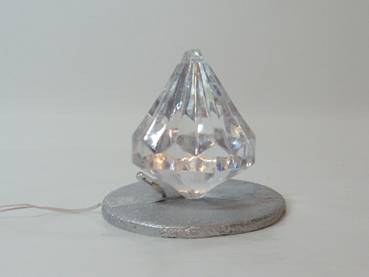
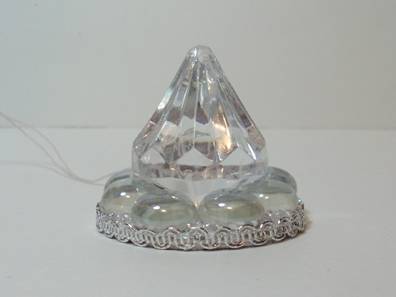
Using fast drying tacky glue or super glue, place the diamond crystal upside down on the circle base, making sure that the point of the diamond is set evenly in the hole. Check to be sure the diamond is straight and center, then hold it in place until the glue sets.
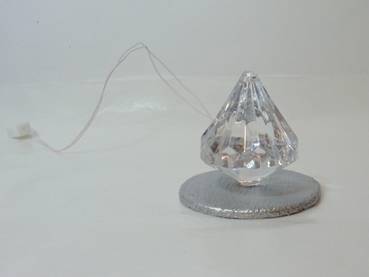
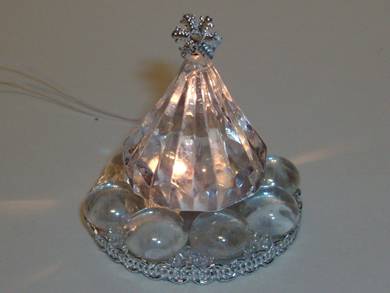
The light bulb will be positioned at the back of the diamond, bending backward with the shape of the diamond.
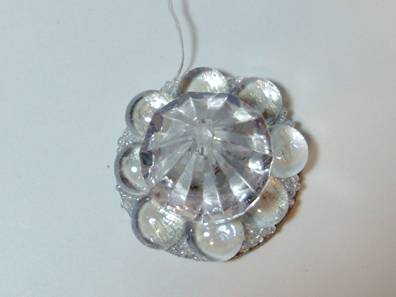
Place a small dot of clear drying glue on the bottom of a clear glass pebble and glue it to the base, snugging the rear side up under the slanted side of the diamond. Continue gluing on the pebbles in the same way all the way around the base. The pebbles help hold the diamond upright as well as creating a beautiful contoured design around the base. Suddenly you’ve transformed a diamond into a tree!
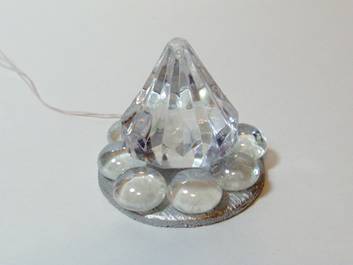
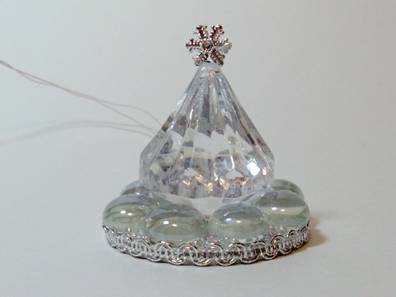
With a toothpick, dab a bit of clear drying glue in the space between two of the pebbles. With a pair of tweezers, place as many clear seed beads as needed to fill the space.
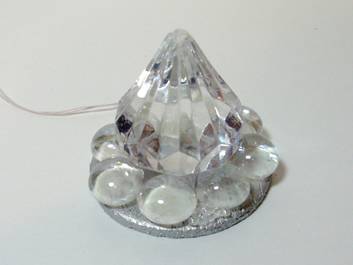
Continue all around the base of the tree until all the spaces between the pebbles are filled with crystal seed beads. The pebbles and the seed beads will pick up the light and add even more sparkle to your tree!
Using a toothpick put a layer of glue all the way around the edge of the base. Carefully apply the silver ribbon trim to the top of the glue and trim the edges to meet perfectly at the back.
For the finishing touch, glue a silver star or snowflake to the top of the tree.
Plug in the light and prepare to oooh and aaaaah over this beautiful crystal Christmas tree. Pictures simply can’t do justice to the sparkle of this tree and the way it sends rays of light out into the room!
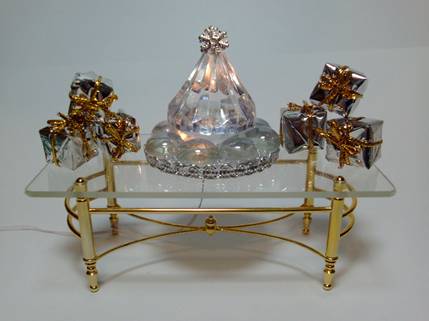
You can display this elegant crystal tree almost anywhere in your house. It makes a stylish statement no matter how you show it off!
Return to Newsletter Home Page...
|