|
Diary of a Polymer Clay Novice Part 1: Making Polymer Clay Molds
By Deb Roberts

Traditionally the arrival of a new year inspires people to make resolutions, usually about things they want to stop doing. I tend to go the opposite direction and when January 1st rolls around I start thinking about doing something that I’ve never done before; expanding my horizons with new experiences.
Usually I can nip that urge in the bud before it gets too far but this year it caught me unaware and before I knew what was happening I was in a craft store with a cart full of polymer clay and a pasta machine. I blame it on the huge discount coupon in my pocket because I was able to convince myself that the pasta machine was too much of a bargain to pass up. The funny thing is that I only vaguely sure why I would need one in the first place, but I’m never one to walk past a good deal if there’s a remote possibility that I might need something someday.
One of the things I was sure I’d need was something to use to make molds. I scanned the mold products on the aisle and decided that at this point in my learning experience it would be best to stick with the most simple process. I grabbed a box of mold maker clay and after reading the simple instructions on the back of the box, I came to the conclusion that I could do it. I wouldn’t even need a pasta machine! (Of course that didn’t make me take the pasta machine out of my shopping cart and put it back on the shelf. I’m positive that I’ll need it sooner or later.)
Armed with all the supplies I’d need for my clay learning experience, I skipped home and set them all out in front of me on the studio table when reality hit and I realized that I really have no clue what I’m doing.
You’re probably wondering how this is all leading up to a newsletter tutorial on a subject that I admit to knowing nothing about, but it occurred to me that as miniaturists we tend to take wild leaps into the unknown when we want to learn something new. For most of us it starts with the thought of “I’d really like for this dollhouse to have a ______” and then we’re off digging thru scraps and searching craft stores to find a way to make it happen. I think that’s one of the more fascinating traits of miniaturists so I thought I’d share my own experience of jumping into a form of miniatures that I’ve never done before. If it works out well then I’ll be doing real polymer clay tutorials in the future. If it turns out badly, well then, we’ll just call this a “What not to do” article.
My motivation behind this project has been two things---one is the desire to make molds for architectural embellishments that I can use on dollhouses. (Tracy Topps is my inspiration in this. If you’ve ever seen the gorgeous embellishments she adds to pediments, corbels, and fascias you’ll know exactly what I’m talking about.) The Victorian Rosedale that I’m building right now really needs some rose and cherub embellishments. I have some plastic buttons that would be perfect for that but I’d rather create molds of them so I can make more. The other motivation to learn to use polymer clay is the toaster oven that’s been sitting unused in my kitchen for over a year. Guilt is a strong motivator!
So my goal is to first make the molds and then use polymer clay to create embellishments from the molds that I can use as architectural features or even to decorate furniture. I eagerly gathered up my materials! (I’m not going to include product names since this is all about learning the process rather than suggesting one type of product over another.)
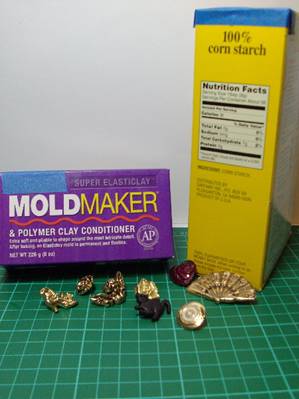
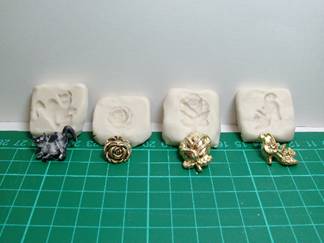
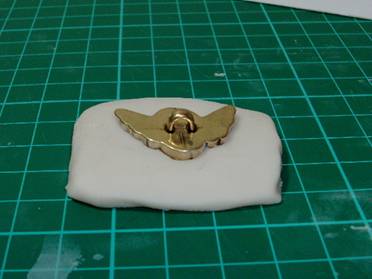
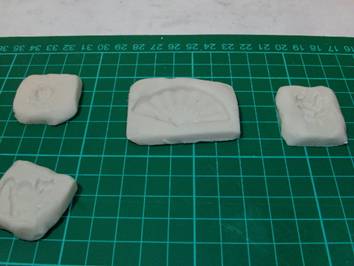
I’m using only the instructions provided by the manufacturer which is why this isn’t a tutorial—it’s more of a pictorial diary of how it worked out for me. After I set out the mold maker clay and a box of cornstarch I started digging thru my button drawers. It’s a little known fact that I’m a button fanatic. Digging thru my button collection took a little longer than I thought because I had to stop and pet so many of them on the way to finding the ones I wanted for molds. I was searching for a cherub and a rose but somehow a Victorian lady’s boot, a flower, a heart, and a medallion got tossed on the table too. I’m thinking that boot would make a killer embellishment to a shelf or hutch used in a lady’s boudoir or shop. Oh, and then there’s the black cat. I’ve wanted to use him for embellishments for a long time. The fan jumped out at me too just because I think it’s pretty even if I have no idea of how I would use it as an embellishment. So somehow my quest for two buttons turned into several and I decided I’d make the final cut later on.
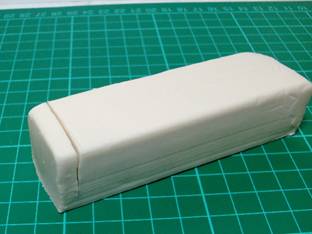
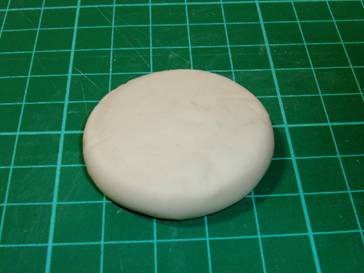
The baking guidelines on the box were proportioned for a quarter inch thick so to lessen the chance of failure on the first time I cut a slice a quarter inch thick for my first mold.
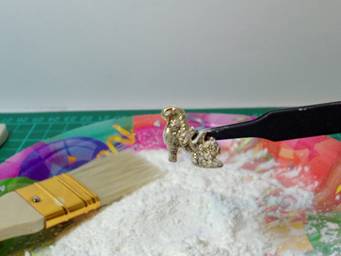
I chose the boot for my first mold and dipped it into cornstarch. That left way too much cornstarch on the button so I used a brush to clean it. The object is to give it a thin coating of cornstarch so it won’t stick to the clay and I didn’t want clumps of cornstarch stuck inside the mold.
I pressed the boot straight down into the clay. I didn’t push it all the way in because I want the finished piece to be thinner than the button.
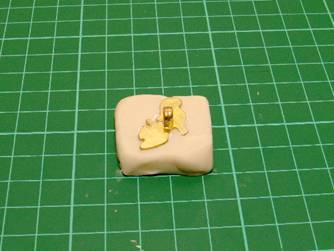
I may be taking a chance on it being so thin but I’ll give it a try. The mold looks good anyway.
I noticed that the clay cracked around the edges because I hadn’t kneaded it to soften the clay. So I gave each piece a nice little roll to soften it with the remaining pieces and that worked much better. I took care to make sure that it stayed an even quarter inch all the way across.
These four were all the same size and turned out okay so I moved on to something a little larger. I formed a larger piece and then realized that I was leaving fingerprints in the clay. I flattened it with my palm and then I had palm prints. Hmmm. The object of this little practice was to make a fan mold, not create crime scene evidence. So I fixed that by putting a piece of waxed paper over the clay and gave it a nice roll with a bottle that was handy on my work table.
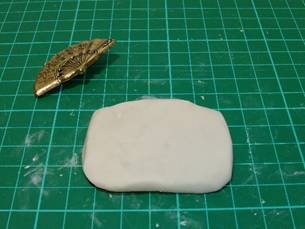
That worked out well so I was able to make my fan mold with no fingerprints.
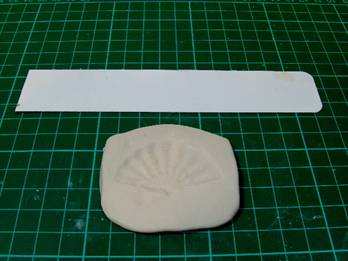
One thing I figured out early in the process was that even after dusting the work surface with cornstarch there was still going to be some clay sticking to the mat. So I kept a thin, flexible plastic ruler close by to slide under the clay and lift if from the mat. That worked well to remove the clay without distorting the shape. That means the ruler goes into my clay workbox for future use. Yay! I love finding a new tool!
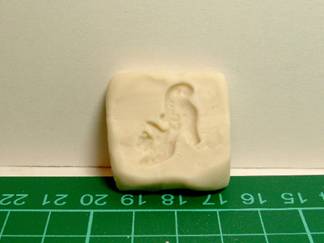
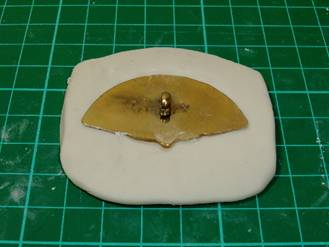
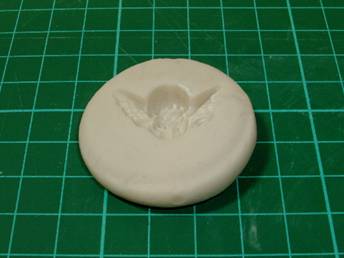
The final mold used a cherub button that was thicker in the middle than on the ends and I ran into a little bit of trouble with that. I made the mistake of making the first piece of clay too thin. My first clue something was wrong came when the button didn’t go all the way thru the clay. You can see in the picture that my clay was way too thin in addition to being uneven.
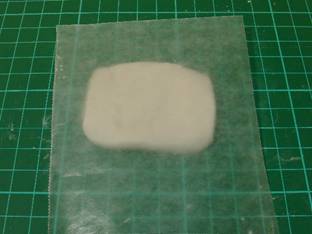
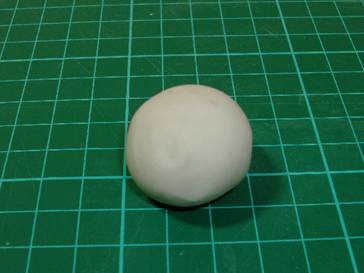
I started over by rolling a ball of clay and then covering it with a piece of waxed paper and rolling it to a slightly thicker width.
That worked perfectly!
Finally I trimmed the edges of each mold so they were straight and didn’t have tapered edges that might burn. I don’t have any experience with clay but I do have experience baking cookies and the same principle applies to both—thin edges burn before the middle is done.
After I dusted off my toaster oven and covered the baking tray with foil, I carefully put each mold on the tray and put it into the oven preheated to 275 per the package instructions. I let them bake for 20 minutes, making sure to have the exhaust fan running in the kitchen to clear the fumes.
I’ve heard the horror stories about burning clay so I didn’t want to go far from the toaster oven and that left me with 20 minutes to kill in the kitchen. I remembered that I’d seen a recipe for sweet and sour chicken on the back of the cornstarch box and that sounded really, really good so I grabbed my favorite kitchen tool---the phone that has the Chinese take out place on speed dial.
The one thing I forgot to get was an oven thermometer so I could monitor the temperature in the toaster oven. That made me a little nervous but apparently the oven was pretty precise because after 20 minutes the molds looked great. There was no burning and after they cooled the molds were nice and firm and still flexible. I put down my crab wonton and did a little happy dance around the kitchen. I’ll still get a thermometer because it could have been just a fluke and one time success doesn’t guarantee I don’t need the proper tools.
One thing on the instructions that struck me as particularly helpful was the formula for 20 minutes per ¼ inch thickness for the mold maker clay. Since at least one of my molds was thicker than the others I was able to adjust the baking time accordingly and I think that had a lot to do with how well the baking came out. I think that might be a very important thing to remember in the future.
I heeded the warning not to move the molds too much until they were cooled to avoid distorting the shape. But after they were nice and cool I spent quite a bit of time going over all the details. I’ve never seen a polymer clay mold before so I was curious about how flexible they are and the quality of the clay after it had been baked. I like it!
Now on to Part 2 of my diary---using the molds to make things!
Newsletter Home Page...
|