|
Diary of a Polymer Clay Novice Part 2:
Using the Molds to Create Decorative Elements from Polymer Clay
By Deb Roberts
Time to go back to the studio to make some great decorative elements!!
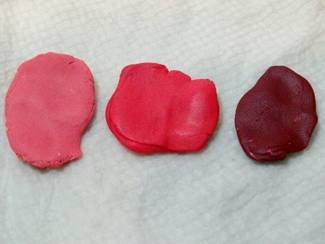
I remembered to spritz the molds with water before I used them and that worked out nicely when it came to releasing the clay. The water stands up on the clay and there was no residue left in the molds at all. The first thing I had to try was a deep red colored clay to make a rose. I fell in love with this color in the store and couldn’t wait to use it. I pressed the clay into the mold trying to keep it as even as possible, and then twisted it slightly to release it, and trimmed the edges with a sharp knife.
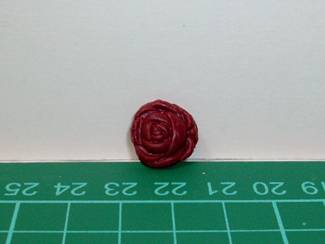
I like it! That will work wonderfully well as an accent on a pediment or even as a decorative element on a piece of furniture.
I went on and tried each of the molds I made and was happy with all the results until I made some white roses. The clay was stiff and crumbly so I used a little of the mold maker clay which also works as a conditioner. I should have paid a little more attention to the warning on the box not to use more than 1% because I ended up with very sticky clay. I added more white clay until it was manageable but when I tried to trim the edges it tended to stick to the knife.
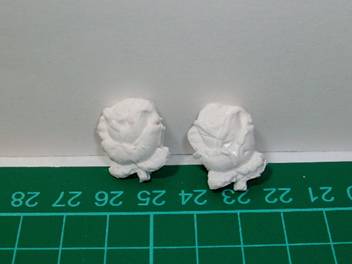
Actually this gives me an opportunity to try another technique so I stopped fussing with the wet clay. After they’ve been baked I’ll try a little sanding to smooth the edges. On all the other pieces I was able to smooth any rough edges with the flat edge of my knife blade.
Since I’m planning on gluing these pieces onto other things it’s important to get the back as flat and even as possible. I think that’s going to take practice because I felt a bit clumsy with my first few efforts. The clay kept sticking to my fingers and lifting out of the mold which caused some blurring of the details in the design. After scrapping and restarting on a couple it occurred to me to rub a bit of cornstarch on my fingertips and that helped. I still think it’s going to take some practice to get the knack of knowing how much clay to use for each mold and being able to smooth the back evenly without shifting the clay inside the mold.
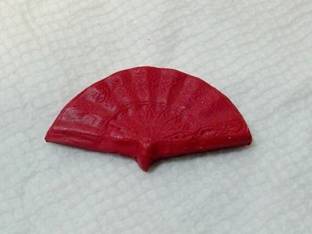
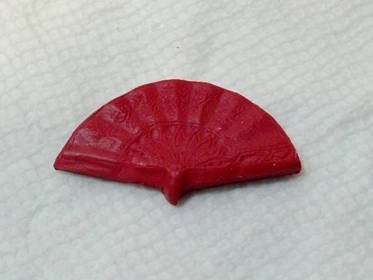
I gave some thought to the fan mold because I wanted the fan to have the look of fabric. To get that effect I thought that mixing three shades of red would work best. At last! A chance to use that pasta machine! I softened (kneaded) three different colors of clay, using a little more of the predominant color than I did of the lighter and darker accent colors.
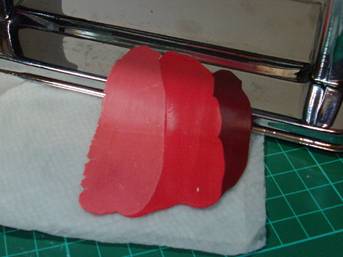
I experimented with some bits of clay to find the right setting on the pasta machine before I started blending my colors. I want a mottled look, not evenly mixed, so I overlapped them like this

before running them thru the pasta machine.
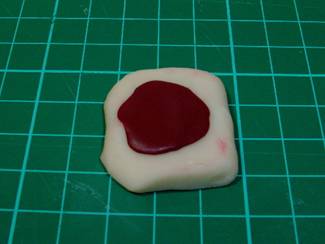
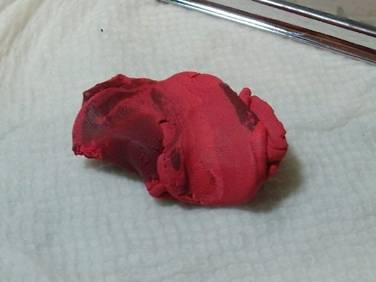
After the three pieces became one I pondered for a bit about how to continue blending them without ending up with long, thin stripes. It occurred to me that it’s much the same principle as kneading biscuit dough so I folded the clay in half and ran it thru the pasta machine again, repeating that step two more times. By then it was soft enough for me to use my hands to finish mixing it till it was a little more blended. I have to say that my hands are happy I got the pasta machine because it took most of the work out of mixing the colors. It only took a little twisting and pushing to get this:
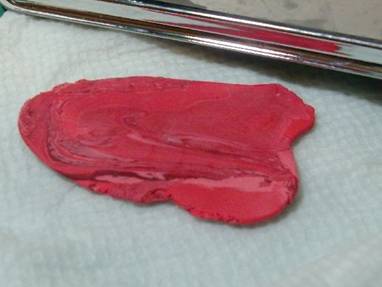
That was a little more like the marble that I was looking for! A couple more times thru the pasta machine was all it needed before I pressed it into the mold.
I’m quite pleased with the blending of tones thru the fan. If it were all one flat color it would look less realistic and more like plastic but I think the marbling gives it depth and realism. It will really come to life when the accents are painted.
Being eager to get these pieces in the oven to see how they baked, I only molded one more piece—the cute little Victorian boot. I think I’ll probably use it as an embellishment for a hutch so I wanted it to be much thinner than the others and that would add a degree of challenge to the baking.
The clay package uses the formula of 15 minutes at 275 per ¼ inch thickness and based on that, I had three different baking times. I was a little concerned that opening the oven door and sliding out the tray just enough to remove the first pieces would compromise the heat in the oven so I added an extra minute of baking time for the remaining pieces each time I opened the oven door. I put the thinner pieces to the front of the tray so they could be taken out quickly and reduce the amount of time the oven door was open. It seemed to have worked out pretty well since everything came out nicely. One thing that I did notice is that the clay seems to darken at least one tone after it’s baked so my careful shading in the fan wasn’t very noticeable when it was finished. I think my solution to that will be to make the shading a bit less subtle next time. As with other things it will take some practice to get it right.
Join me in Part 3 as I finish and paint each piece!
Newsletter Home Page...
|