|
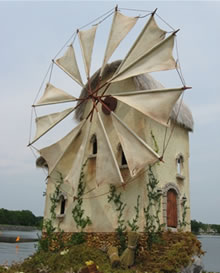
Tips and Techniques of the Original Loganberry Mill
By Jen Barrick
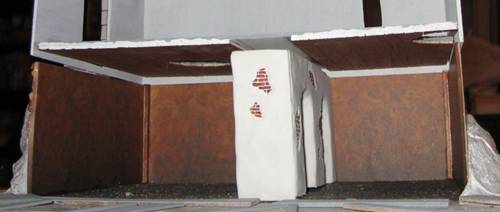
Before the kit arrived I made a basement level. The base is foam core posterboard. The floor of the basement is a stone pattern Lemax floor from their Christmas Village set. Burnt sienna, brown and white pastel chalk dust was used on the floor then sprayed with a mate varnish. The walls are made of basswood planks. The interior is wallpapered with a great dark paint splattered scrapbook paper I found. Stained wood strips are glued to the corners and eventually will run along the floor and ceiling edges. The arched room divider is cut Styrofoam covered in Paperclay. After sanding the Paperclay smooth, I took a Dremel sander and ‘chiseled’ exposed brickwork. I used the edge of a foam sheet cut to size to stamp the ½ scale brick pattern.
The exterior of the basement needed to be a combination of the ground and a stone base. The stones are natural-colored fish tank gravel glued with Aileen’s Tacky Glue. The ground base is made of shaped tin foil glued to the base and walls with Gorilla Glue. Once dry, the tin foil was covered with Plaster of Paris and painted brown.

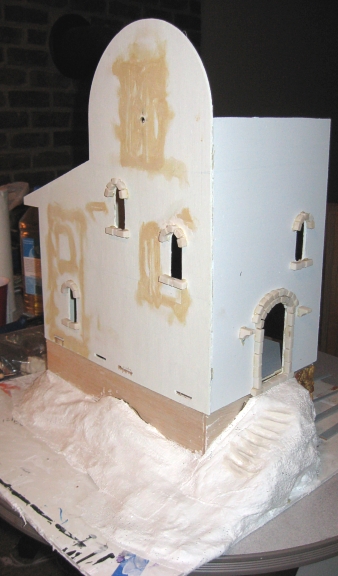
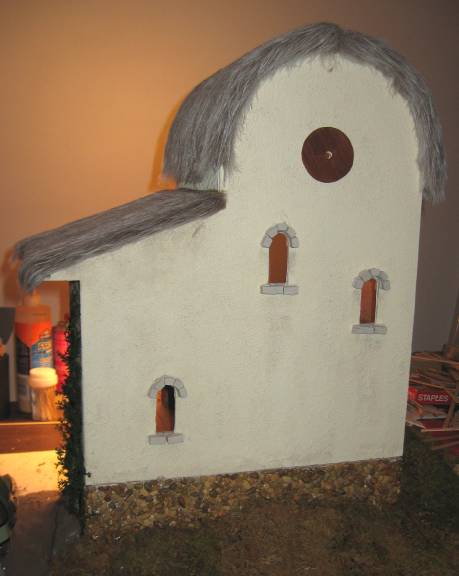
Here you see the Plaster of Paris before being painted. The steps were formed later using Paperclay. I did not remove the original scored door and window parts. Instead I filled the grooves with wood putty and sanded them smooth. New half-scale windows and door arch were then cut out. The stonework glued around the windows and door frame are from cement building kits from Oriental Trading.
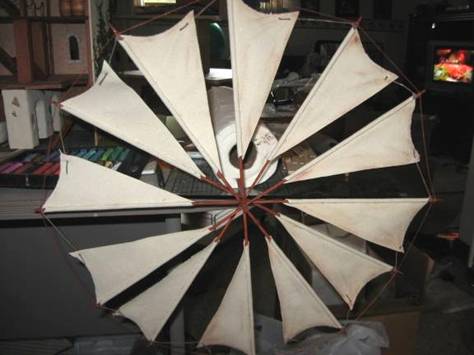
The sails are made of a lightweight canvas material glued to, and wrapped around, wooden shish kabob skewers. I used a Dremel bit matching the width of the skewer, drilling properly fanned holes in the dowel rod. This was the most complicated part – drilling straight through the center of the dowel rod six times, spaced evenly down the rod and at the proper angles so they fan evenly. In fact, the dowel rod ended up breaking at one of the thin sides of a drill point. In hindsight, I think a slightly larger diameter rod would have been much easier.
The canvas pieces are treated with Fray Check and were eventually lightly dusted with gray and burnt sienna pastel dust to age them. The original sail design in Greece had lots of additional cables running to the center, but that seemed like overkill. I only included the chain running around the end and the rope tacking the end corner of the sail to the chain. The chain is a 60’ silver necklace chain painted with burnt sienna metal paint to simulate rust (also used for the chain railing inside).
The walls of the interior levels are wallpapered with a half-scale brick printie. The floors needed to be divided three ways to develop three half-scale levels from the original 1:12 two floor scale. I used the slats that were originally bought for the roof to create a ceiling for the basement. I made the floor of the first floor using a layer of balsa wood over the actual dollhouse base with the grain running in one direction. Then I used a pointed clay tool to score the length to resemble half-scale slats. I used both balsa and bass wood for different parts of the structure and was fortunate that the satin didn’t look too different considering how much more absorbent balsa wood can be.
I cut the kit’s second floor in half to form an office loft. The columns were made by gluing four wood strips together. The walkways are single cut pieces of spare dollhouse wood with popsicle sticks cut as planks. Balsa wood strips were used to frame the corners and cut at 45 degree angles to resemble wall bracers under the walkways.
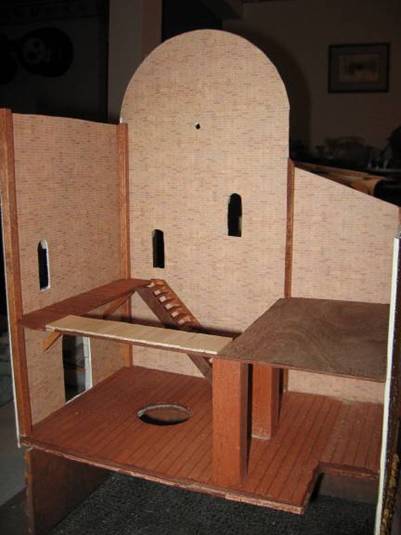
The stairs were difficult. I ended up cutting a section out of a popsicle stick so the stick width (not length) would equal the height of the riser. Once a step (again, popsicle sticks!) was glued properly and set within the two wood edges, I would add a step above it and use the popsicle ‘tool’ to gauge the distance between steps. It was a long process because one step had to set before another could be added. In the meantime, I added slats across the roof pieces to look like rafters spaced equally apart from one another.

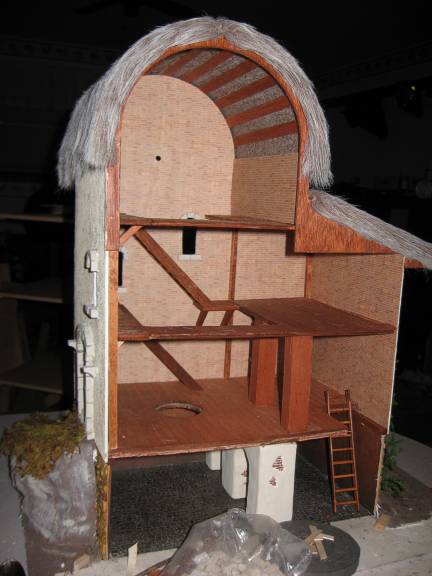
The ladder was constructed using a Dremel bit to dig into the side pieces and then wood skewers were used for the ladder rungs.
Once the rafters were completed I used a gray faux fur to cover the rafters. A great big shout out of thanks to Deb for her tips on creating a thatched roof using faux fur! I purchased a matte varnish which can be found in the acrylic craft paints section at the craft store. I used a cheap plastic comb and combed the varnish into the fur. It immediately began looking like thatching!! What a great, and easy, effect – just like Deb said! Some of the fur will come off into the comb, but certainly not a noticeable amount. The end result was really incredible.
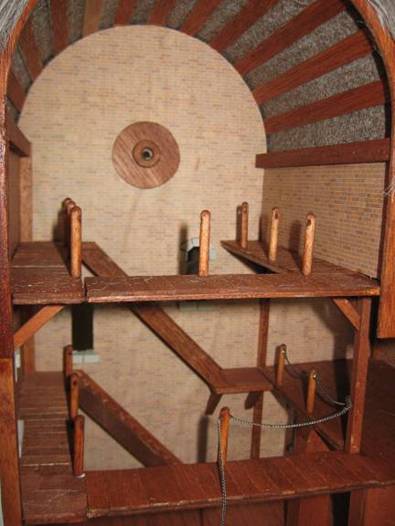
About this time I was getting a little tired of staining everything, so an entire railing of wood was not sounding very appealing. Instead, I took the leftover chain from the wind sails and used it to create a chain railing. I drilled a hole into a dowel rod, sanded one end round and inserted the chain through the hole. Once the chain was just about where I wanted it, I added a drop of hot glue and brought that section through so the chain wouldn’t be tempted to move through the poles and become uneven.
I used a white Kilz primer and over that a cream colored paint mixed with fine white sand. It required two layers to get a decent raised consistency to look like aged stucco. Eventually I added a wash of burnt sienna to give the stucco an aged look – particularly directly under the windows and roof. Between the beige paint and the beige sails, I decided it was too white and I added greenery along the walls as ivy. This and the random flowers were the only points where I used hot glue – it seemed to make a better and much quicker bond between the paint and the plastic greenery.
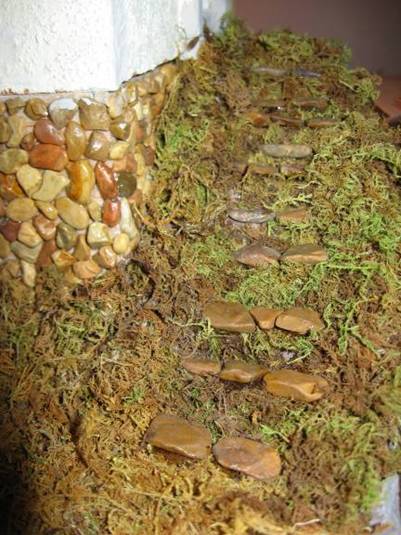
I used deer moss for the landscaping – I actually painted some of the areas that had browned with acrylic paint – and it worked like a charm. The gravel along the walkway is coarsely ground sand set in Aileen’s clear dry glue. I selected quite a few different plastic and dried flowers that would look natural at the half-scale and glued them into the deer moss randomly.
Initially I molded steps using Paperclay over the Plaster of Paris on the hillside leading to the front door. Moss glued firmly to the step shape made it easier to then glue flat rocks on top of the moss as steps.
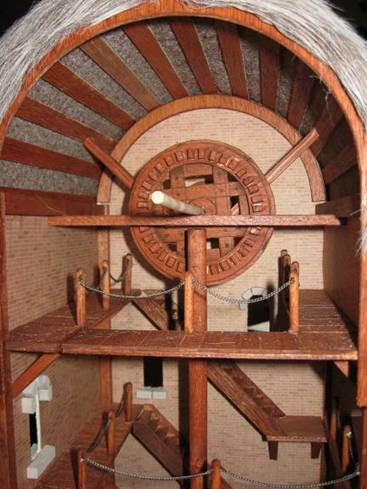
The main gear is three layers of balsa wood with smaller cuts of balsa wood as gear teeth. The nice thing about working in half-scale is that the detail can be more easily painted on and still look three dimensional. The bolt, line and shadow detail on the gears are painted on. The beams only act to hold the dowel rod connected to the wind sails, keeping the sails parallel.
The secondary gear connects at the top of a dowel rod extending all three levels of the windmill. At the very top of the dowel rod is a smaller gear carved from balsa wood. It can be very frustrating watching bits of balsa wood chip off accidentally – but nothing a little wood glue can’t fix or setting up just right can’t hide.
I have a friend who is an archeological historian. After getting a bit of the mill together I sent him shots and he offered a few suggestions including adding support beams everywhere I saw fit – I hadn’t thought about just how much the mill would weigh in reality – but it definitely made sense to add lots of support beams. It was also a nice way to break up the brickwork.
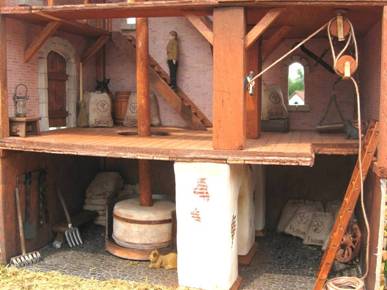
The grid stone was fun to make. I purchased a soft flower-foam cylinder, cut it down to the correct height and shoved the dowel rod into it. With the rod removed, I coated the foam with Paperclay layers until the green foam color was completely covered. Once dry I dusted the “stone” with dry acrylic chalks – grey and burnt sienna to age the stone and white to simulate flour. The stone holder I found at Michaels in the wood department.
One of my favorite activities of the miniature world is to wander aimlessly up and down aisles at craft stores, thrift shops and yard sales to find the needles in the haystacks. I found the perfect sized wood cylinder box in the wood section of Michaels for the grinding stone container. I also took slices of the box to make the two edges running around the stone.
I did a little research on equipment and managed to recreate a pulley system and flour scale. Several tools are actually Playmobil, which is close to half-scale, painted and aged with acrylic dust. The basement bench is also made with spare wood leftovers. The lantern is a bead with wood and wire glued until it, well, looked like a lantern.
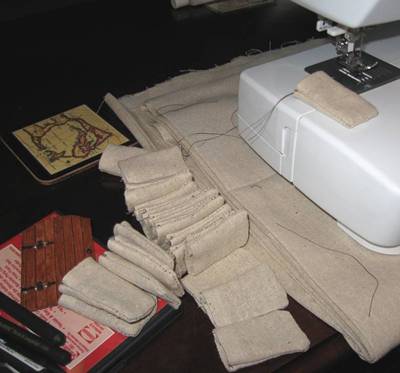
I found a material that looks like burlap without the burlap smell. After sewing three edges and painting logos on the front, I tossed them all into a bag of brown acrylic dust to age them, and then added a lighter coating of white for flour.
This was a lot of fun to create. I hope you’ve enjoyed the explanation and photos showing how Loganberry Mill was constructed!
Return to newsletter home...
|