|
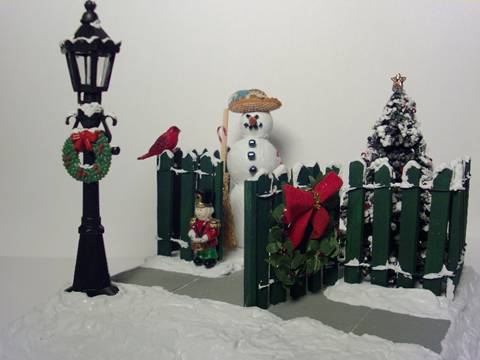
"Let it Snow" Vignette
By Deb Roberts
~~City sidewalks, busy sidewalks, dressed in holiday style. In the air there’s a feeling of Christmas~~
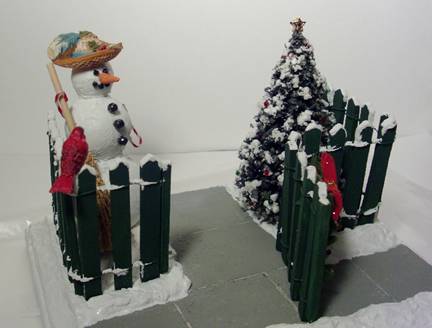
Sing along with me if you know the words! “Silver Bells” is my favorite Christmas song so maybe that’s why I visualized this little scene when I was wondering what mini to make for Christmas. However, I didn’t visualize a busy city sidewalk. Instead, I thought of a quiet and quaint sidewalk scene leading up to a charming little home—a welcoming place with lights in the windows and beautifully decorated rooms inside. Of course it had to be a dollhouse!
This little vignette works as a stand-alone scene or the concept can be used for landscaping a small house.
Things you’ll need:
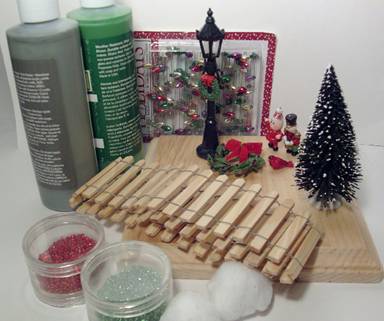

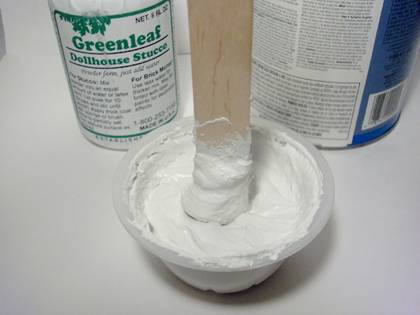
Greenleaf Dollhouse Stucco
A 6” x 6” square wood base (If you’re making a vignette and not landscaping)
Section of fencing (either wooden picket or ornate plastic will work)
Small flocked tree
Red and green seed beads (or the colors of your choice)
Small wreath
Lamp post
Red Bird or Blue Jay
White latex paint
Grey paint
Paint for fencing—your choice of color
Silly Snowman (tutorial for snowman is also in this issue)
Optional:
Small holiday figurine
Lights or garland for fence
1 cotton ball
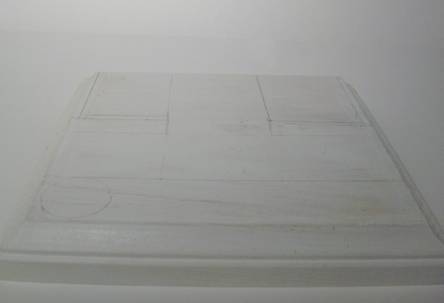
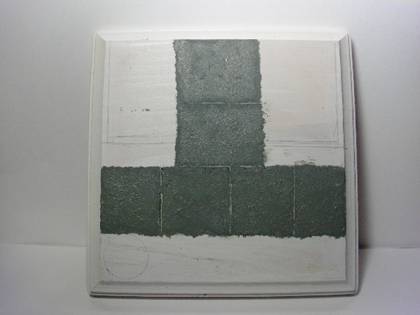
Begin by applying a base coat of white paint to your base to seal it. After the paint has dried, use a pencil to draw out the placement lines for your scene. You’ll need to mark where the fence, lamp post and sidewalk will be so this is the time when you’ll shape your fence to fit the space. Plan to set your fence back from the edge of the sidewalk by about half an inch.
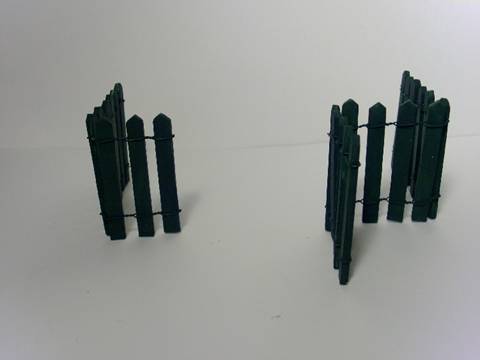
Cut the fence into two pieces and bend the wires on the fence to fit the sides and front of the yard only. Bend a portion of the fence to create the gate in front. Cut off the excess at the back. If you’re using plastic fencing, cut the pieces to fit the sides and front, then cut an additional piece to be glued to the front section at an angle to create the gate. Set the fence aside.
Mix your grey paint in a 50:50 ratio with Greenleaf stucco to the consistency of pudding. If you’re using acrylic craft paint, keep in mind that the stucco powder will slightly lighten the color of acrylic paints by about one shade. (latex paints will remain true to color) Using a stiff bristle brush, dab the paint onto the sidewalk area. A dabbing or patting motion works best since you want the finish to be pebbly so it looks like concrete.
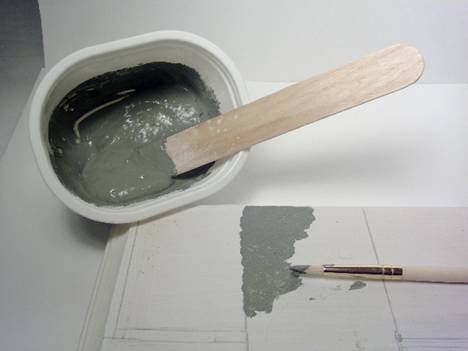
Before the paint dries, use the tip of your pencil to etch in the sidewalk lines.
Allow the sidewalk to dry. Mix white latex paint with Greenleaf stucco in a 60:40 ratio. The consistency will be thick enough for a tongue depressor to stand up in it.
Using a stiff bristle brush, “frost” the areas around the sidewalk to create snow. This is the part that takes a little time and patience because you’ll be working in layers. When you’re applying the stucco mix, visualize the shape of snow banks and sculpt the stucco to simulate that look. Don’t worry about the texture for now. At this point, we’re creating the valleys and contours of snow banks. Push the stucco up around the edges of the sidewalk so it will look as if it’s been shoveled. Create higher areas of snow where your fence will be placed and lower areas where your “yard” will be.
Avoid applying snow in the circle you’ve designated for your lamp post since it will need to be at street level. You can apply snow in the area for your fencing since you want the snow to be piled up around the fence—but before each layer is completely dry, fit your fencing into place and push down so it creates a depression for each picket. (if snow sticks to the bottom of the fence, wipe it off with a cloth) By doing this, you’ll create spaces for your fence to fit down into the snow drifts after the snow is dry.
Each layer should be no more than ¼” deep and you need to let each layer dry completely before applying the next. The number of layers depends on how deep you want your snow to be. Just remember that you’re creating a street scene and not a ski slope! Usually two layers is enough. Don’t worry if the snow cracks a little on top since you can fill the cracks with the next layer. Cover your stucco mix with plastic wrap in between layers so it doesn’t dry out. If it does stiffen up too much, add paint in small amounts until you’re back to your original consistency.

If you’re making a vignette and not landscaping a yard, do the same thing with the sides of the wooden base, bringing the snow up over the edges to create little “banks” around the sides.

After all the layers have dried, use an emery board to gently and lightly sand the surface of the snow to remove the peaks and rough spots. Blow off the dust so that the last layer will adhere well. For the final layer, fill any cracks, then take a portion of your stucco mix and thin it down with paint to the consistency of thin pudding. Dab on the last layer with a stiff bristle brush, much in the same way as you did for the sidewalk. Your last layer isn’t to create depth, it’s to smooth out the surface and add the texture of snow.
Since we’ve used paint for our stucco mix, your snow is already white. If you wish to whiten it up just a bit more, wait till the stucco has dried and paint the snow with plain white paint.
When you’re waiting for layers to dry, you can prepare the other parts of your scene. You’ll find a tutorial for the Silly Snowman in the next article of this issue of the Gazette.
Paint your wooden fence the color of your choice. You want to avoid very light colors for the fence since they’ll disappear against the white snow background. I used hunter green to make the fence stand out against the snow and add a dash of color.
While the fence is drying, you can decorate your evergreen tree. Use a toothpick to place dots of glue on the branches of the tree, then use tweezers to set an individual seed bead into the dot of glue. Continue all around the tree to add “ornaments” to your personal taste. I used red and green but any color of beads—or multi colors—will work to add sparkle. You can also put lights on the tree and/or a star on top. (You can also use tiny strands of white cotton balls for “angel hair” on the tree if you like that look)

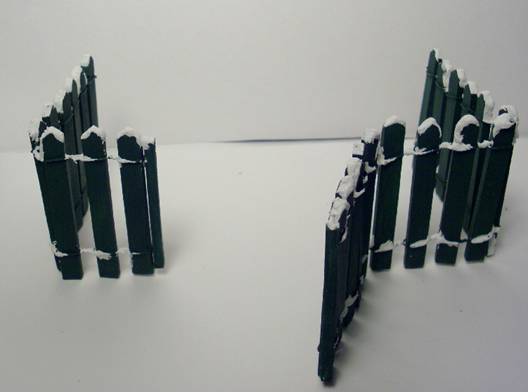
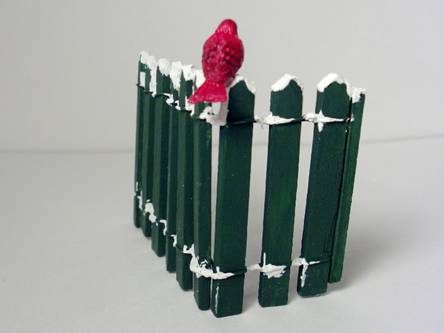
If the paint is dry on your fence, uncover your thick stucco mix and use a toothpick to apply snow to the top of each picket as well as on the wires holding the pickets together. Try not to be too precise since natural snow sculpts itself in random ways and you want your snow to appear natural. If you’ll be putting lights or a garland on your fence, do that *before* you apply the snow.
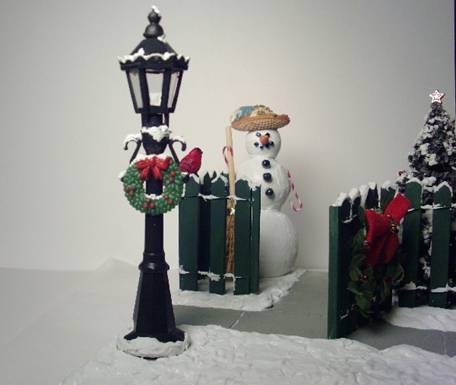
Glue your red bird or blue jay to the top of the fence.
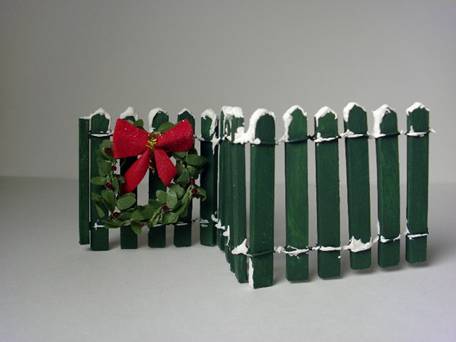
Glue a wreath to the front of the gate.
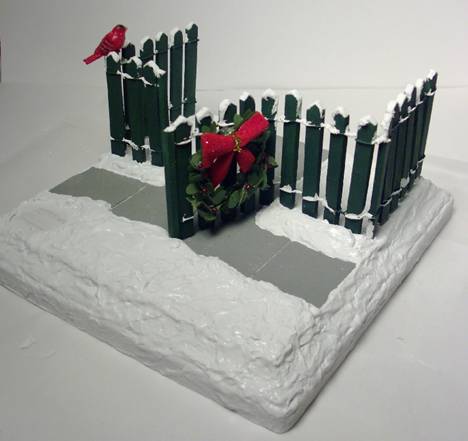
Now you can glue your fence into position on your snow by fitting it into the depressions you created earlier. Don’t worry if there are some gaps, we’ll fill that in later.
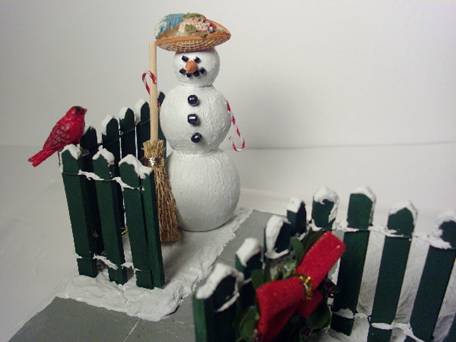
Glue your Silly Snowman into position on one side of the sidewalk behind the fence.
Glue your tree into position on the other side.
Glue your lamp post into position in the bare circle you left in the snow. (if you haven’t already, dab stucco onto the top flat spaces of the lamp post and around the bottom of the base as seen in the picture.)
Using a small stiff bristled brush, apply stucco around the base of the lamp post, blending it into the snow on the ground. Do the same around the bottom of your fence if needed.
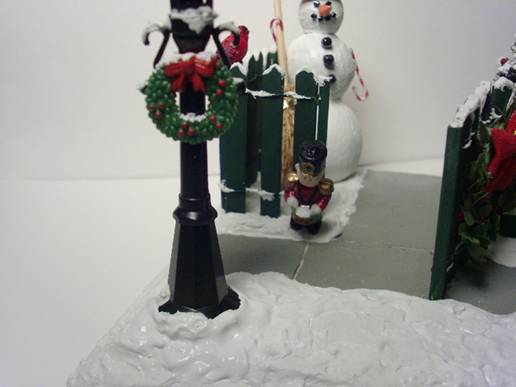
You can add a small lawn ornament to the front of the fence or in the yard if desired. (My toy soldier kept leaning over to inspect the base of the lamp post until I told him, “Stand at attention!” and glued the back of his little head to the fence.)
Touch up any grey-ish areas with white paint and you’re all done! Whether you’ve created a holiday tabletop decoration or have landscaped a yard, you’ll have a delightfully cheery scene!

Return to Newsletter Home Page...
|