|
Wall Papering Your Dollhouse Before You Build
By Deb Roberts
Wallpapering steps are different for each house depending on their architectural design, but the general steps are the same for wallpapering a house before you build. I’m using the Storybook Cottage for this tutorial because the Storybook Cottage (and many other houses with gabled roofs), has front roof pieces which create walls for both the first and second floors.
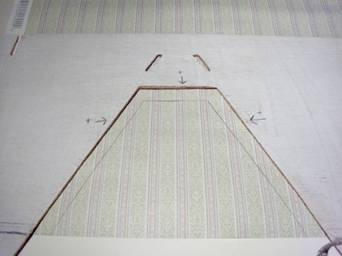
I penciled in the dividing line on the roof pieces. That dividing line will tell me where my first floor wallpaper ends and the second floor wallpaper begins. There is one gable on the second floor and here I made notations in pencil of where I would be adding a little extra to all sides for the wallpaper to wrap around the gable joins and where the roof wall section meets the downstairs wall. The second line marks where the second floor meets the roof.
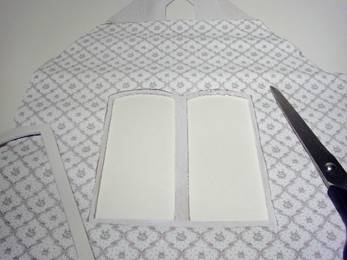
After my prep work was done, I took the house apart and began the wallpapering. A quick tip for wallpapering: Always paper the larger pieces of your house first. Smaller walls and bays can be fit into the pieces cut off, which uses your wallpaper more efficiently.
Contrary to some schools of thought, I don’t measure walls or wallpaper. In fact, my ruler and measuring tape never get used when I wallpaper. I find that I get more precise results if I trace the outline of the house piece directly onto the wallpaper in pencil and cut along my lines. Why make yourself crazy with measurements that don’t always get an exact fit when this simple method is faster and easier?
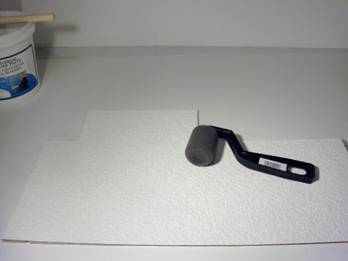
The most important step to successful wallpapering is to prime the walls first! There are a lot of shortcuts that can be taken when building, but never, ever skip the priming. Without primer, the wood will soak up the wallpaper paste and the wallpaper will peel right off the wall.
With my guidelines already penciled onto the walls, it’s easy to get the perfect fit for the wallpaper. Lay the wallpaper face up on your work surface and lay the wall on top of the paper, also face up.
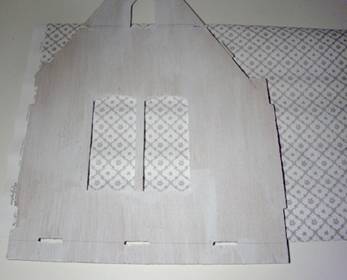
Align the sides of the wall with the left edge of the wallpaper. Use the slots at the bottom of the wall to line it up with the bottom edge of the paper. A good rule of thumb is that the top edge of the slot is where the floor begins and a straight line drawn across the wall to line up the top edges of those slots will give you a perfect fit for your wallpaper every time.
Once you have the wall piece lined up on the paper, press your hand down firmly in the center of the wall. This flattens out any slight warping of the wall as well as holding it securely against the paper. With a pencil, lightly trace around the outside edges of the wall. In the picture above, you’ll see that there are tabs on the right side of the wall. If you want your wallpaper to wrap around the corner of the room to cover the join, trace your edge from top to bottom using the outside of the tab as a guideline to give another 1/8 inch allowance. That allowance can be folded back when applied to this wall and then glued down to the adjoining wall to cover the corner.
On walls with windows, be sure to trace around the inside cutout of the window before moving the wall. Try not to let the wall shift on the paper. Remove the wall and cut out the piece, including the window cutout.

Think ahead a little bit at this point and notice how your window frame is going to sit on top of the wallpaper. You don’t want edges of the wallpaper showing under the inside edges of the window frame. With a pencil, lightly trace a line about 1/8 inch around the edges of the window cut out.
Cut along these lines, removing the middle piece of the paper.
As you can see, this pulls the wallpaper back away from the inside edge of the window. The same principle works around door frames as well as double hung windows where part of the wall is used for the window frame. With practice, I’ve discovered that this little step is much easier than trying to peel off wallpaper once it’s been glued on.
Continue cutting wallpaper for all your walls, including interior walls. Use the lines drawn at the floor break as a guide for the edges of the upstairs and downstairs paper.
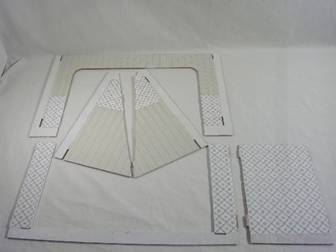
Moving onto the roof pieces, it’s time to utilize the marks made for adding additional paper to the edges of the gable opening. Lay the roof piece face up on the wallpaper. Trace a straight line down the sides even with the inside edge of the vertical slots. Just as the floors are even with the horizontal slots on the wall pieces, the vertical roof slots are even with the upstairs walls. Align the inside edge of the vertical slot even with the edge of the wallpaper. Align the marks dividing the first and second floor with the bottom edge of the wallpaper. Trace around the outside edges with a pencil.
In the gable cut out, trace your lines 1/3 of an inch away from the top and sides of the wood. When the house is assembled, this allowance will be folded back into the gable to hide the joins and give your wallpaper a smooth look.
Cut out the remainder of wallpaper for the roof pieces. Again, use the lines drawn as a guideline for your first and second floor breaks.
Don’t forget your ceiling paper! Lay the paper face up on your work surface and lay the second floor, ceiling side up, on the paper. Trace around it and cut out.
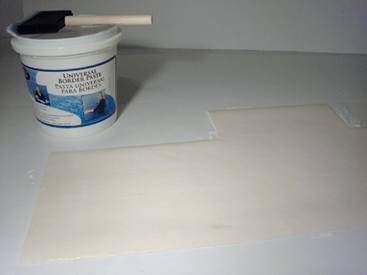
There are a lot of questions asked about the type of wallpaper glue to use and lots of different answers. Some people like to use tacky glue diluted with water, others are firm believers in Modge Podge. My personal choice is plain old wallpaper paste sold at any discount store that carries wallpaper or wallpaper borders. I’ve used this paste on every house I’ve ever wallpapered and have never had my paper bubble, lift or discolor. It’s affordable and easy to use. It doesn’t dry immediately which allows the wallpaper to be lifted and repositioned during application.
Waxed paper makes the pasting process much cleaner! Lay a sheet of waxed paper on your work surface and place the wallpaper upside down on the waxed paper. (you can wipe off any excess glue from the waxed paper and use for the next piece too!) Use a large brush (I prefer a foam brush) to apply the paste evenly on the paper. If there are globs or areas where the paste is thicker or thinner, the wallpaper will bubble or lift when the paste dries.
Lay the wallpaper onto the wood, making sure the edges are lined up. Keep in mind that paper stretches when it’s wet so don’t worry if it overlaps the wood on the sides, just be sure that it is even with the pencil markings you’ve made on the wood. Once it’s dried, those side edges can be trimmed with a sharp blade. For now, make sure the paper is straight and positioned correctly.
After the paper is positioned, use a clean, dry rag to gently wipe over the paper to remove any traces of paste. (another great thing about wallpaper paste is that it doesn’t leave any marks on the paper if it gets on the right side) Use the rag or a foam roller to press the paper down to ensure there are no bubbles and the wallpaper is uniformly sealed to the wood.
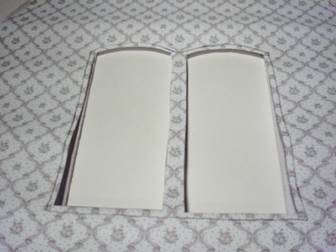
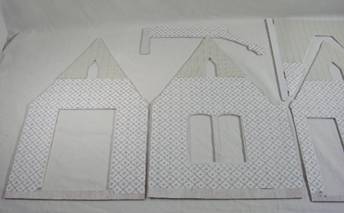
As you finish each piece, lay it on a flat surface and cover with a sheet of waxed paper. Weight them down evenly so they won’t warp and allow them to dry overnight. This is what it looks like when they’re done.
Your walls are ready to assemble into a house now! If you like, you can add your doors and windows to the walls before assembling the house. I find this to be much easier than trying to install them after the house has been glued together since I can work on a flat surface rather than trying to reach into small spaces or around corners. Assembling a house with wallpapered walls is exactly the same as assembling one with bare wood, you just want to be a little more careful with your glue.
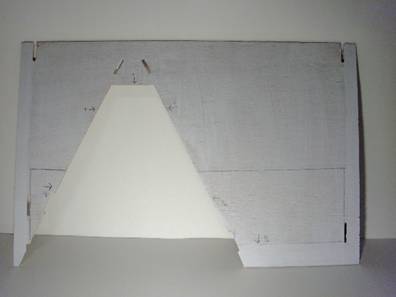
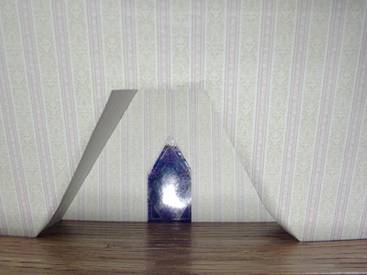
When you add the front roof to the house, the edges of the top and bottom wallpaper will pull back slightly from the floor. Be sure that they are bending toward the outside of the house and are not caught under the floor edge. You want them to look like this:
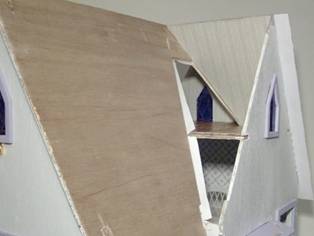
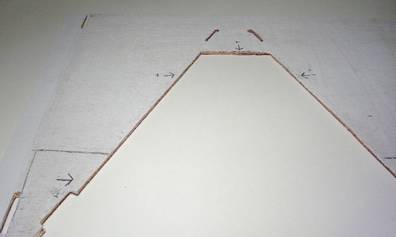
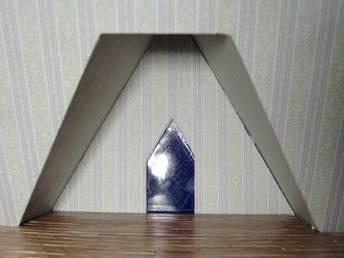
As you can see on the other side where the gable wall has been added, the wallpaper is bent back in a natural position to wrap around the corner of the front roof edge and be glued to the gable wall. Before going any further, glue your gable walls to the front roof and clamp them securely with tape. (Apply the glue carefully and check inside the house often to make sure the glue doesn’t leak onto the wallpaper) After the glue has dried, you can fill any gaps on the exterior with spackle. Don’t worry about the gap filler being visible. You’ll cover it with shingles on the exterior and the wallpaper will hide it from the interior.
From the inside, the wallpaper will look like this:
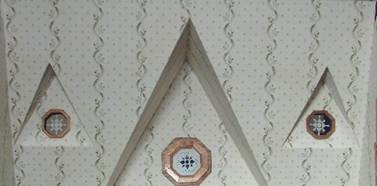
Some gable windows have a straight top edge at the opening and some come to a sharp point. Using a very sharp blade, make a diagonal slice at each corner of the wallpaper to the edge of the wall for a squared opening. For a pointed gable, the slice will be straight up to the top point. This allows you to fold the wallpaper back without tearing it. Using a toothpick, reach around inside the gable and spread a thin layer of tacky glue on the back side of the wallpaper edge. Fold the edge back and press it firmly against the gable wall to glue it in place. Repeat with the other edge. The top will fold back and be glued to the top edge of the front roof. The finished edges will look like this:
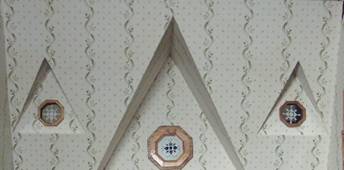
The Orchid is another house with a gabled roof, but it has two smaller gables on either side of the large one. The bottom edge of the smaller gables fits flush with the front roof. To get a fitted look on these gables, cut excess wallpaper on the front roof at the BOTTOM of the gable opening and fold it down over the bottom edge. Cut excess on the sides of the gable opening and fold over, gluing it in place on the gable sides just as you did for the large gable.
As I mentioned earlier, wallpapering before or after assembling the house is a matter of personal preference. Each builder has their own style and it’s a matter of trial and error to find the style that works best for you. But if you’ve never tried wallpapering before you build, give it a shot! You might find it easier than you think and the end result is picture perfect wallpaper every time.
return to newsletter home...
|