|
Wallpapering a Tower After Building
By Linda Cullen
Before I began wallpapering and painting the tower, I took the roof piece out that goes over it and laid it on to draw myself some lines to work in. I drew two different sets, one where I would need to paint to, and one where I would need to wallpaper to.
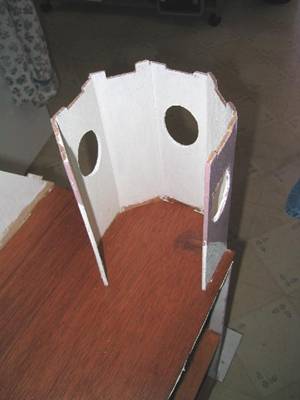
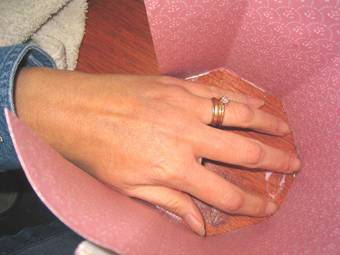
I started with the smallest outside side of the tower first, and just cut the paper to the line, or actually slightly above it. I also cut a slight overhang on the edge so that I can wrap it around to the inside of the tower. I'm using a prepasted vinyl paper, so I go ahead and put wallpaper paste on both the tower itself and the wallpaper, and then I laid that small piece in, wrapped it around, and rubbed it down with a dry cloth.
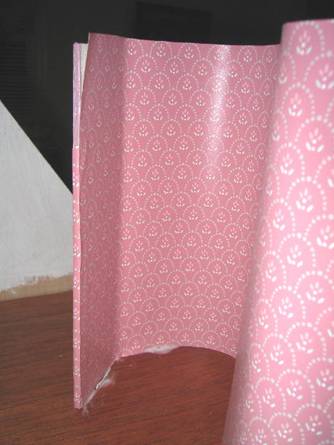
The larger side of the tower is a bit more tricky, because I have to go around corners with it. I took a piece of wallpaper, already cut to the largest height that I would need, and held it onto the tower. I then folded the paper back/down until I found my lines, and continued to do this all the way around. That gives me my lines where I can go ahead and finish cutting that paper, and that will give me the height I need to go all the way around it. I have again left myself an overhang to wrap around to the inside of the tower on this piece. I then put my paste on the paper, lay it on the tower where I've already drawn the lines, wrap it around, and rub it down with a dry cloth.
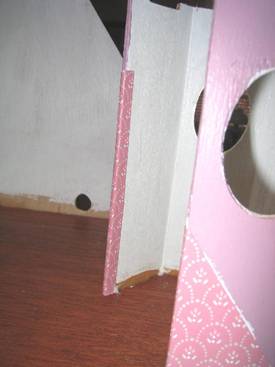
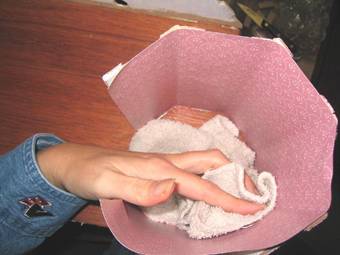
Now it's time to wallpaper the inside of the tower. Normally, I use the top uncut edge of wallpaper as a gauge, but this time I will use the bottom uncut edge of the wallpaper as my guide. I lay the dry wallpaper inside the tower, and see how much I need, of course giving myself a bit extra, and then go ahead and pre-cut the wallpaper as much as possible. I am also leaving extra at the top because I am unsure of how the tower roof goes in.
Once again, I put wallpaper paste on both the inside of the tower and the wallpaper itself, and I begin laying it in, aligning it at the bottom, and on the first panel, and I then rub just that panel with a dry cloth. Then I move to the next panel, and repeat the process, except that I take the cloth and use my fingernails to run down the edges of the tower room to lay the paper down tight on those edges/creases.
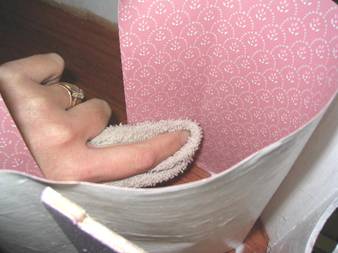
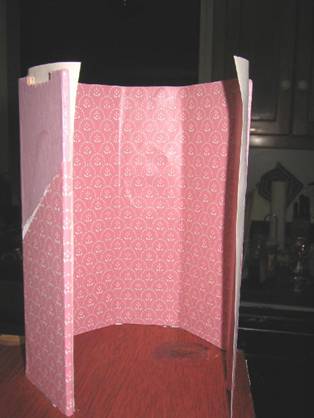
Once I'm about halfway done with the tower, I change tactics and go ahead and align the paper at the bottom of the rest of the tower. Then I continue rubbing the dry cloth on the panels, one by one, until I am finished. If the wallpaper has moved up or down, I just gently move it back into place, and rub it down again. I always give the creases an extra rub, just to make sure that stays in there tight.
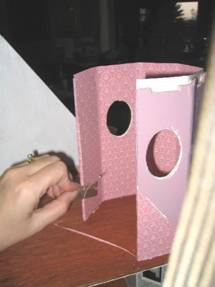
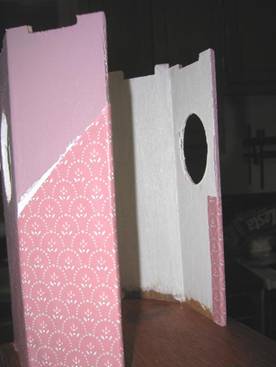
I've let the tower wallpaper dry overnight. I want to make sure it's good and dry because I don't want it to start moving when I begin cutting. Now it's time to cut out the windows and trim the excess wallpaper off.
Before I cut out windows and/or trim, I go ahead and get a new razor blade--I don't want any jagged edges, nor do I want the razor blade to "catch" on the wallpaper as I'm cutting.
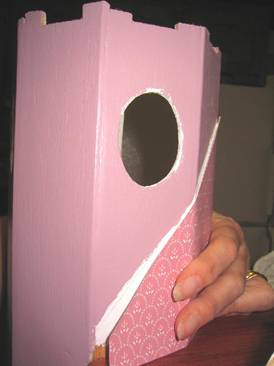
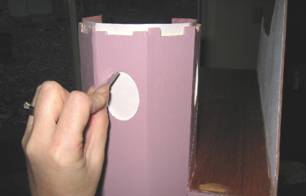
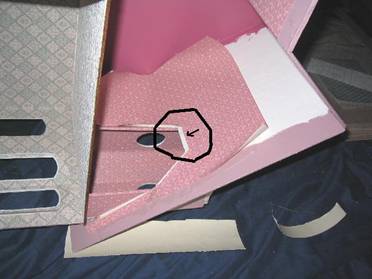
I start with the oval windows, and I begin cutting from the outside of the tower. I start near the top of the window, lay my razor blade against the edge of the opening as tight as I can get it, and begin cutting on one side. I just gently pierce the wallpaper with the edge of the razor, and move it down and around, holding my hand with the razor blade tightly to the edge. Then I move to the other side of that window and do the same thing. Last I cut the top of the windows out.
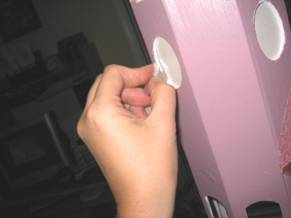
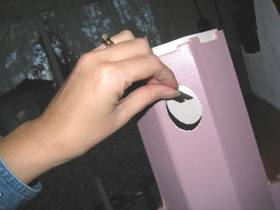

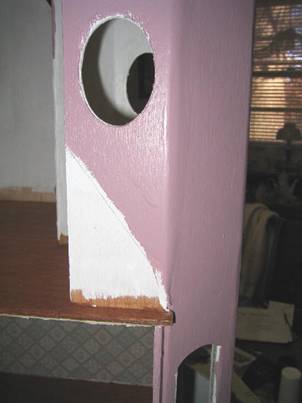
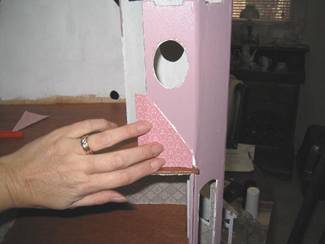
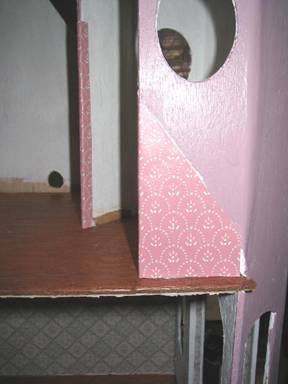
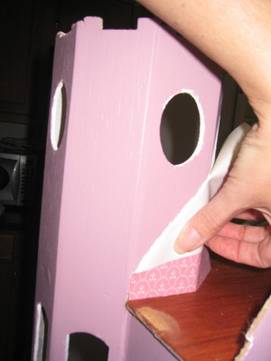
Once I'm done with the windows, I go ahead and trim off the excess from the sides. Again, I start from the outside, lay the razor blade up against the wall, pierce the wallpaper gently, and just slide the razor blade down it, cutting of the excess. I usually start about two-thirds of the way from the top and cut down. Then I turn the razor blade upside down, and cut the top of the excess off. I do the same thing for the other side.
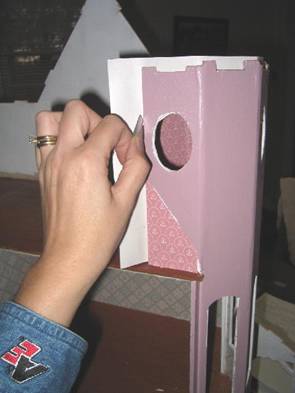
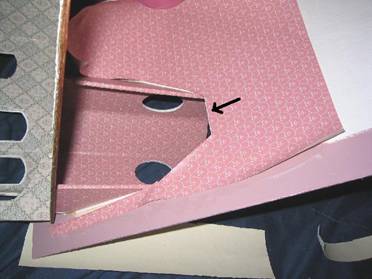
And now, the trimming in the tower is complete. You can go back inside the oval windows of the inside and cut some on the inside of the window, but you really don't have to.
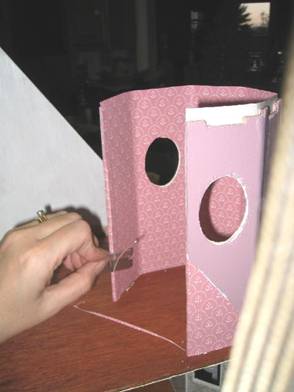
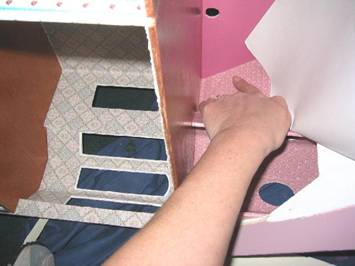
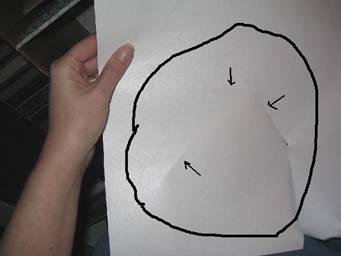
Time to wallpaper the rest of the tower room. This room is a bit tricky because of its angles and the tower room itself. To get my first cut, I actually took the wallpaper and laid it on the outside of the house at the tower, face down, and made a crease to show me how the tower goes into the floor and around the tower, and then I cut along the crease. I then took the paper and laid it into the house. I also discovered that it was easiest to lay the house on its side to wallpaper this area. This area is also a lot of lay the paper down, make a crease, take the paper out, cut it, put the paper back in, make a crease, take it out, cut it ...
Once I have the paper laid against the back wall, I again rub the paper down against the tower, just running my finger and fingernail along the curves, which makes creases in the paper--and that's how I know where to cut the paper.
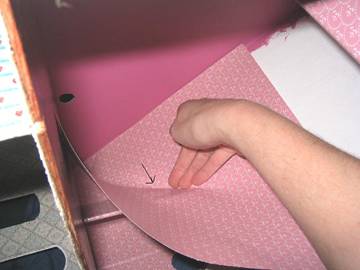
I then begin creating a line along the ridge at the top of the tower. This line is important, because it'll be a guide when actually gluing the wallpaper in. I take my fingernail and run it along the ridge at that line. That gives me a crease in the paper and again shows me where to cut it. When you turn the paper over after you've made your creases, you can see where the paper needs to be cut. Then I just take some scissors and cut it.
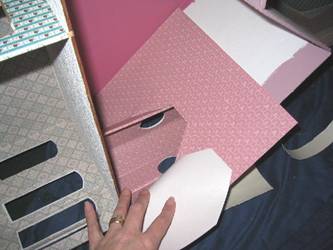
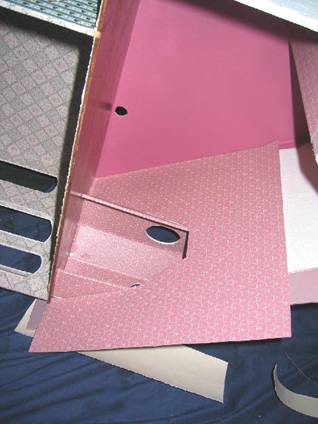
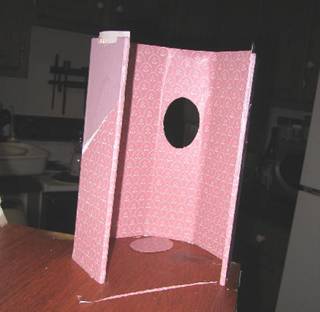
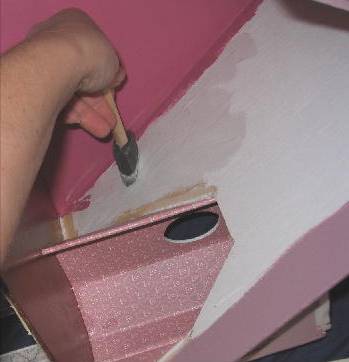
Now I've got my paper pre-cut and it's ready to be glued in. I will need to move and manuever this paper around a bit to fit into all its little nooks and crannies, so I liberally apply wallpaper paste to both the walls and the paper using a sponge brush.
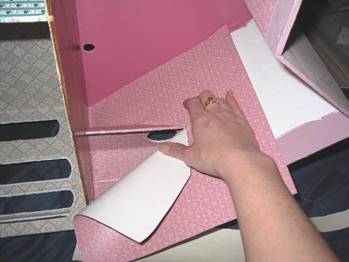
One of the tricks to putting in wallpaper is--weirdly enough--to have a straight line to guide you. Remember the ridge cut? It's my guide on this particular piece of wallpaper. I lay the paper onto the wall, and then move/slide it down so that it covers that ridge.
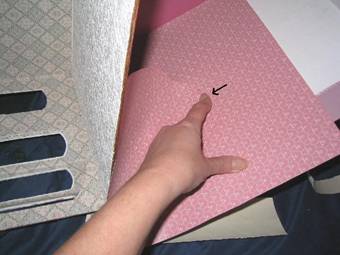
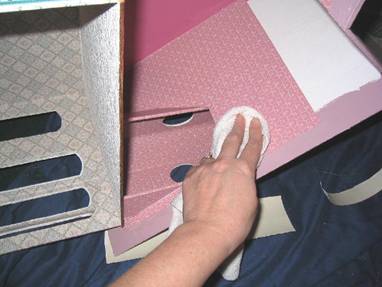
I then check all my lines and smooth the paper down, just using my hands to rub it down a bit, covering all white areas (paint). I like to take a dry washcloth to finish rubbing the paper down to smooth out any wrinkles and/or air bubbles.

There! The hardest part of that room is now done and you have a perfectly wallpapered tower room!
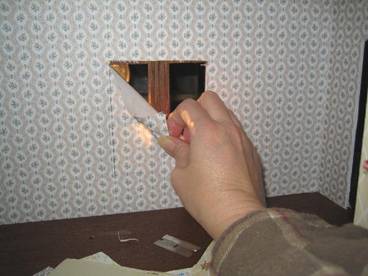
Editor’s Note: Linda also has another wonderful trick she uses to cut wallpaper around a window by shining a flashlight thru the window from the outside. She explains:
‘It's my goal to cut just around the inside of the window, where some of the wood will show. I take my razor blade, using the tip of it, and just cut around the window frame.
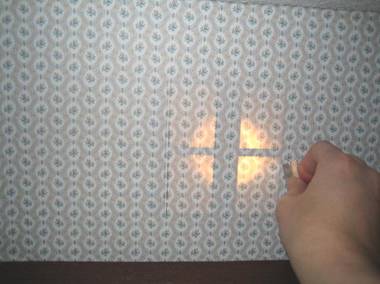
Once I've cut around the window frame, I get my fingers into the area where I cut from the outside, and gently pull the wallpaper away from the window, and usually starting in an upper corner. If I've got my cuts right, I can keep pulling until I pull the paper off the window. If any paper sticks to the window, all you have to do is take a damp washcloth and run it over it, and it will take the paper off of it.
What a great tip! Thanks Linda!
return to newsletter home...
|