 Filling in the Gaps
By Deb Roberts
A natural challenge to building houses is finding ways to fill in gaps around wall seams, tabs, and in areas that just don’t quite fit together smoothly. Sometimes we don’t get joins perfectly square, or there might be a bit of natural warping in the wood that creates a little space that needs to be filled. Builders know that gaps are a part of the process and there is a multitude of creative ways to fill or cover them.
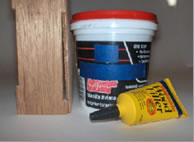
The all time favorite filler is spackling compound. Lightweight and easy to handle, spackling compound can be spread on with a finger, a credit card or a small spatula and fills in gaps very nicely. When applying spackling compound to a gap, it’s a good idea to cover the back with masking tape so the spackle doesn’t ooze thru the other side. Apply a liberal amount and use your finger or tool to smooth it down, then let it dry.
Once it’s dried, you can sand it smooth and paint it. Spackle can also hold stain to some degree, so it can be used to smooth rough or porous edges of wood such as stairs and window trim. Spackle works well to smooth the edges of slots both on corners and on the exterior walls of your house. The benefits to spackling compound are that it’s lightweight, sands smoothly and adheres nicely to wood without any additional adhesive. HavanaHolly also suggests that you can mix spackling compound with white glue for a little smoother and more pliable texture, then pour it into a waxed paper cone to apply into gaps and hard to reach places.
Wood putty is another choice for filling gaps, but is not favored for large areas. Wood putty is a little harder to work with as it doesn’t smooth as easily as spackling compound and may not adhere as well. The benefits to wood putty are that it’s stainable and you can also find brands that are already tinted with the same stain you’re using on your woodwork.
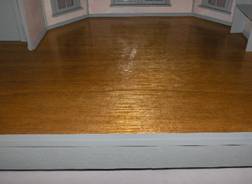
Filling in tab slots on stained surfaces such as hardwood floors can be another challenge. Wood putty works well for these little gaps, but you can also mix sawdust and wood glue together into your own putty, and tint it with stain to match your woodwork.
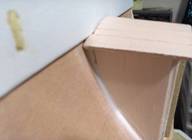
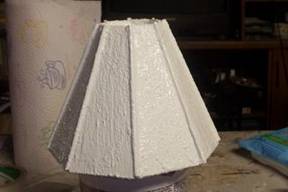
Bay windows are often the biggest challenge when it comes to gaps. Nutti has an excellent solution for bay and tower gaps to give a smooth and lovely finish to them. In her McKinley Blog on the Greenleaf forum, Nutti suggests using bamboo skewers cut to size and then glued in place on the joins of the bay walls. This works well for both interior and exterior walls and makes an elegant architectural finish.
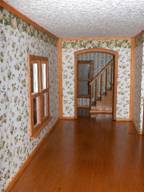
Interior walls present a different type of challenge since some builders install wallpaper before assembling the house. For that style of building, it’s best to put the house in dry fit first and use a pencil to mark areas where you’ll want to extend the wallpaper around an edge or a gable. When applying the wallpaper to the walls, give an extra 1/4 inch to the wallpaper beyond the edge of the wall. When you assemble the house, it will be easy to apply just a touch of glue to that wallpaper extension and smooth it down on the wall to cover the join.
Another finishing touch for covering wall joins on the interior is to use crown moulding in corners. The crown moulding can be applied vertically in the corners and gives a lovely finished look, as well as providing a little extra support for interior walls. Baseboards and crown moulding at ceiling and floor also give a finished look to a room while covering gaps.
Floor edges are another area where we sometimes want to provide a finished look and cover any gaps or rough edges. Roof line moulding makes an excellent finish for exposed floor edges and can be painted or stained to match the floors or exterior. It also gives an impression of floor boards on the exterior side of the room.
Exterior trim is another favorite for hiding gaps around the roof line or on walls. Extra gingerbread or medallions can be placed along the roofline and basswood strips can be used on vertical edges of the house for “framing”. Basswood strips can also be used horizontally along the sides of the house to cover the slots on the walls. Both techniques add to the architectural features of the house.
During the process of building, it’s a good idea to occasionally stop and place a light behind the house and examine if from all angles to locate hidden gaps. If possible, pick up the house and turn it upside down and sideways so you can see every angle. (This isn’t advisable with a house the size of a Garfield or a Pierce so you may have to be content with walking around the house or standing on your head)
Regardless of the house you’re building, gaps happen and are easily remedied…….and sometimes the remedy can be a beautiful new feature to your mini home!
Back to the March Newsletter...
|