|
The interior of the Gris Gris House
By Brandaen Jones
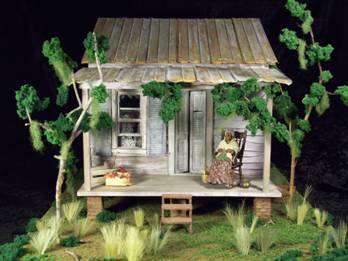
In this tutorial I wanted to go over the unique features of the interior of the house. I had so much fun with this house and as I have said before, money being tight should never stop you from creating something fun and wonderful. I always try my best to save money because there never seems to be enough with these days being what they are. I love to pinch a penny. In creating this house I found inexpensive ways to create a miniature that I am truly proud of.
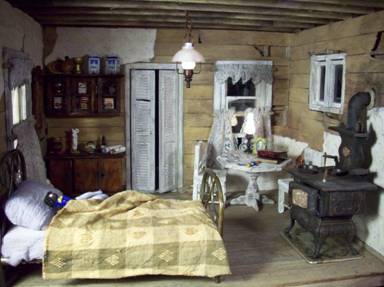
Ok so I will jump right in to it. The inside of the house had to be just as perfect as the outside. For the bed I ordered a pre-rusted iron bed from online. I actually thought it was just fantastic that I didn't have to work to hard on the actual bed outside of the bedding.
I found some old gauzy type fabric in my collection and hot glued it around the foam mattress and around a few cotton balls (for the pillow.) The whole purpose of the bedding was to create the illusion of her poverty and squalor, so I used my nifty little bottle of “juice” to stain the bedding. Be very careful, the bad is supposed to look dirty not completely black.
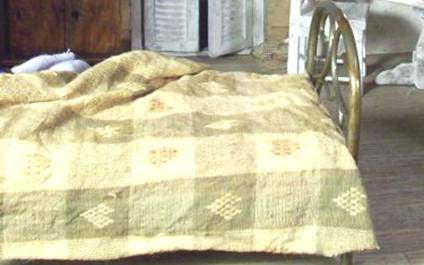
I spent a lot of time with the pillow pushing it down in the center like an old favourite pillow that has lost its ability to bounce back. My little lady that lives here had just gotten up from bed and the poor pillow can't recover from the shape of her head. The blanket itself was actually a little quarter piece of fabric that I got from Joann's craft store for the great price of one dollar!
When I bought the fabric it was very vibrant and dark blue with brown squares, you can see how it looks now. I actually bleached the fabric and then soaked it in hot tea to bring back some of the color. I wanted it to be faded and sad and again like she just got of bed.
I hot glued folds into the fabric making sure it looked just like my own bed. (My mother would be upset if she found out that I stopped making the bed.) Be super careful to get the folds just right but ultimately just go with your gut feelings.
As for the faded look of the bedding, there are no right or wrong answers, just go with it and have fun, take as little color out of the fabric as you like.
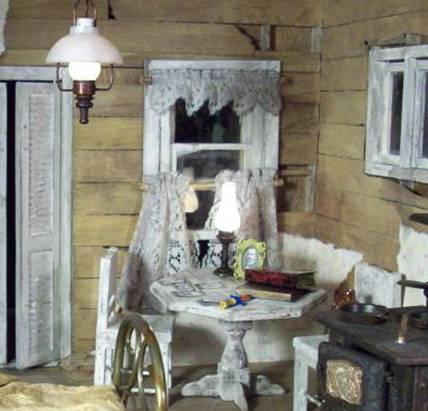
Moving on to the cabinet that you see in the background, that was just a dollar as well! Believe it or not that is just a dollar cabinet from Michael's craft store. Like many miniaturists I love the dollar store and the craft stores especially on a coupon day.
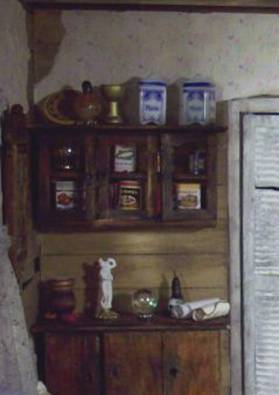
The cabinet actually started life as a solid cabinet but I cut it in half and made a shelving unit out of the top of the cabinet. Both pieces of the cabinet were stained with a nice mahogany stain.
It actually turned out beautifully but it was too beautiful for the space, it needed to be run down and dirty too. Back to my “juice”. I coated the whole cabinet with the solution and gave it a nice wipe with a cloth to prevent it form seeping in too much. Pay close attention to the areas of the cabinet that would receive your grease and oils from your skin. Imagine a century of neglect and then you will be happy with how the whole thing turns out. I even used some sandpaper to scratch some of the edges to give it that extra wear.
The rest of the interior of the house was completely covered with my juice concoction, just make sure that you don't over do it, nothing should be completely black.
And again a friendly warning the “juice” from part one of my tutorials is rubbing alcohol based so please, please, please make sure you have adequate ventilation. I got one heck of a headache I can tell you! My brain cells will never forgive me!
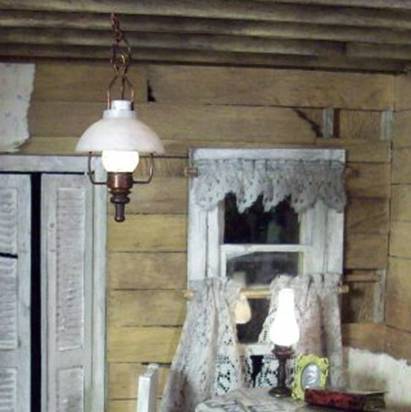
The hanging oil lamp and the lamp on the table started life as a nice shiny bronze but it's amazing what juice can do to them too!
The only other item that I had so much fun with in the house was the stove.
I cannot take credit for the actual technique though and I can't find the article I followed but the technique was in an article I found in American Miniaturist Magazine. I will loosely tell you about the article but please remember I got the ideas and technique from the magazine.
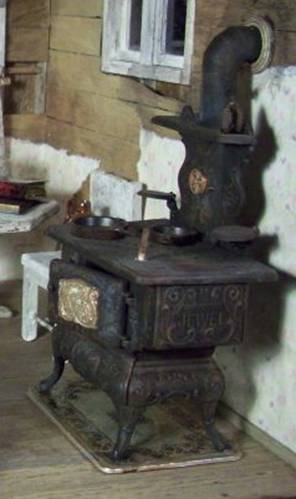
I took a Chrysnbon stove and glued the whole thing together following their directions. If you have never played with these kits, you need to! I never thought plastic could look so great! Once the stove dried I covered it completely with acrylic black flat paint, once that dried I lightly dry brushed with dark gray and burnt sienna acrylic paint. The gray gives the stove that nice worn down gunmetal color while the brown creates the illusion of rust. Use these paints sparingly but just imagine where rust and the used color would naturally show up on the stove. A great idea would be to go to the junk yard and photograph the ways items rust and age. What a great little field trip that would be!
I hope that everyone enjoys these little tuts and have fun with them. Next time I will talk about landscaping.
Return to Newsletter Home Page...
|