|
Hard Wiring a Brimbles Mercantile
By Deb Roberts
I'm a big fan of hard wiring altho I know others who are just as passionate about tape wire or hybrid wiring. It's all a matter of what you're most comfortable with and what works best for the house you're building. I've taped wired a couple of houses and then settled on hard wiring because it works best with my building style of painting/wallpapering/etc before I assemble the house. We’re always hearing requests for more information about how to hard wire larger houses, especially how to hide the wires, so when I was building my Brimbles Mercantile, I wrote up a tutorial as the wiring progressed.
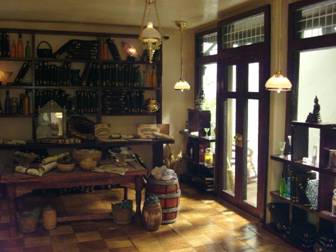
This Brimbles is a themed house so I don't intend on moving things around in it as I would with a regular dollhouse, therefore the shelf contents are all glued down. I dust with a can of air and a make-up brush so having the contents permanently set in place isn't a problem.
I made lamps for the shelves using grain of wheat bulbs and real sea shells. Give that a try sometime! The light picks up the colors and designs in the shell from both inside and out. I also found some really cool GOW bulbs in the model train section of my local hobby store that are mounted into a little black base. How perfect is that for a lamp! There are two lighted crystal balls on the shelves too. My tutorial for the lighted crystal balls is here.
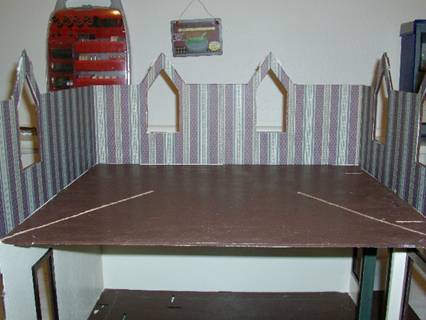
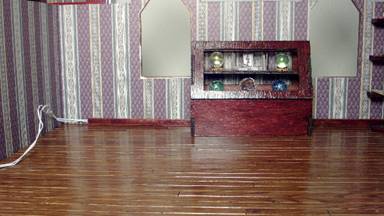
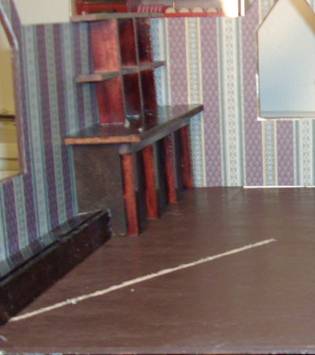
Brimble’s shell was mostly assembled except for the roof and the two side panels that are on either side of the opening. I mapped out my wiring diagram using a white dressmaker's pencil so I knew where everything was going to be. Many of the lights are either on the shelves or inside display cases so it was important to know exactly where they would be located.
I started with the shelves downstairs and put the lamps in place, running the wires down the back of the shelves, taping them in place with black electrical tape.
I positioned the shelves and used my white pencil to mark where the wires would be going thru the first floor.
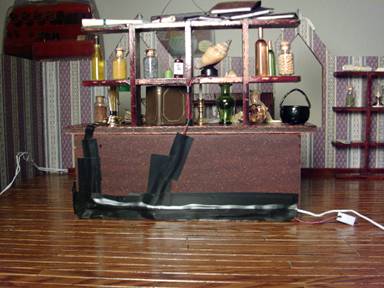
I removed the plugs, ran the wires thru the floor and taped them in place on the bottom of the house with black tape, then reattached the plugs.
I did that with both shelving units and then started work on the downstairs ceiling lights.
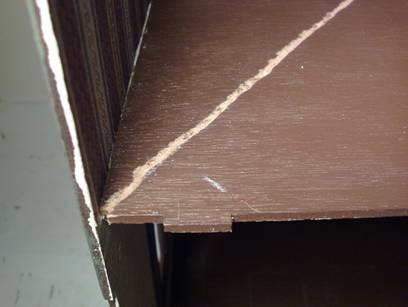
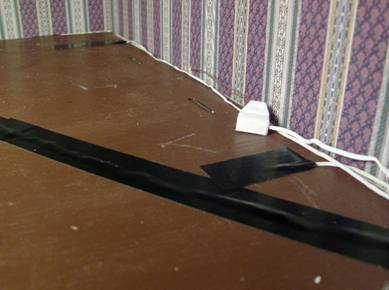
Using my earlier marks, I drilled holes in the ceiling for each light. The holes don't have to be big, just large enough for the wire to go thru. I used my dremel to score trenches into the floor from each hole to the closest corner or wall to each wire. The trenches don't have to be perfect, just deep enough for the wire to sit down into just under floor level. There are four lights coming thru the ceiling, two in the center and two just slightly left of the front wall. There is also a porch lantern, so I drilled a hole thru the porch roof and then another in the front wall just above floor level. The porch roof has a cap so the wires for the lantern will be hidden under it, I simply needed to make sure that the hole in the wall was below the level of the cap.
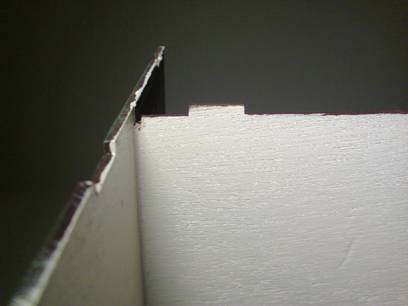
In each outer corner of the second floor, I drilled a small U shape large enough for a bundle of six wires to pass thru.
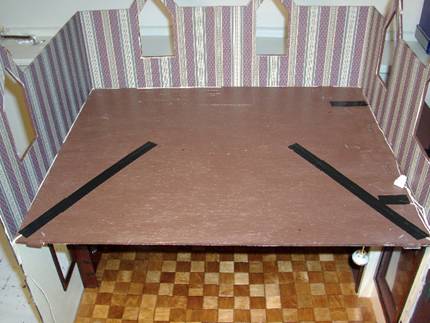
I removed the plug from each light (it's a good idea to keep a small container on your workspace to hold the plugs and contact poles because those little brass poles will run away in a second if you don't fence them in) Then I ran each wire up thru the hole, applying gentle pull until the light fixture was firmly seated on the ceiling. The key word is "gentle". I learned that if I shine a flashlight down thru the hole, I can almost always get the wire thru on the first try. I'm not sure that yelling "Go to the light! Go to the light!" at the wires helps, but it amuses me so I do that too. Laying the wires inside the trenches, I ran my finger over them to make sure they were flush with the floor and then covered them completely with black tape.
I ran the wire for the porch lantern thru the hole in the wall and reattached the plug, then plugged it into a single receptacle extension wire. I'll show you how to hide the plug in a few minutes.
It's easier to continue working with more wires if the ones that are already in place aren't running amuck. Since I'm done with the ceiling lights, I moved all the wires to the corner where my U shape is cut and ran them down thru the opening. I taped them to the side of the house to keep them in one place and prevent them from tangling up until I was ready to finish installing them. I did that on both sides.
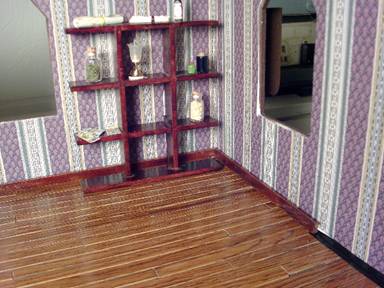
Cover the wiring with your flooring, bringing the edges of the flooring up to the wires running along side the wall but not covering them. We'll do that with the faux shelves in a little while.
Speaking of flooring, one of the best choices for flooring that will cover your wiring neatly and looks *fabulous* is the Greenleaf vinyl hardwood floor strips. If you've never used it, you're missing out on the best flooring ever. It looks exactly like hardwood flooring with a gorgeous laminated wood grain. The strips are die cut and self adhesive so you pull one strip at a time off the backing and lay it on your floor just as you would a real house. The result? It's just like real life hardwood flooring! The fact that it's 1/8" thick means that you don't have any ridges or bumps showing from the wiring or trenches too. You can also add a coat of poly varnish to the top and have a shine that makes miniature people tremble in fear at the idea of walking on it in their stocking feet. I've used it on several houses and absolutely love it. If you haven't tried it, grab a pack and give it a go. You'll be sooooo happy that you did because it looks rich, elegant and totally real. Since it's only sold at the Greenleaf webstore, it's one of the little known treasures in the mini world. You can see it here. (btw, the vinyl tiles are just as awesome)
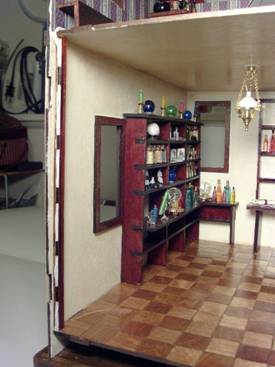
But back to wiring! With the ceiling wires out of the way, I moved on to the shelf and display lights on the second floor. Again, I have the lights already attached to the shelves. There are two pea lights in the bottom of the crystal ball display case and those wires exit the case thru a hole drilled in the back.
My favorite way of hiding wires in baseboards is to use flat channel strips that are normally used for the bottom of porch and staircase railings. The channel groove is just the right size for hiding several wires and they're flat enough and wide enough to make perfect baseboards.
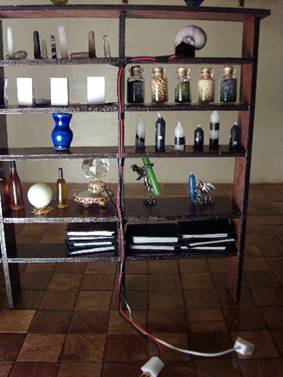
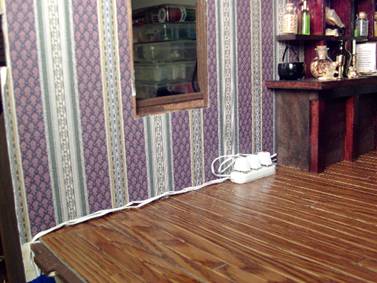
In this corner, I have a shelf with one light, so I attached the wire to the back of the the shelf, then ran it to the corner and covered it with my channel baseboard. The baseboard extends to the point where I'm going to be adding a cover for the plugs. I also put a desk with a lamp under that window and ran the wire for the lamp to the same spot where it will hide with the others.
The crystal ball display goes in the middle of the back wall and I already have my baseboard installed from the right corner behind the shelf to the line I marked for the right side of the display case. I measured the distance from the left side of the display cabinet to the left wall and cut a piece of channel baseboard to fit. It's easier for me to attach the baseboard to the display case in a single unit so I don't have to fuss with pushing the wires into place later. The wires are taped down to the back of the case and securely into the channel.
I put the display case into position. You can see that the baseboard doesn't go all the way to the wall, but there's a reason for that. The lab table will go into that space and I have some wiring to take into consideration for it.
The wires from the display case are too short to reach the corner of the wall, so I plugged them into extension cords and attached the plugs to the side of the unit facing the back wall so it wouldn't push the back of the unit too far away from the side wall, hence the reason for the baseboard attached to the display case not reaching all the way to the corner.
I put the lab table in place, making sure that the wires for it and for the display case all extend out from the edge of the table. I used a three plug extension here.
Planning ahead, I knew that my 2nd floor ceiling lights that will be installed in the roof are going to need an extension cord, so I went ahead and added the cord here (not seen in the picture), running the wire down to the foundation with the other wires. The outlet is left up here with the others so I can simply plug in my ceiling lights when they're installed.
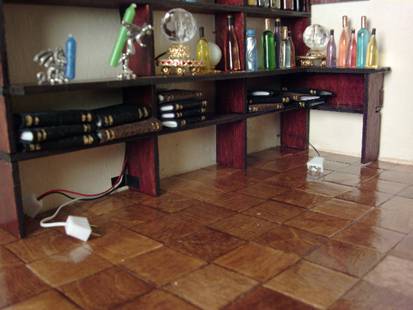
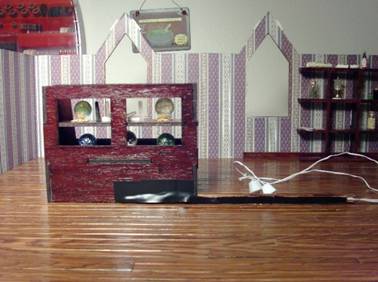
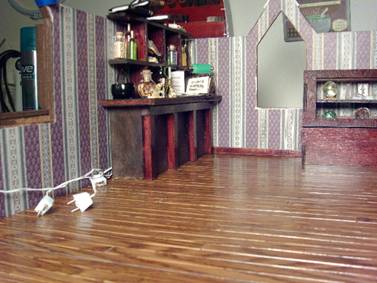
To hide the plugs on both sides of the room, I built very simple, yet servicable, shelves using two pieces of bass wood creating half a box. This unit is just tack glued to hold it in place in the event I need to troubleshoot a light, replace one or add another. For now, I left it loose until after I've plugged in my ceiling lights.
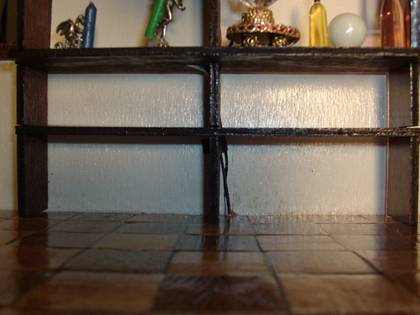
The end result is a low shelf that I filled with books. I'll make faux drawer fronts to be added to the front of the shelf so it appears that there is extra storage there. You can see the corners of the shelves in the next two pictures to give you an idea of placement and of the space created underneath for the plugs and outlets.
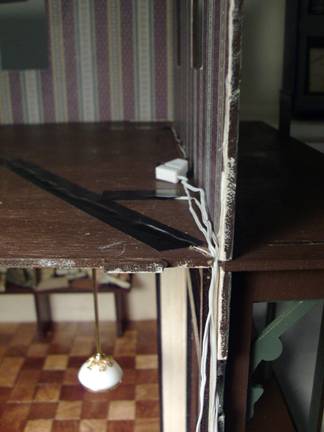
Now that I have all my wires on the second floor in place, I bundled them all together neatly with strips of black electrical tape and snugged them down into the U shapes in each corner of the floor. It's important to make sure they all sit down proper into the U because the side panel walls will be installed flush with the edges of the floors here.
To hide the wires, I used a deeper channel trim cut to fit floor to ceiling and tucked the wires inside it. From the inside of the shop, this appears to be a nice corner moulding. I glued it to the side wall to hold it in place.
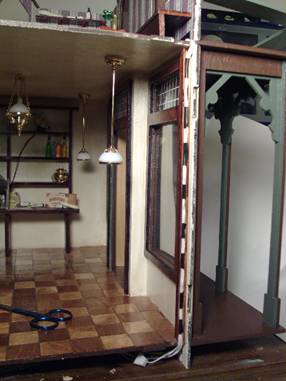
Finally all the wires are located under the floor where they should be! I taped them all up to avoid tangles while I installed the dormer windows and put on the roof. The side panels of wall on the opening are also added to the assembly at this time so your wiring is completely covered.
The second floor ceiling lights are installed the same way as the first floor. Drill your holes and trenches into the roof, install the lights and lay your wires into the trenches to be covered with black tape, ends of the wires running down thru a U shaped hole in the corner of the roof. Then there's the challenge of how to cover the wiring on the roof. I thought about that for a little while and decided that there's no need to overcomplicate things. I measured a piece of poster board to fit the roof, painted it brown and glued it down. Brimbles has a very nice double roof trim so you don't see the edges of the posterboard and it came out nicely.
The wires from the 2nd floor ceiling fixtures come down thru the inside corner of the second floor. Fortunately it's nearly impossible to see this area even looking thru the windows so you can tack glue the wires to the sloped corner of the roof down to the point where it meets with the straight walls. I used another piece of channel moulding to hide the wires from this point to the floor. My ceiling lights were plugged into extension wires and the plugs were hidden under the faux shelves.
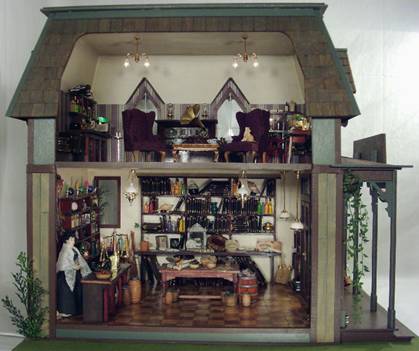
I made one last check to be sure that everything worked, and then taped all the wires down into place under the house foundation and plugged them all into the power strip. I drilled a very small inverted U shape in the foundation for the cord from the power strip to run thru so the foundation remains flush with the base.
And that's it! Brimbles is all hard wired and ready to go!
Return to Newsletter Home Page...
|