|
Creating a Weathered Patina
by Deb Roberts
From the time I was old enough to walk I was always sneaking off to play in the dirt. If I had access to water than my goal was to play in the mud, but I’d settle for dust if that was all I could get. So it’s not surprising that after all those childhood years of mud pies and sand castles, I learned that dirt is beautiful.
Don’t get me wrong, dirt has its proper place to be beautiful and that’s not dust on the coffee table or mud spatters on the windows or little hand prints on the back side of Mom’s best dress. But if you’ve ever gone exploring in places where the past is preserved, you know that sometimes the natural dirt that comes with age can be absolutely lovely. When it’s pretty, we call it “patina”.
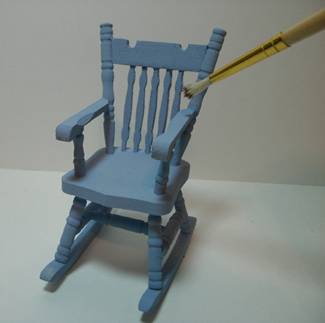
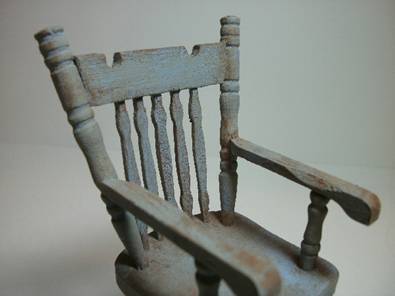
I’ve spent a lot of time admiring various types of patinas because I like to explore old things. Mother Nature has her own way of forming patinas on objects and while there are some consistencies, each item has its own distinctive design. Patinas are like fingerprints on antiques and since I love to make my miniatures look as real as possible, I’ve practiced making mini patinas on various things too. In this case, I’ll show you how to add a weathered patina to a wooden rocking chair. All you need is the chair, the paint color of your choice, another paint in the same tone but several shades lighter, a dark color paint, and a stiff bristle brush.
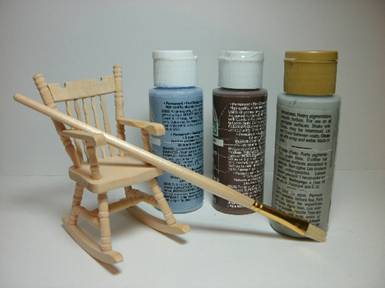
I use a dry brush technique to add patina so this stiff bristle brush is probably the most important tool for this tutorial.
Begin by painting the chair your base color. There’s no need to sand the wood at all; in fact the opposite is true because you do want the wood to be a bit rough and even a teeny bit splintery.
For the patina it’s easier to pour about half a teaspoon of each of your patina paints onto a paper plate. If you’ve never used a dry brush technique before, it’s as easy as pie. Simply dip the tip of your brush into the paint, then wipe off as much paint as you can on the plate or a rag. With the “dry” brush you’ll be able to apply the paint so it looks completely natural and blended with no harsh lines.
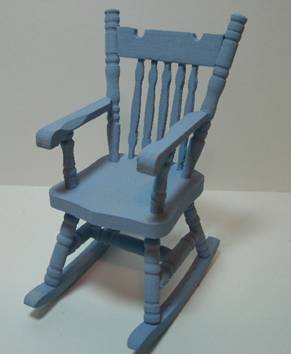
Before we go any further, I want to talk just a little bit about choosing the right colors to make the paint look naturally faded by the elements. Actually, it’s not the color that is important. You can use any color that you like as long as you can find or create another color that is as close to the same tone as possible, just several shades lighter. In this case I used a light blue for my base color and a blue-gray for the over brush to make it look faded. In most cases when I’m making a faded patina, I’ll simply add a few drops of off-white or grey paint to the base paint to lighten it. That way I’m sure that my fading will look perfect.
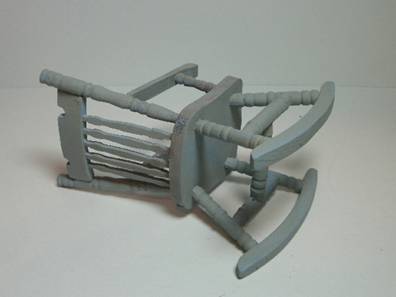
Some people prefer to use a wash to add the faded look but I like my dry brush best. When you begin to apply the paint, be sure that the brush is dry and then dab on the lighter color. Apply more of the light color in places that would naturally be exposed to the sun and less paint in places like the underside and in crevices. Leave enough of the base color showing thru here and there so it doesn’t look uniform.
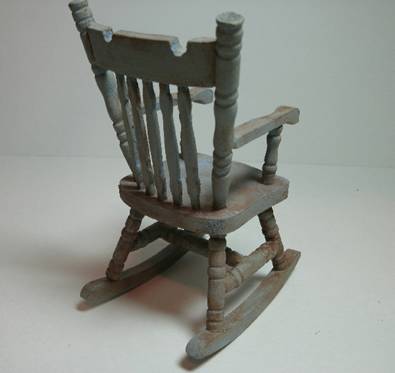
After the chair was properly faded, I roughed up a couple of places with an emery board to make sure the wood would have a bit of ‘tooth’ to give the patina some depth.
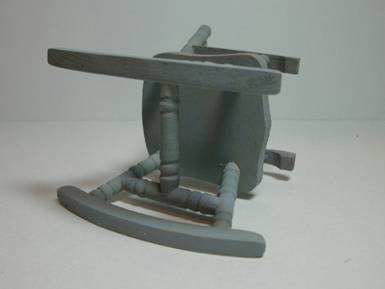
This time I used brown paint with my dry brush to add the dirt. Another trick to remember about dry brushing is that you’ll need the brush to be even dryer with darker colors. You can always go back and add more dark color easier than it is to remove it if you get too much. I always keep a bowl of clean water close at hand and if I get too much paint in an area, I dip the tip of my finger into the water, blot it on a rag, then use my damp finger tip to blend the paint. Always drag your finger in the direction of the wood grain if you need to blend this way.
Before adding the dirt I looked at the chair and thought about how dirt would settle on it if it were a real chair left outdoors for an extended period of time. Obviously more dirt would settle on flat surfaces and into the crevices. It would also bring up the grain of the wood just a touch. So I dabbed my brush, wiped off as much paint as I could and began dabbing at the chair with my ‘dirty’ brush.
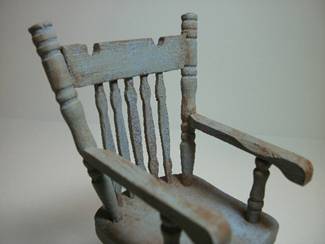
Using a dabbing (up and down or patting) motion with a stiff bristle brush is the perfect technique for patina because the paint goes on in flecks and spots, leaving teeny bits of color to show thru. If you look closely at the finished chair, you can see that a dabbing motion is a much more natural finish than if you were to stroke with the brush. (This technique is hard on paint brushes and even the most stiff bristled will end up splayed out when you’re done. Don’t throw the brush away! A splayed stiff bristle brush is perfect for applying stucco!) Keep working at adding dirt until you’re satisfied with the amount of dirt.
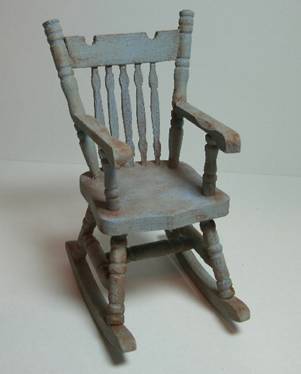
See? Dirt can be beautiful! This chair is ready to go into a garden, an old house, or even a haunted house. This same technique is perfect for aging your Brownstone dollhouse as well, especially if you’re going for an aged or inner city appearance. It’s just as beautiful to put dirt on rocks as it is to put dirt on wood!
Return to Newsletter Home...
|