|
Make your own Dollhouse books with Polymer Clay
By JennyBee
Supplies:
Clean work surface
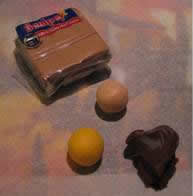
Polymer Clay - multiple colors
Tools
Parchment Paper
Acrylic Paint
Cookie sheet
Tin foil
Oven
*When using Polymer clay please read the directions and use the manufactured suggested cooking time and temp.
**The items I use are only used for the Polymer clay and never used for anything else from there on out for safety.
Tools needed:
Cutting tool—kitchen knife or clay knife
Rolling rod—rolling pin, cup or acrylic rod
Paint brush—this is for tinting pages so small or fine tip will do
Toothpicks
Stamps (to make designs on outside of books, or if you make the book open, you could stamp a design on the page and then use a color wash to make the image appear.
Getting your work area ready:
I use a big plastic card table so I have plenty of room to spread out my clay and tools and still have enough room to put the tin foil covered cookie sheet so as I finish a book I can put them on it so then once done they can all go into the oven. I also cover my work area with a sheet of parchment paper. It helps prevent the clay from sticking to the table and it makes cleanup much easier.
Now down to the fun stuff:
Using the clay... Any color goes for the outside of your book, I even mix multiple colors or use scrap. Make sure you condition you clay before you try to roll it out. To do this you smush it around until its pliable. (if the clay is to cool/stiff you can pre-warm it by putting it under your leg.
After you have chosen the color for the outside of the book and its pliable go ahead and roll out a strip to about the thickness of about a quarter.
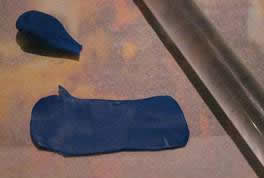
Now that you have a rectangle you will want to cut the edges so you have straight lines.
Once this is done put the rectangle aside so you can start the prep work for the pages inside the book.
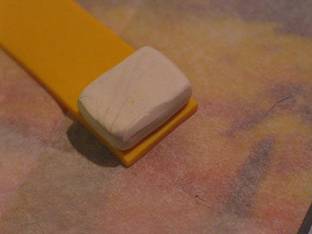
For the page part of the clay I like to use a light color like beige or white.
Condition the clay the same way by smushing it around and then mold it into a thick rectangle. You will want this about the same height as your rolled out rectangle

*You can roll out the books and shape the pages ahead of time just be careful when using one color then going to another. Some colors will transfer on your hands and stain the lighter colors. Red is the worst. I recommend cleaning you hands and tools after using red before going to another color.
Okay, back to making your book pages.
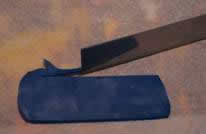
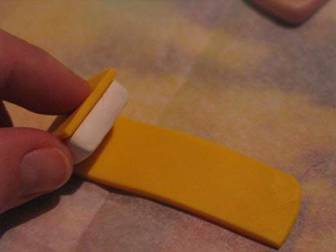
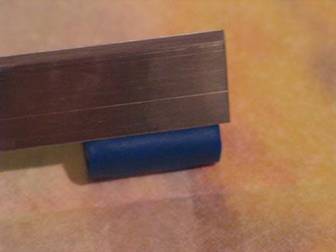
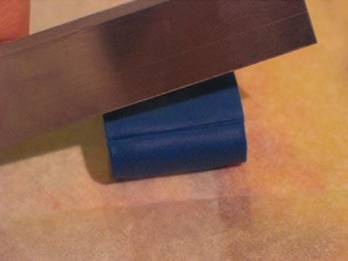
Now that you have a rough thick rectangle, take your knife and flatten the sides.
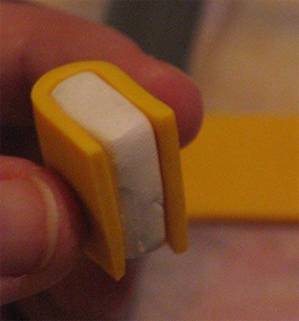
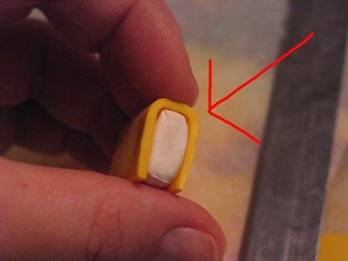
Then place the clay down on the book rectangle with a bit of the rectangle showing.
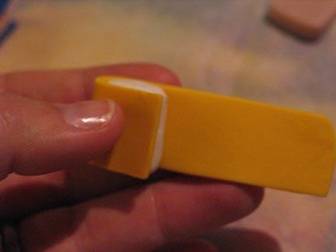
Then you will want to fold the book over the rest of the page - now its starting to look like a book.
Don't worry about the excess as you can now take your knife and cut it off. The extra clay can be added back to your yellow or set it aside to add to more clay to and make another book.
**When I make the books I don't really do any at a specific size because in the real life books come in ever shape and color and thickness you can imagine. Now if you have a shelf or a specific place you want them and size does matter just have a ruler handy. This will help you keep to a certain size as you roll out your triangles for the book part of the clay.
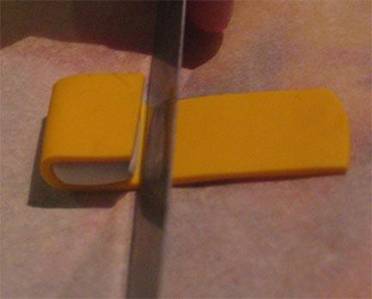
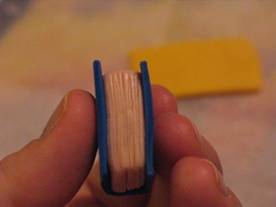
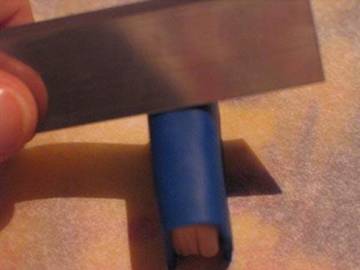
Now that it’s starting to look like a book you will want to make the page part of the clay really look like pages. For this you will need to have a thin bladed knife or a clay knife handy. Hold the book between you fingers and press the blade down lightly onto the page area.
There is no exact way to this, just do it multiple times until you have enough marks to fill the area. The more you do, the fuller the book looks.
As you are making the page marks your clay may start to distort a little. The way I find to help lessen this is I start making the dents to the side of the book then go on to the top and bottom of the book.
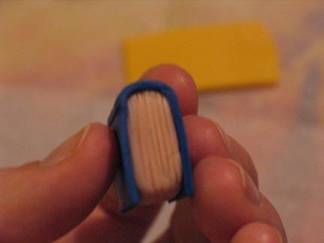
Now you’re almost done!
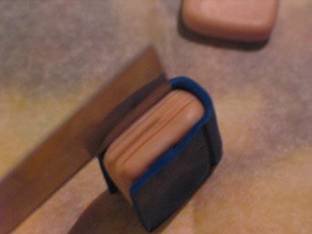
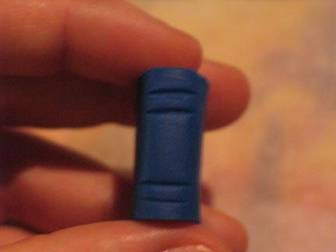
At this point I like to take the flat side of the knife and gently press it against the binder part of the book to flatten it so it had a more squared off look.
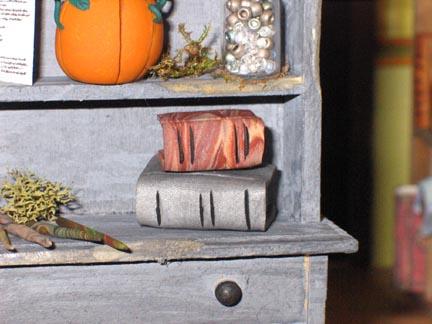
All that’s left is to make the outside indentations. These marks will be like the ones all hard back books have where the bends are.
For this you will need your knife again or a toothpick. Put the book on its side on the table and with your knife or toothpick press a line the height of the book.
From here anything you do is just to add more character to the books. I like to add lines on the binder by pressing with a knife into it like so:
Once this is done, I set the book on the tin foil covered cookie sheet. When you cook your books, the side touching the cookie sheet will have shiny marks. This is not a big deal if you add a color wash over the books because it covers it up. If you don’t want to color wash the book and just want to put it on a shelf or lay it on the table, just glue that side down or cook the book standing up.
Want to make an open book? That’s easy too!! Just roll out a rectangle about the same length as your closed books and put an arch/bow in it. You can roll up a tiny bit of tin foil and place it under your book to help support the shape while cooking, but because the books are so small I haven't had to use any.
Then after you cook it you can add printed pages and glue them to the book.
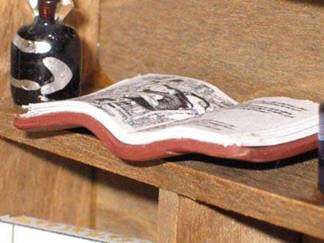
I like the idea of the tea staining and lemon juice the other ladies suggested to give the pages an older look.
Do you want to make your book pages stand out more? This is where your small or fine brush will come in handy. I like to dilute some black acrylic paint with water then put a little on your brush and just paint some on the pages part of the book. If you get a little too much paint on there I take a wet paper towel to wipe some off. You can always go over it again to darken the lines.
The other thing I like to do is paint the binder and bend lines so they stand out more.
For this I will use the fine point brush and just use straight black acrylic paint not the diluted one.
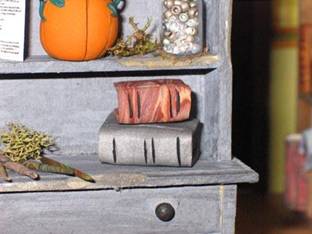
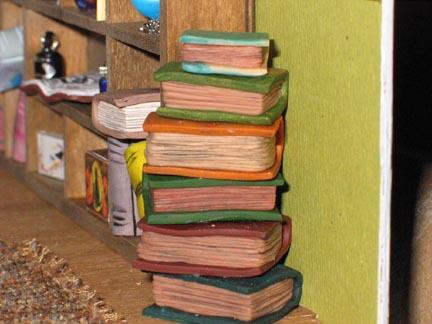
That’s it! It’s all done you have just made a book or lots of books!!! Just remember its all about mini fun so mix and match your colors and the shape and sizes of your books.
Return to Newsletter Home Page... |