|
Greenleafs New Laser Cut Speed Shingle Strips
By Dean Roberts
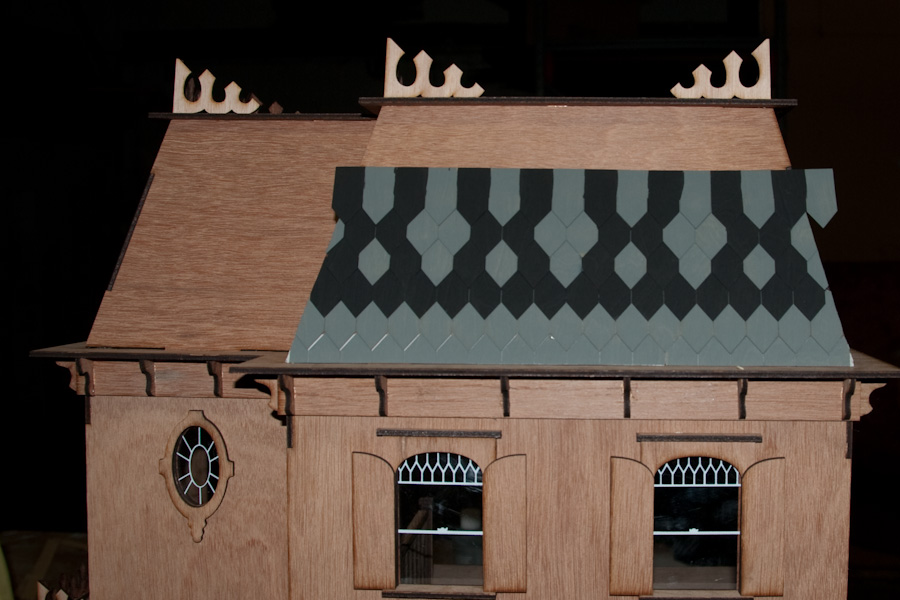
I Love Diana’s Rosedale! In fact, it inspired me to re-release this dollhouse as a laser cut model which is now available at the Greenleaf Company Store. After reading her shingle tutorial, I realized I needed to start manufacturing Diamond shape shingles again. They look great, especially on the Rosedale, but I’ve longed to come out with a better product that would make applying shingles a little less daunting. So I fired up the laser cutter and burned off what I’m calling speed shingles strips. I figured this was the perfect time to introduce this product with a comparative tutorial on shingling the Rosedale along with a money saving offer!
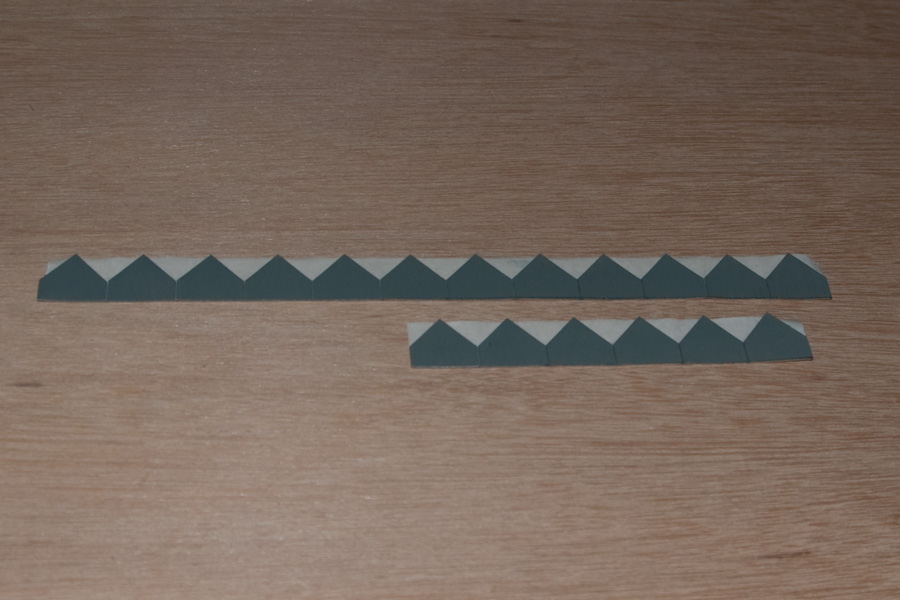
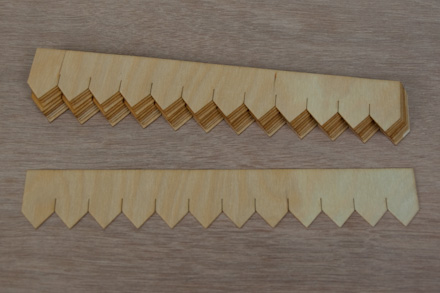
As you can see in the picture above, the Greenleaf Speed Shingles come in strips of 12 shingles. That means you can shingle 12 times as fast! They are laser cut to ensure a precision edge and they require no sanding. The vertical lines in the shingles act as a measuring guide. Just line up the point of the shingles with the top of the vertical lines and you will have evenly, perfect spaced rows! That means no more wasting time drawing lines across your roof! Speed Shingles come in packages of 34 strips for a total to 408 shingles. Be sure to check out the introductory offer at the bottom of this page!
Things you will need:
Diamond Shape Laser Cut Speed Shingle Strips*
Masking Tape
Glue Gun or Tacky Glue
Black Paint
Gray Paint
Paint Brush
Scissors
Pencil
Ruler
Utility Knife
Rosedale Dollhouse Kit
*You will need at least two packages if you plan on shingling your entire Rosedale Dollhouse. Since we are only shingling the main front roof in this tutorial, we used less than one bag.
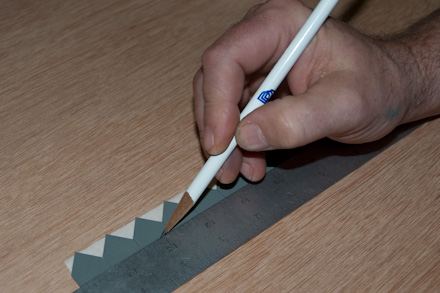
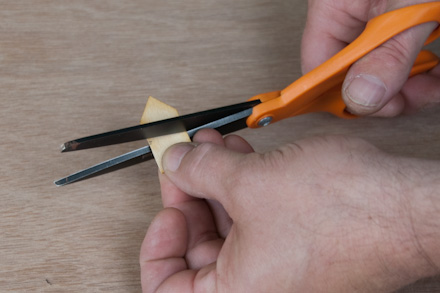
Picture of cutting shingle strip.
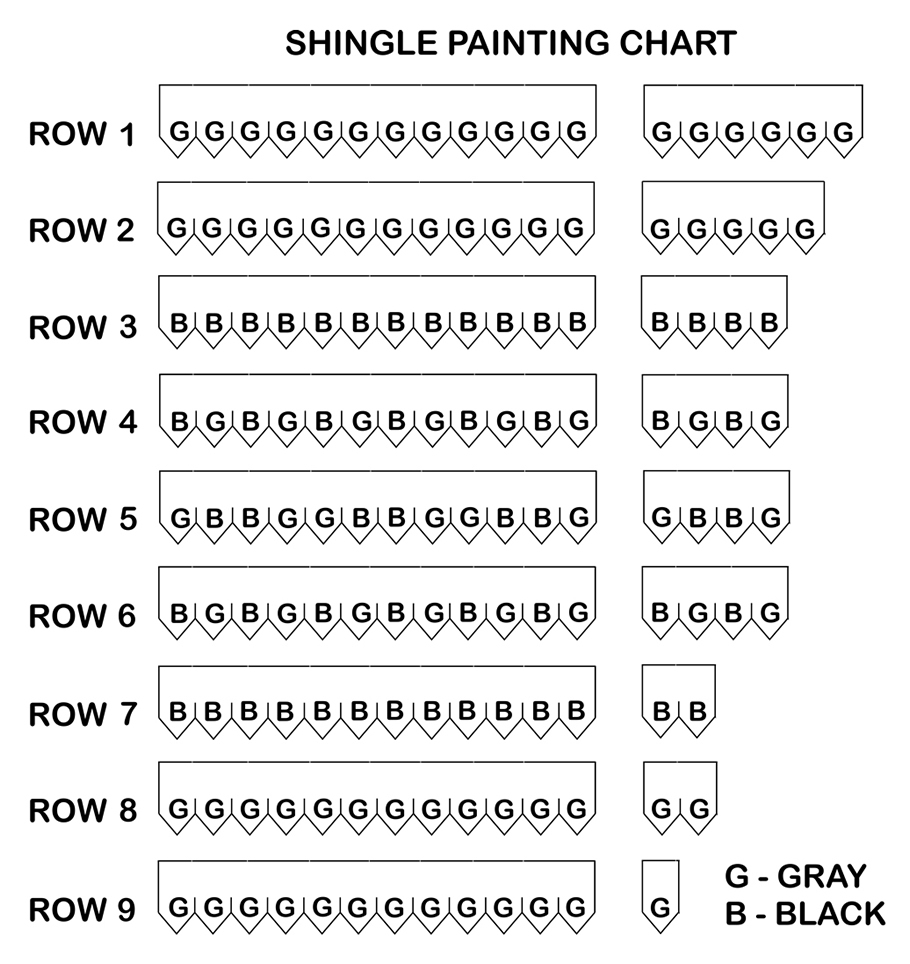
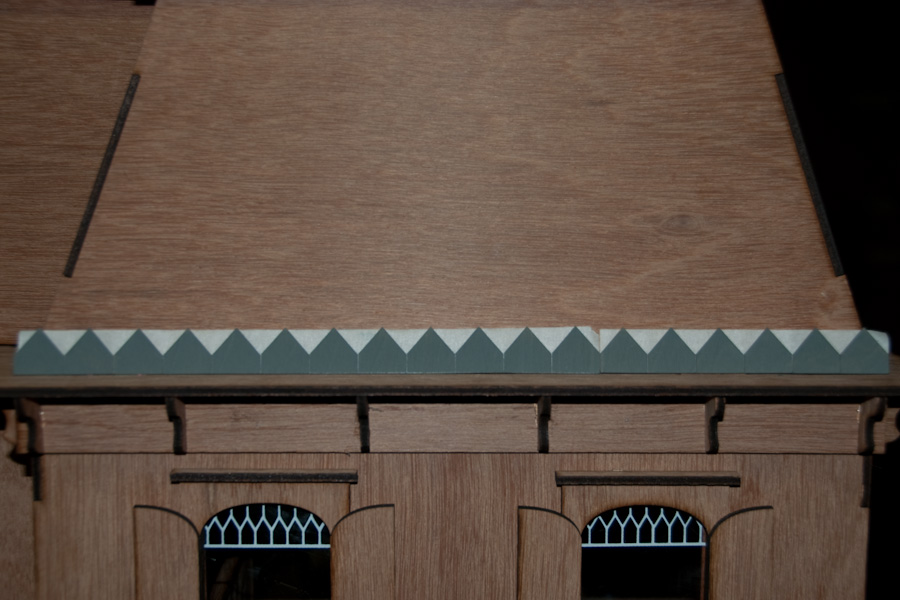
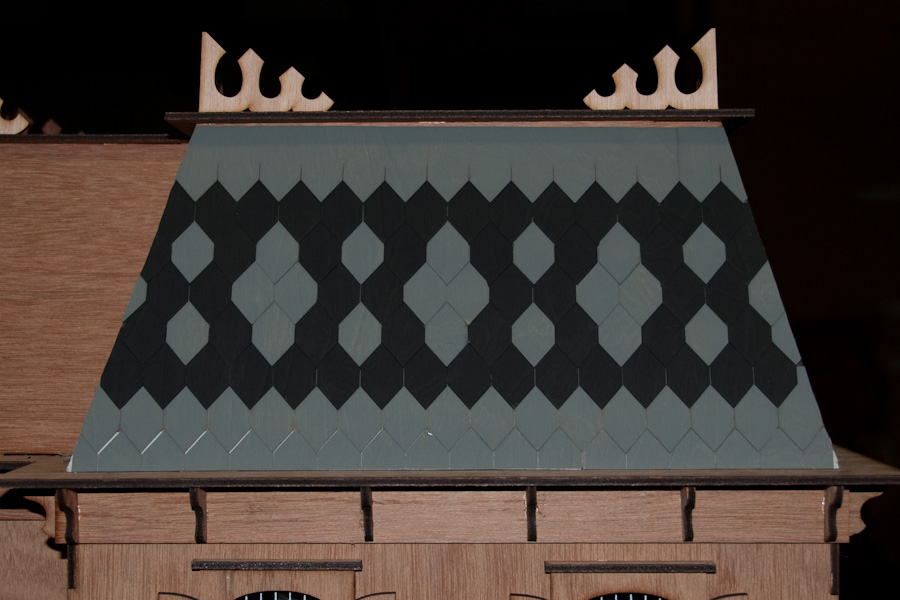
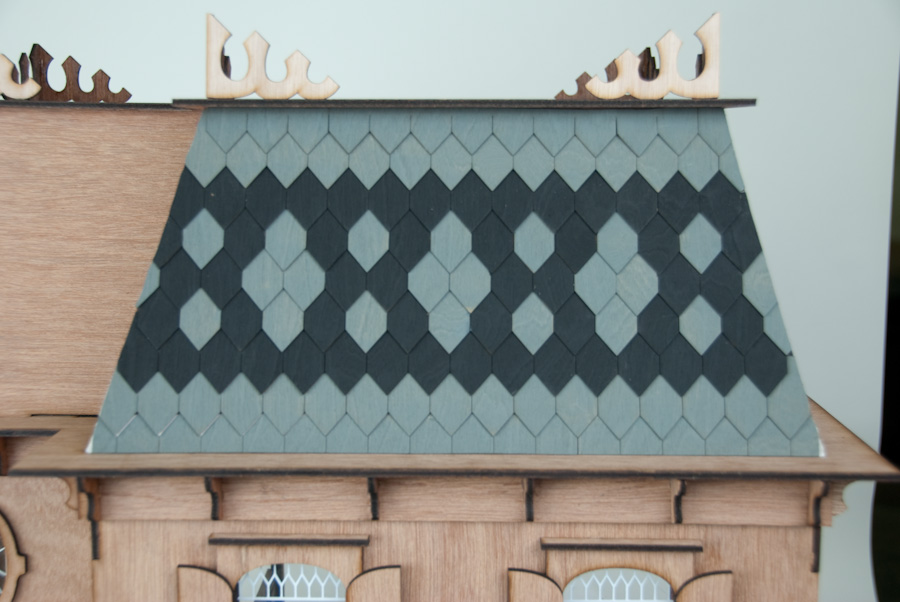
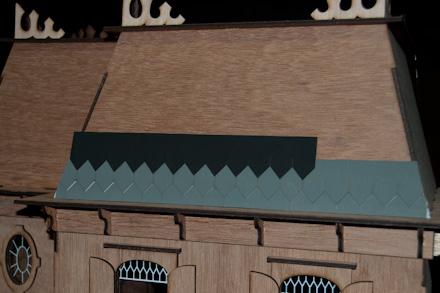
There are nine rows of shingles on the main front roof. Each row has one full strip of speed shingles plus a partial strip. The partial strips can be cut out of a full strip by using a scissors. Be sure to follow the existing cut so the partial strips remain square.
You will need a total of nine partial strips. Here is how I did it:
Take a full strip and count out four shingles and cut it. Take the remaining strip and count out another four and cut. This leaves a strip of four remaining.
Take another full strip and count out six shingles and then cut. Take the remaining strip and count out four and then cut. This leaves a strip of two remaining.
Take another full strip and count out five shingles and then cut. Take the remaining strip and count out two and then cut. Cut one additional shingle out of the remains. You can set aside the remaining four shingles for later use.
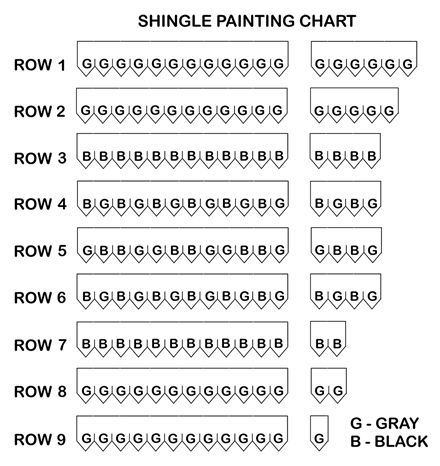
Take the nine partial strips and nine full strips and group them in rows as indicated in the painting chart. Take a pencil and write the row number on the backs of each strip.
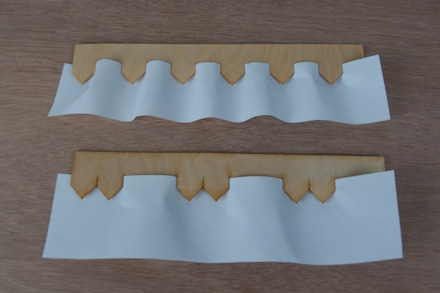
Rows one and nine will need to be trimmed lengthwise which can be done with a scissors. In this tutorial, I choose to paint the strips before I cut them. There are three rows that will have alternating colored shingles. To prevent over painting, take a narrow strip of paper and weave it between the shingles and paint. Wait for the paint to dry then reverse the weave and paint the second color. Please refer to the painting chart for the exact layout.

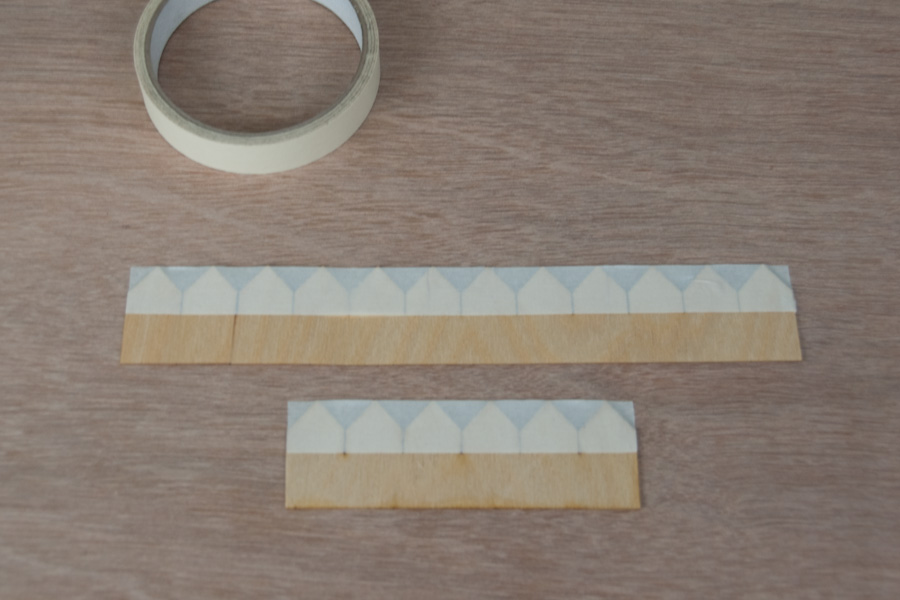
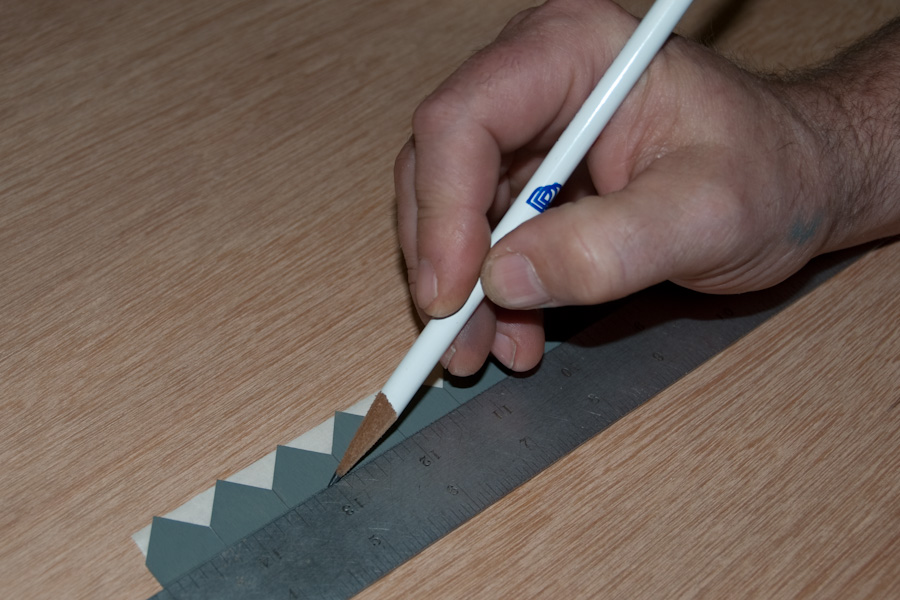
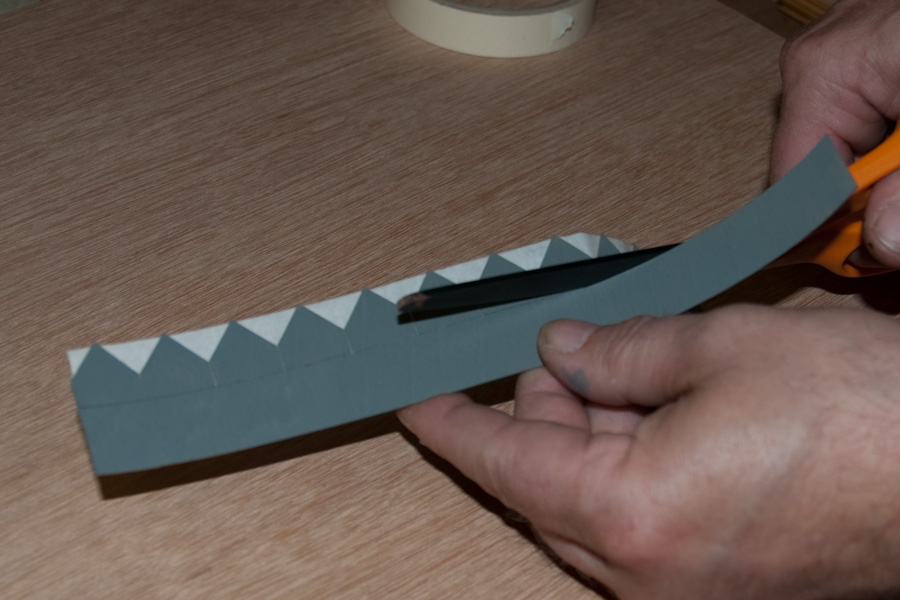
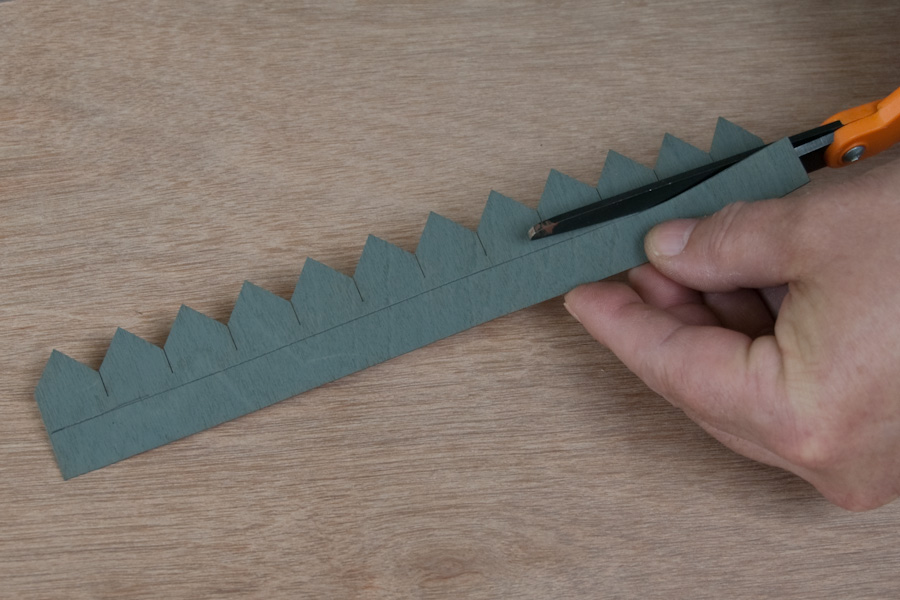
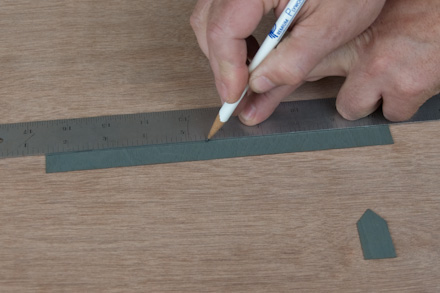
Once the paint is dry, you’re ready to get started applying the shingles. The first row, row one, needs to be trimmed lengthwise. Take a piece of masking tape and apply it to the back side of the shingle strips. Keep the tape even with the pointed edges.
Line up your ruler with the end of the vertical cuts in the shingle and draw a line across the shingle strip.

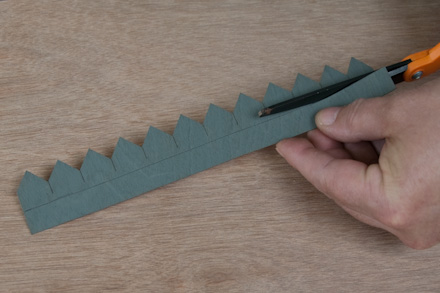
Using your scissors, cut the shingle strip lengthwise along the line you just drew. Follow the same steps for the partial strip.
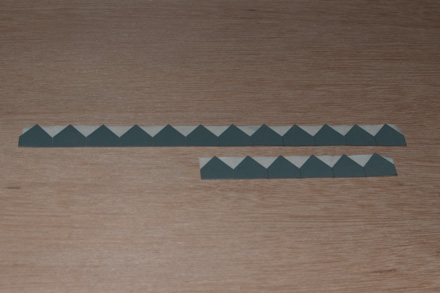
The strips for one should look like the picture above.
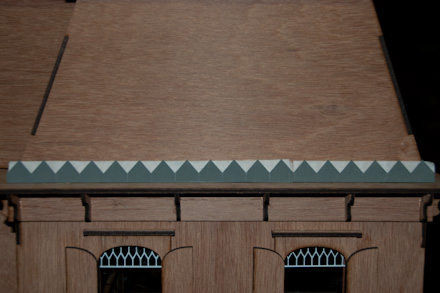
It’s time to start applying the shingles to the roof. Center row one on the roof section. For this tutorial, I used hot glue to apply the shingles. The only acceptation was this first row. Here I used Aliens Tacky Glue which I applied to both the masking tape and the exposed points.
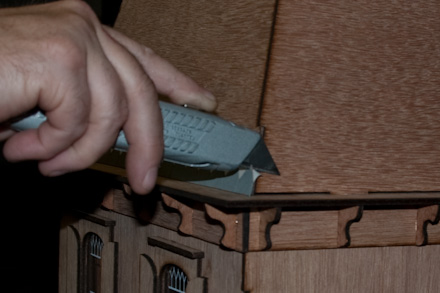
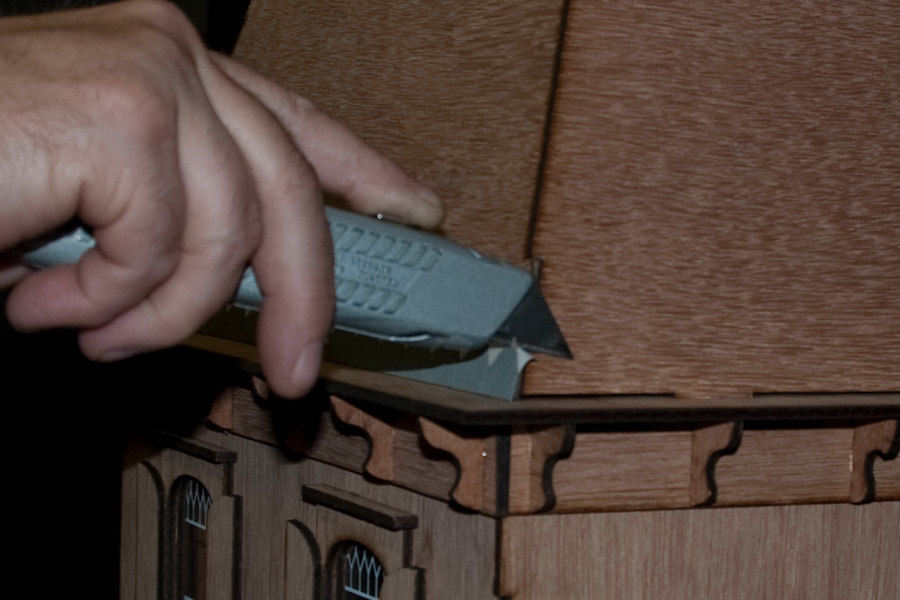
After the glue has dried, line your utility knife up with the left roof section and cut down through the excess shingle. Repeat trim on the opposite side.

Starting at the left hand side, line up the points on the second row so that they just cover the vertical cuts in the first row. Be sure to overlap the first row a little. Trim both sides with your utility knife.
Continue on through row eight always starting on the left hand side. Remember, using the vertical cut in the shingles as a measuring guide will ensure that all your rows are evenly spaced. Just line the point up with the top of the vertical cut in the previous row. Trim each row as you go. (NOTE: you may want to make a dry run by just tapping row two through eight in place before you commit to gluing them. This way you can be sure you will get the desired pattern)
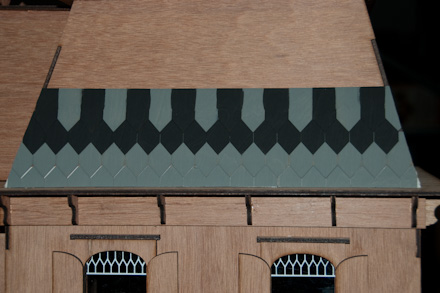


As you approach the top, you will need to start trimming the shingles in an upward manner with your utility knife.

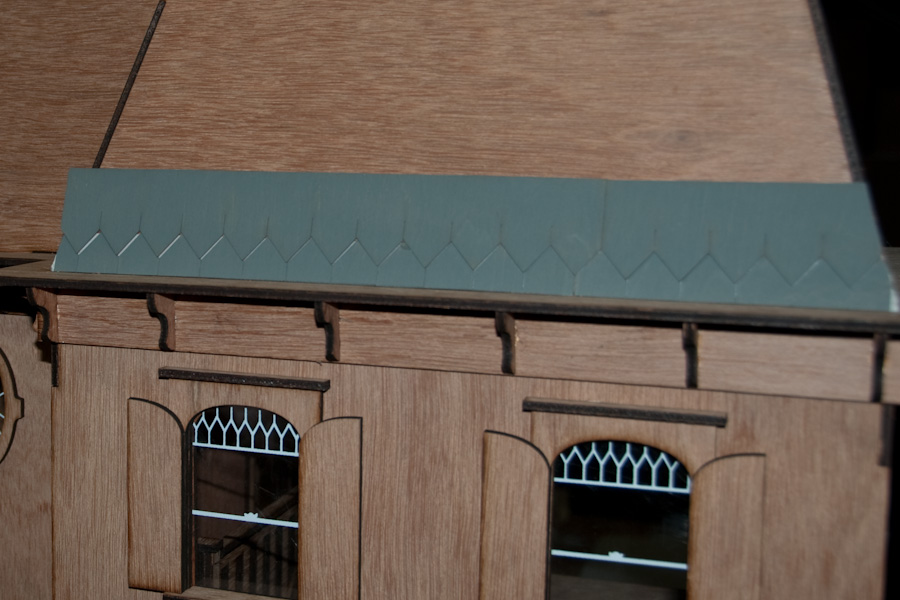
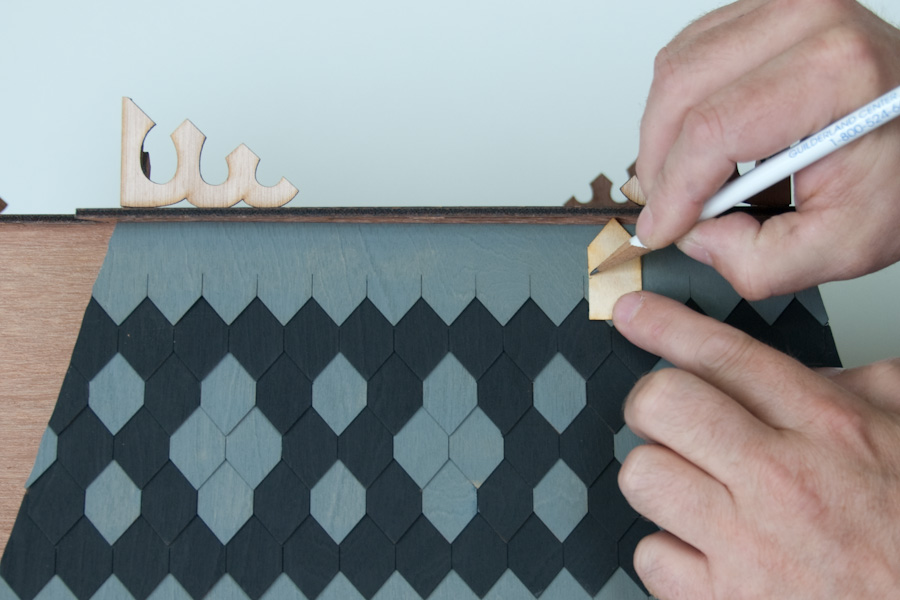
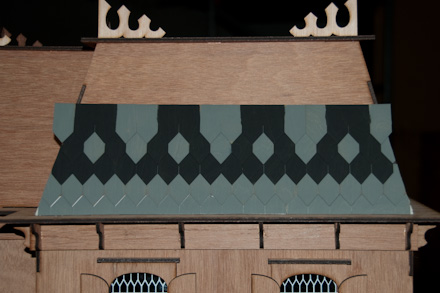
You are now ready to trim the final row

Using one of your extra shingles for a measuring guide, place it upside down against the edge of the roof. Line it up next to the one of the vertical lines in row eight. Use you pencil to mark the correct length.
Cut the shingle at the mark and check it on the roof to ensure that it is the correct length.

Lay the measuring shingle over the first shingle in the final strip being sure to line up the points. Mark with a pencil and repeat at the other end.
Line your ruler up with the marks and draw a line length wise across the shingle strip.
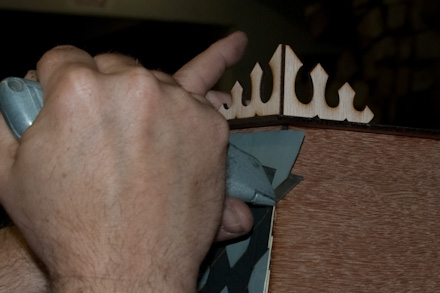
Using your scissors, cut lengthwise along the line. You will need to trim the single shingle for row nine as well. You may wish to use the scrap from this cut and the scrap from row one to trim out the edges on the roof line Diana did on her Rosedale.

Apply the final strip and you’re done with the main roof! Using this as a guide as well as Diana’s tutorial, you should have no problem finishing off the rest of your roof!
Money Saving Offer
To celebrate the re-release of the Rosedale Dollhouse, I’ve put together a package deal with the new Laser Cut Speed Shingles! If you order the Rosedale and two packages of Diamond Shape Speed Shingles by July 6th, you will save $10 plus get free shipping anywhere in the US. Just visit the Rosedale Dollhouse Kit page and select the Speed Shingle option in the drop down menu!
A big thanks out to Diana for inspiring us with her Rosedale Dollhouse!
Return to Newsletter Home...
|