|
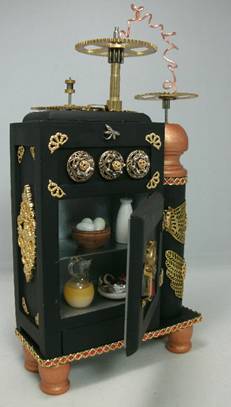
Food and Beverage Cooling Receptacle (Steampunk Ice Box) Tutorial
By Deb Roberts
I hear a lot of people say that they’d like to try their hand at making a steampunk miniature but are hesitant to give it a try because they don’t work with metal or they aren’t mechanically inclined. The great news is that neither of those things are required! You can be a steampunk miniaturist with your imagination, a couple of minis, some wood scraps, a little paint, and a quick trip thru an old jewelry box and the junk box in the garage.
One of the best sources for steampunk parts is the jewelry section of your local second hand store. Watch parts are great but please don’t think that something can’t be steampunk without a watch gear! You don’t have to use watch gears unless you want to. Be creative and take a close look at some of those necklace clasps and shiny stones in old jewelry and you might be surprised at what you can find. My mini mad scientist found his favorite pressure conveyance system at the bottom of my jewelry box. (I used to call it a necklace but I didn’t want to argue with a mini mad scientist so I let him have it.) The second best source for parts and pieces is the hardware store. Just wait till you see what they have in the way of nuts, bolts and screws in teeny, tiny sizes! Take time to wander thru the rest of the store because you never know what you might find. Don’t forget that you can get metallic paints that can transform wood into metal so when you pop into the craft store, don’t forget to take a quick stroll down the aisle with all those little wood finials and barrels and such. There are all kinds of wonderful steampunk treasures to be found there!
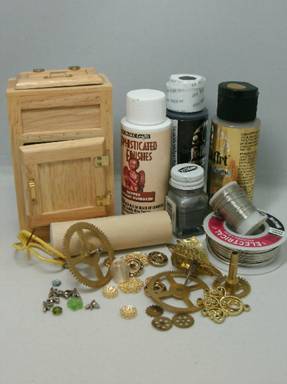
This particular tutorial is for a steampunk icebox but you can use it general suggestions for transforming the everyday into steampunk goodness. Here are a few things that you’ll need if you decide to create an icebox:
Wood ice box
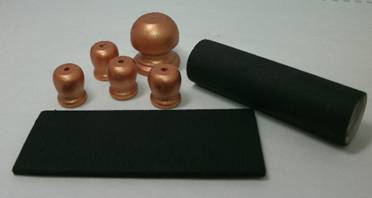
Wood dowel; 1 inch thick x 2.5 inches tall
Round wood finials in two sizes: one large, four small
1/8” plywood, 1 ½” x 3 ¾”
Copper wire
Silver, gold, copper, and black paint
Super glue or epoxy of choice
Miscellaneous pieces of metal charms, beads, jewelry findings, watch gears, etc.
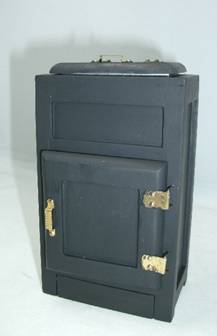
Begin with painting the ice box black and setting it aside so it has plenty of time to dry. It may require more than one coat of paint. Most iceboxes have a silver interior which is perfect for this project. If not, a quick coat of silver paint inside will work nicely.
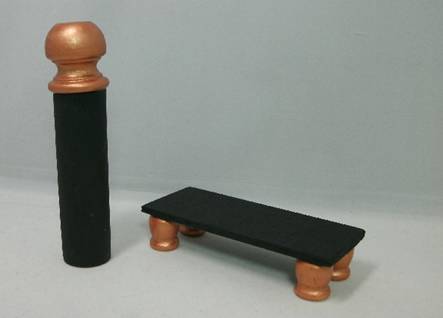
The plywood rectangle for the base and the dowel for the water reservoir also need to be painted black. The wood finials are all painted copper.
After the paint has dried, turn the plywood upside down and glue one of the four small finials to each corner. This is the base for the ice box components and the finials are the feet. Wait till the glue has dried completely before turning it right side up.

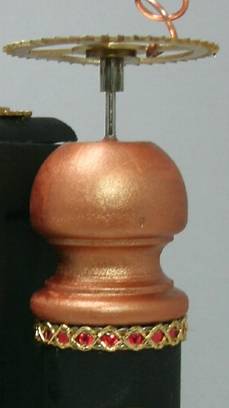
The large finial is glued to the top of the dowel as a cap. The black and copper are already looking good together.
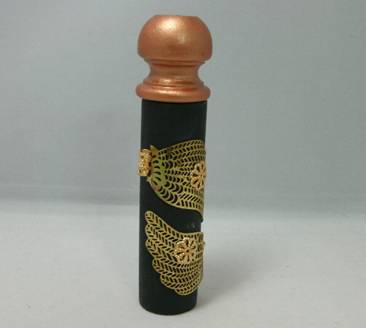
To create an ornate etched look on the water reservoir, I used a pair of brass angel wings. I cut the wings in half and gently bent them around my finger to give them enough curve to fit the side of the dowel. Once I was satisfied that they had the correct contour I glued them to the side of the dowel.
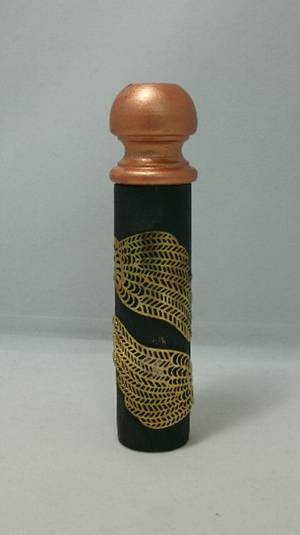
The final touch added a bit of depth and dimension to the sides of the reservoir. I flattened small metal bead caps with a pair of pliers and then gently bent them over my fingertip to get the proper fit before gluing them on.
As long as I was flattening bead caps for the reservoir, I flattened a few extra to be used on the corners of the icebox. They can be cut in half easily with a pair of sharp craft scissors and arranged in the corners of the top of the icebox front.
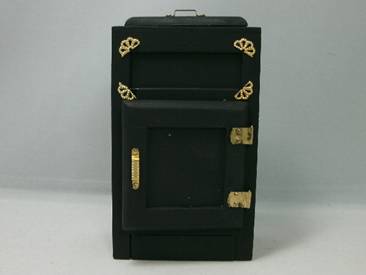
I used three different components to make the dials for the front of the icebox and glued them together in layers. The first layer is a button (I pulled out the center and the shank), the second is a silver bead cap, and the third is a filigree gold bead. Together they make luxurious dials!
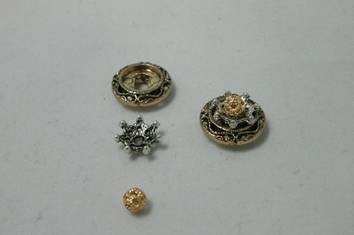
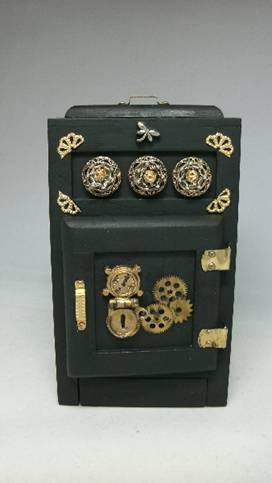
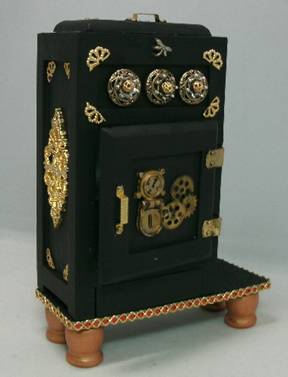
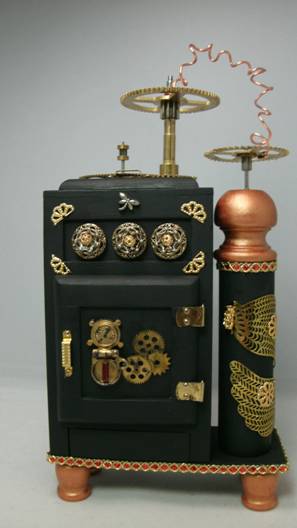
I made three of these dials and glued them to the front of the icebox between the gold corners. In the center of the icebox door I glued three small gears and a pewter compass charm that I painted to look like an aged brass gauge. The finishing touch on the front was a tiny silver dragonfly right at the top.
The right side of the icebox will have the reservoir attached to it but in true Victorian fashion I couldn’t bear to leave any surface bare. I used four more of my flattened and halved bead caps in the corners and then glued a gold plastic filigree charm in the center.
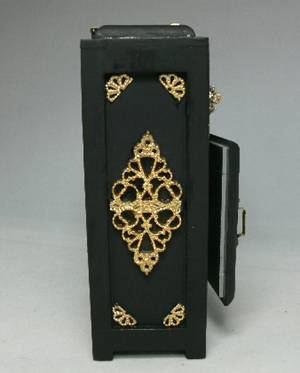
The combination of gold and silver on the black as well as the layering creates a look that says functional can be luxurious too.
The icebox was ready to mount to the base now but I wanted to dress it up a bit first. I used a bit of gold and red metallic trim to edge the base and it definitely stepped up the techy look.
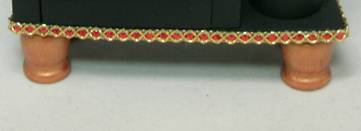
So I added a touch of the same trim around the top of the reservoir, just under the copper cap. As long as I was there I drilled a hole in the cap for the gear and glued that in place.
I glued the icebox onto the base, making sure the corners were flush,
and then glued the reservoir to the base on the right side of the icebox.
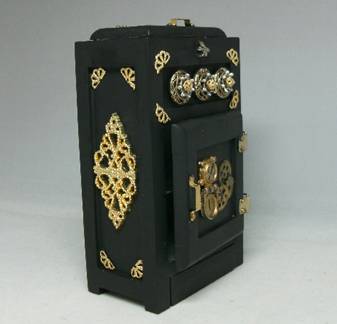
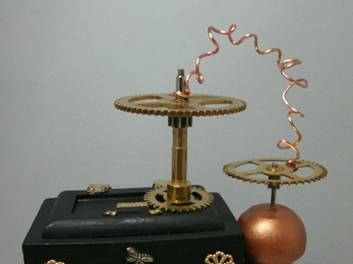
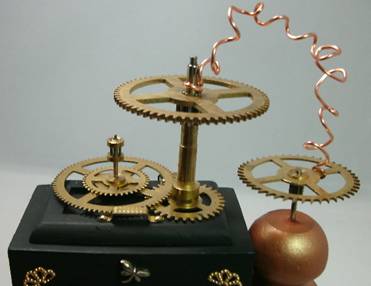
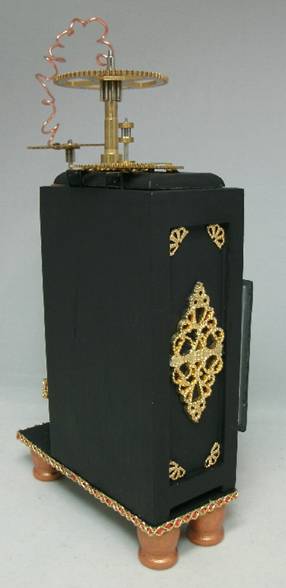
Since there are gears glued to the top of the icebox, it could be a little top heavy if the lid of the icebox were opened so I glued that shut. Then I dug thru my box of gears till I found two that fit together with a small one on the bottom and a large one on the top with a rod in between. I glued that to the top of the ice box and attached it to the gear on top of the reservoir with a piece of coiled copper wire.

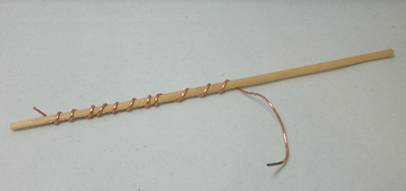
There are lots of different types of wire that you can use for steampunk minis. Soldering wire is soft and pliable if you want silver or you can use traditional copper. Copper wire can be found in plastic insulated wire easily obtained at an electronics or hardware store. Simply strip off the insulation and you’ll have lots of shiny copper wire to play with.
Getting the wire into coils is as simple as wrapping it loosely around a pencil or a stick. I used a ¾ round dowel for this one because I wanted some corners in it. Almost any shape will work from traditional round to square dowels.
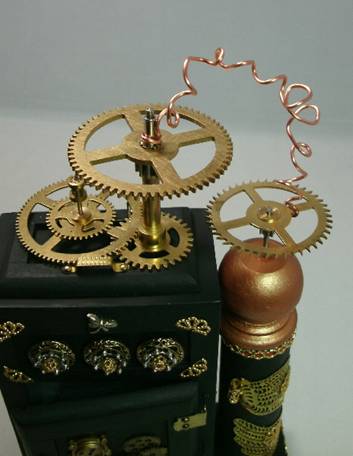
I added one more gear to the top and decided that it was just right. Remember, it doesn’t have to actually work, it just has to give the impression that if it did work it would be very, very busy!
The last step is to dry brush a tiny bit of black or dark gray paint around the areas where the gears join or as an antiquing over some bits of brass and copper here and there. The shadows of black paint should be applied with a light hand since you just want to give the appearance of a touch of grease or a bit of mechanical wear.
That’s an icebox that even Professor Potts would be delighted to own! While you may not be in the market for a steampunk icebox, I’m willing to bet that you had at least six ideas of your own while reading this tutorial and that’s what it’s all about! Find your steampunk inspiration and let your imagination run wild. Speaking of wild, I have to go now. My Mad Scientist Alter Ego is insisting we watch “Wild, Wild West” again and this time he said I have to take notes. If this weren’t so much fun I’d be worried!
Return to Newsletter Home Page... |

