|
Miniature Telescope Tutorial
By Chris Shea

I found a site that had a telescope on a tripod for $110.00. Well, not having the last name of Rockefeller or Gates, I decided...what do I have laying around that I might just try to make my own.
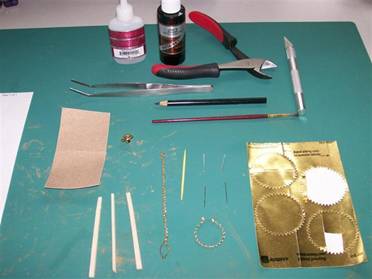
So, I first found a Crayola black colored pencil...said right diameter to me, so I cut a piece off about1-3/8" and sanded the cut end flat.

Then I found some Avery Notarial Seals that I had laying around for who knows how long, and said hmmm...adhesive backing, that could work for imitation brass parts.
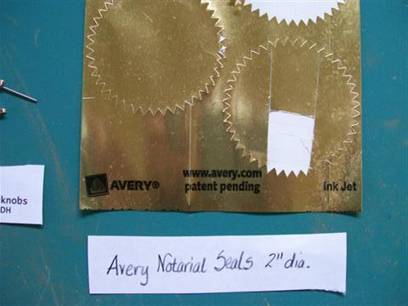
Then I needed something small for the brass piece above the main telescope, so I thought a toothpick piece covered with the Avery gold again, and for the wider rim at end, I just added another smaller width of Avery gold again, wrapping it around twice. The piece that holds smaller scope up is also very small piece of toothpick wrapped in gold again. I did have to use instant glue to get ends to seal because the adhesive gets dirty very quickly on pieces this small (and my fingers got glued as well) The Insta-Set works great for these really small pieces. It helps instant glue seal even more quickly so I didn't have to let fingers set to the piece (Thank God!!) Glue smallest piece to top of telescope about 3/4 of the way back, then glue small scope to top of that.

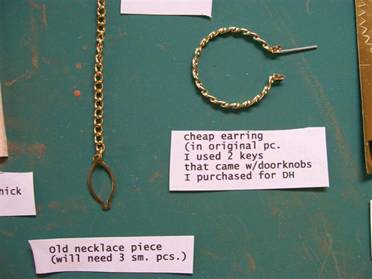
My next find was purely coincidence...I had purchased a set of 2 door knobs/plates with keys for my Orchid, and the keys were just hanging about, so I bent them a bit and thought they could be used for attaching the piece legs would adjoin to. (in my pic's I have substituted what I think will work- a cheap gold earring I had from WalMart, just cut with good sharp clippers)
Now to find the piece legs adjoin to....
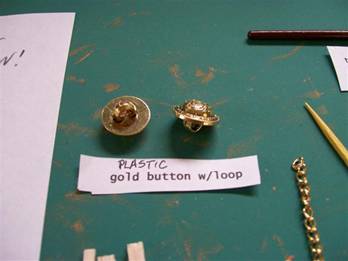
Having a huge bag of misc. gold buttons from Michael's (plastic and metal for about $4), I found a plastic button with right shape (plastic is important as you will have to sand top of loop flat so it can adhere to bottom of telescope), so I sanded it a bit (by the way, I used drywall sandpaper and laid it flat on my work space...a couple swipes in same direction did it) then I glued that piece to the bottom of telescope directly under the top scope already in place.
I then took the bent keys (refer to "earring" I swapped in this, as I did not have more keys laying about) and glued them on either side of telescope and to the button (I had to use angled tweezers for this as glue set up quick)
Now you should have main piece of telescope...on to the tripod.
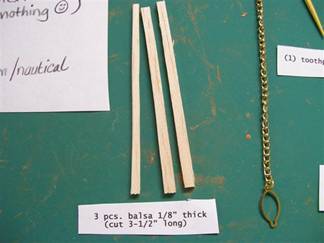
I had 1/8" balsa laying around, so I cut (3) 3-1/2" pieces. (you may want to have your scope sit higher, and since it was first attempt for me, I guessed….I think my Orchid owners are short!!) Lightly sand the edges to a somewhat rounded shape on top and just lightly sand rest to your preference. Cut off about 1/8" from ONE PIECE ONLY...this piece will be used at the back of tripod and will make telescope sit at an angle. Stain the balsa pieces or paint - your choice.
Lightly sand top of each leg to a slight angle so it will adhere with the glue to edge of button bottom.
Glue shorter leg in place (to button rim) directly lined up with eyepiece at back of telescope. Then glue the other legs evenly spaced at front end of telescope. Test that it sits straight, adjust if needed by sanding a bit LIGHTLY.
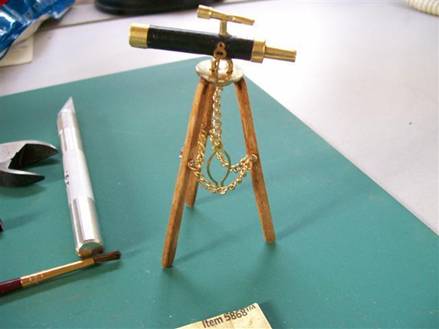
Then I found an old "real cheap necklace" piece I had - think it came with a WalMart blouse I got. I cut it into 3 pieces about 1-1/2" long each. (mine had the little "fish like thing at bottom you see in the finished photo, hanging in middle of telescope structure, which I just added for more fun)
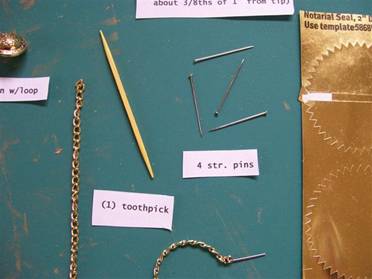
I then took straight pins and in end link of each short chain, I put pin through last link, pushed pin thru the balsa till head of pin and chain met the balsa, hit with crazy glue, then Insta set. Now take the other end of chain, decide how you like it to hang, push pin through that link (cut off any remaining links after gluing) and push through next balsa leg and glue with crazy glue. Take small wire cutter and cut off the pin ends as close as possible. Repeat process through next 2 legs. Add the funny "fish" thing if you have it, or not....was just lying there and I never seem to call it "finished.
And there’s your wonderful, yet affordable telescope!
Return to Newsletter Home Page...
|