|
Halloween by the Book
By Deb Roberts

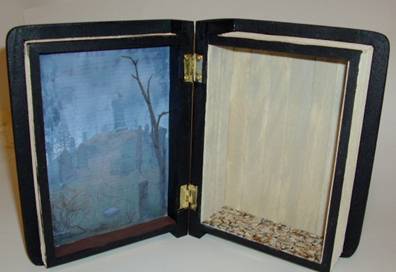
We’ve all seen those cool wooden books sold in craft stores and had a feeling that there was something about them that would make a great miniature. We were right! Here’s a spooky scene just perfect for Halloween.
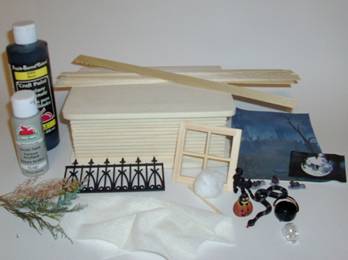
Most of the materials for this project can be found in the craft store or in your personal stash, so a special trip to your miniature supplier won’t be required. Here’s what you’ll need:
1 wooden book-shaped box
A few siding strips left over from your last Greenleaf house kit
Print outs of a couple of spooky scenes
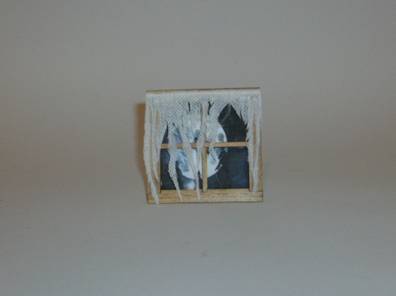
A window frame (Houseworks, or make your own)
A few dried plants
A section of fencing
Acrylic paint—black, grey, gold and brown
A cotton ball
A piece of bamboo skewer cut to fit the top of your window frame
A piece of gauze bandage
A cup of tea or coffee (drink most of it and save a few drops to stain the gauze)
Little spooky odds and ends and a couple of pieces of furniture
Hot glue gun
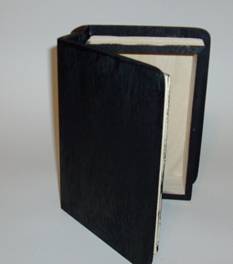
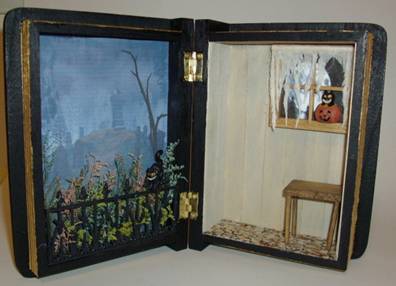
Start with painting the exterior and the front inner edges of the book black. You don’t have to take a lot of care with the painting since you want it to look aged. You can stencil the name of your book on its cover and spine if you like.
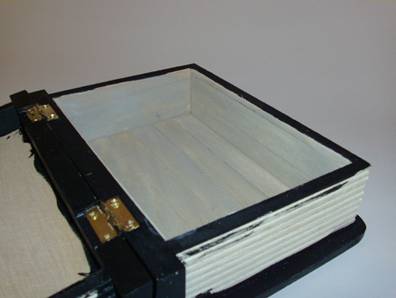
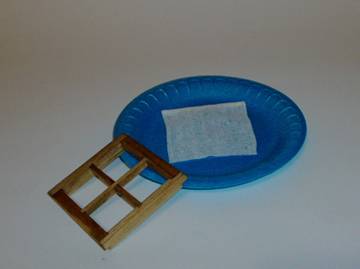
On the left side, paint the bottom of the interior brown. This will be the dirt under your weeds and fence. On the right side, glue down the flooring of your choice. You can leave the floor bare and paint it, use skinny sticks for planks, or use any other flooring you like. In this case, I used some fabric with a stone pattern.
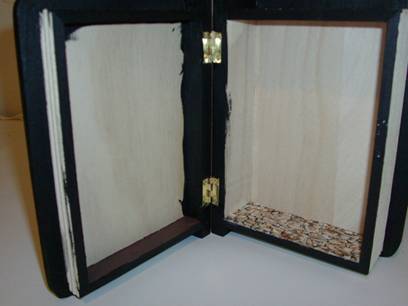
Cut your siding strips to fit the interior of the right side of the book. You’ll want to cover the back and both sides. It gives a great distressed look to splinter the edges of the siding just a little bit before you glue them on. Mix your grey paint with some water and give the siding strips and the bare ceiling a nice, dirty wash. This is one project where you can deliberately leave splotches and bare spots since you want an aged look.
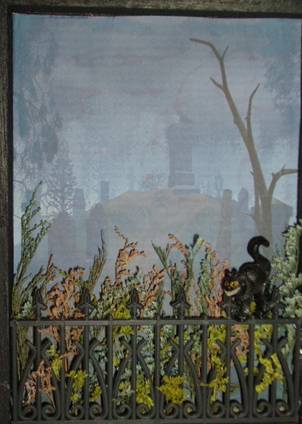
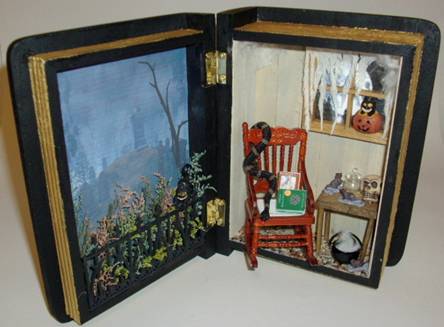
Moving back to the left side, cut one of your printed scenes to fit the interior of the book and glue in place. I used a scene of a graveyard on a hill. This is a good time to paint the edges of the book “pages” in gold and then set it aside to let it dry.
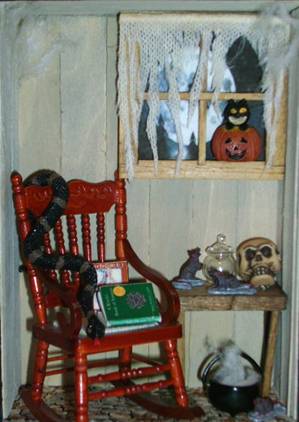
While the gold paint is drying, we’ll work on the window. Cut a piece of gauze to fit the exterior of the window frame. Glue the top edge to the bamboo skewer. While the glue is drying, paint or stain the window frame.
The gauze makes your curtains and you want to give them a tattered look, so take a pair of scissors to the gauze and cut it into dangling strips. To get the right look for the tatters, just close your eyes and visualize what would happen if your cat had her way with your favorite drapes. Easy, huh!! Now shred your mini curtain to look the same. Gently use your fingers to tease the gauze on the edges to soften them. Dab a little tea on the curtains to stain them.

On the back of the window frame, glue your second printed scene. I chose a full moon behind dark trees, but it could be any scene you like. Glue the tattered curtains to the front.
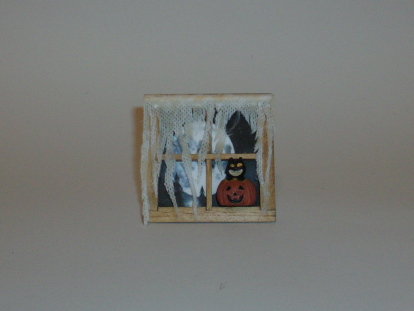
A nice touch is to add a feature to the window, such as a candle, cat, skull, or a jack-o-lantern. This is a little wooden charm I found at the craft store.
Your gold paint should be dry on the edges of the book now, so let’s move back to it. Glue your weeds in place on the left side, then glue the fencing in front of them. I used dried flowers in various colors to give an overgrown look and then glued a black cat to the top of the fence.
Glue your window in place on the right side and you’re ready to start adding in some furnishings. The table is one I made of scrap basswood. One leg is broken and I scratched the top of the table to distress it before I stained it.
For features in this room, I added a rocking chair and some witchy books, a nice snake to curl around the chair, some rats and a skull, and teased a little cotton into steam coming out of the cauldron. I also teased a little cotton into the upper corners of the room for spider webs.
And there we are! A haunting tale of miniatures!
Back to the September Newsletter... |