 Leaf Furniture Tutorial
By Deb Roberts
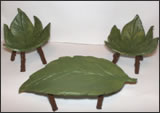
Finding fantasy furniture isn’t always easy to do, but our elves and fairies need cozy furnishings too. It’s been said that necessity is the mother of invention and in the miniature world, which often leads to delightful, original creations. The leaf furniture that is featured in this tutorial was created for a fairy cottage but it could be used in any forest setting. It’s also easily adaptable for 1:24 scale.
Tools and Materials:
Plastic knife or other blunt plastic carving tool
Tacky glue
Enamel craft paints: green and brown
Stucco mix
Creative Paperclay
Bamboo skewers or round dowels
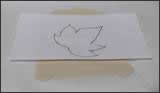
Pattern for leaves of your choice
Step 1: Print out patterns for leaves, sizing them to your own preference (these are just as easily sized down for 1:24 as they are for 1:12) Roll out paperclay and lay the pattern on top. Use a blunt tipped pencil to trace the leaf, bearing down enough to leave an impression in the paperclay, but not enough to tear the paper. You'll need to work quickly as the paper will rapidly absorb the moisture from the paperclay and tear when you bear down with the pencil.
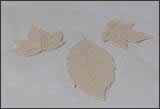
Step 2: Lift off the paper and use a sharp blade to cut out the leaf. Press the lines for the leaf veins into the leaf with your carving tool.
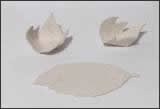
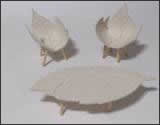
Step 3: Leaves that will be used for chairs or stools need to be gently curved and then laid over a round object to dry. I used extra large marbles to help the chairs and stools hold their shape. Leaves that are used for tables should be dried flat. Paperclay will warp as it dries if not weighted, so for tables such as dining tables, you will want to place something flat over the top to hold it down. If you wish to add some character to items such as coffee tables, allow the paperclay to warp slightly for a natural look.
If your leaves are not symmetrical, that's even better. Mother Nature doesn't make identical leaves, so the natural variations will give your furniture a more realistic look.
Step 4: Cut lengths of bamboo skewers to the desired height for your table and chair legs. Glue them into position on the bottom of the table and chairs. Again, avoid symmetry when placing the legs so you have a more natural look.
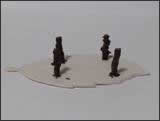
Step 5: Mix brown paint with stucco to a thick paste texture. Apply the paint mixture to the legs with a dabbing motion to create a thick, lumpy coating. Allow it to set for 5 minutes, then use a craft stick to dab at it again to raise "knobs" and natural looking contours.
Step 6: Allow the legs to dry, then paint the leaves, top and bottom.
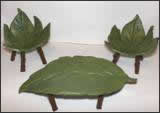
This furniture is extremely versatile and can take on almost any shape. I’ve also made it using stars and moons for the shapes instead of leaves. The beauty of paperclay is that the design is unlimited so use your imagination and have fun!
Back to the April Newsletter...
|